

I’ve been getting very creative in the kitchen lately. My husband and I made a commitment to stop eating out at restaurants and so far our results have been amazing. I’ve not only shed a few pounds, I’ve gained a new love to cook meals for my family again using only the freshest and best ingredients. I’m also finding that I’m getting back to the basics and motivated to cook from scratch. A few months ago, I was the total opposite.
I noticed this week that I had two bananas in our fruit basket turning brown. Usually by this point, my kids and I aren’t interested in bananas turning brown. I prefer to eat them with a slight hint of green color and my kids like them yellow. Show them a brown spot and they turn their noses up! In the past, I threw our bananas out that were going bad. Many people make banana bread with their ripe bananas, but I didn’t have all of the ingredients I needed at the time to make banana bread. I went into my pantry and started digging around to find ingredients to throw together to make something with these two bananas. It’s crazy how two lonely bananas on the verge of going in the trash inspired me to get creative and make something delicious!
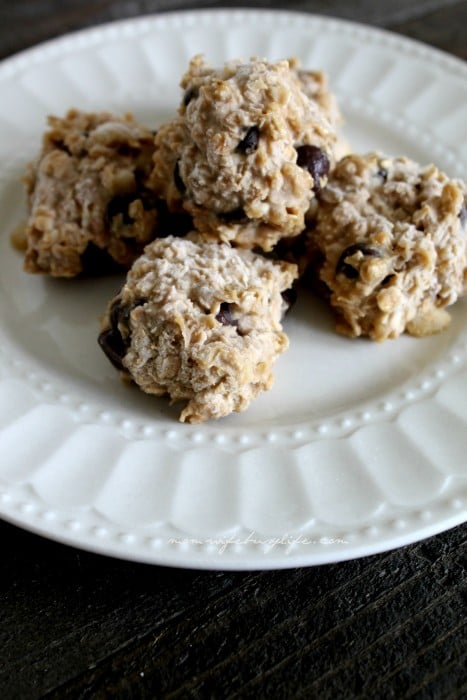
The Peanut Butter Chocolate Banana Bites were the answer! I found some oats, chocolate chips, peanut butter, honey, and vanilla and mixed all of these up and created a delicious recipe. When I started mashing up the bananas for this recipe, I started to think to myself how easy it was and why I didn’t make my own baby food from scratch when my girls were little!
When these tasty treats were ready to enjoy, I did find myself going back for more and wanted to share the recipe with you here!
Peanut Butter Chocolate Banana Bites
Ingredients:
- 2 ripe bananas
- 1 cup of oats
- 1/2 cup of whipped peanut butter (I prefer whipped because it’s easier to mix)
- 1/2 cup of milk chocolate chips
- 2 tsp. honey
- 1 tsp. vanilla extract
Directions:
- Mash the bananas well until creamy.
- Combine the oats, peanut butter, chocolate chips, honey, and vanilla extract with the bananas and stir well.
- Spoon the mixture onto a small baking sheet lined with parchment paper or wax paper a few inches apart. Mixture will be slightly sticky.
- Place in refrigerator or freezer and allow to cool until the mixture hardens.
Serve and enjoy!