
Looking for an adorable, easy pumpkin craft that doesn’t require any carving? Look no further than the Paper Bag Pumpkin!
This is a great project for kids of all ages and can be made in just a few simple steps.
Plus, it’s perfect for decorating your home this fall. Gather up some supplies and get started today!


How do you make a pumpkin out of a paper bag?
If you want to make a pumpkin out of a paper bag, there are a few things you’ll need to do. First, open the paper bag.
Once you’ve done that, you’ll need to put some newspaper or other filling material inside the bag to give it shape.
Finally, you’ll need to decorate the outside of the bag to make it look like a pumpkin. You can use paint, markers, glitter, or anything else you can think of!
Keep reading below to learn how to make your pumpkin out of a paper bag.
How do you decorate a paper bag pumpkin?
Assuming you want to know how to decorate a paper bag pumpkin, here are some tips!
You’ll need some supplies first: paint, markers, glitter, glue, and anything else you might want to use to decorate.
Once you have your supplies ready, start by painting the pumpkin. You can either paint it one solid color, or get creative with stripes or patterns.
Once the paint is dry, it’s time to add the details! Use the markers and glitter to create whatever design you like.
You could make a jack-o-lantern face, or keep it simple with just a few dots or lines. Get creative and have fun!
Finally, once you’re satisfied with your design, glue or tape everything in place. And that’s it! Your paper bag pumpkin is now ready to be displayed.
Paper Bag Pumpkin
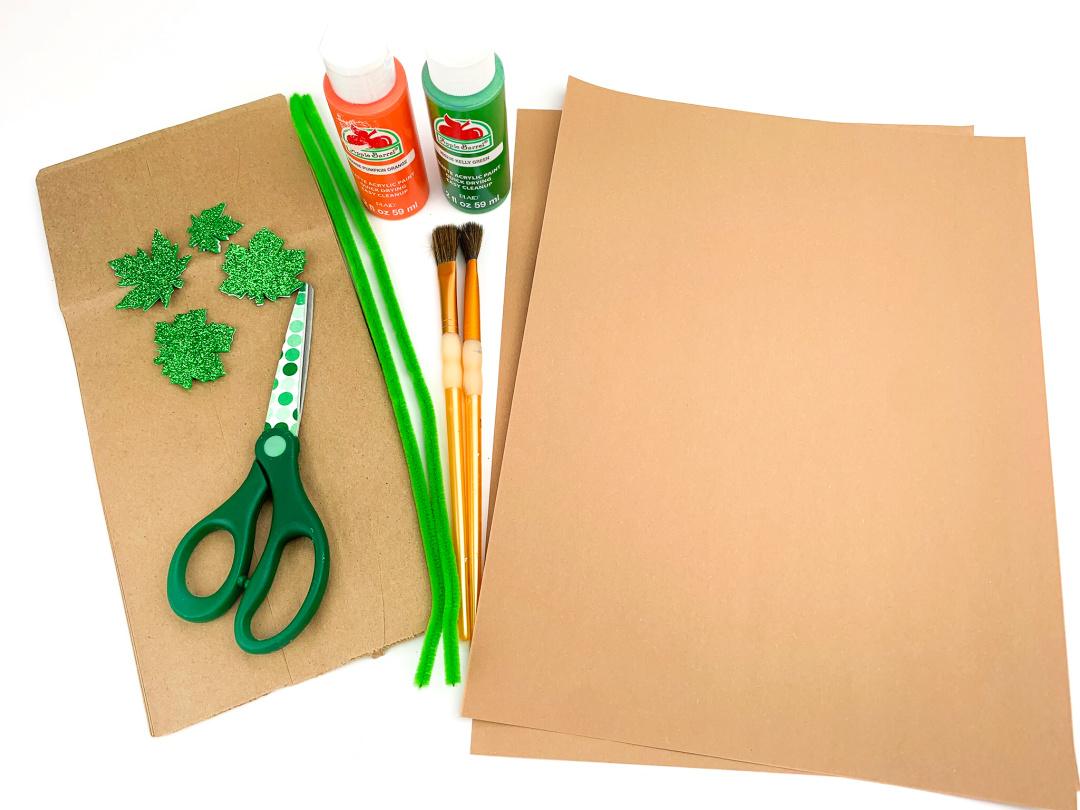
Supplies:
- Brown paper lunch bag
- Orange craft paint
- Green craft paint
- Green pipe cleaner
- Green foam leaf sticker
- Paper (any kind, construction paper, newspaper, you can even use plastic grocery bags to fill the bag with – for this I used two pieces of brown construction paper)
- paintbrush
- scissors
- marker or pencil
Directions:
Crumple up the paper.
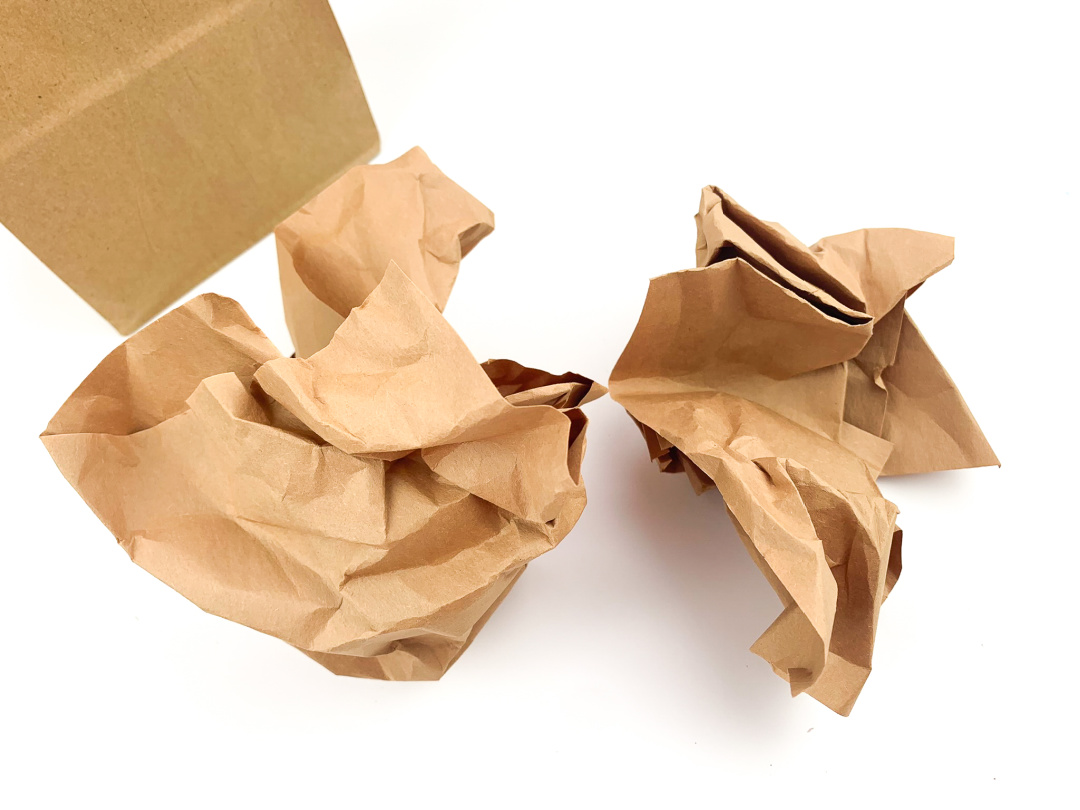
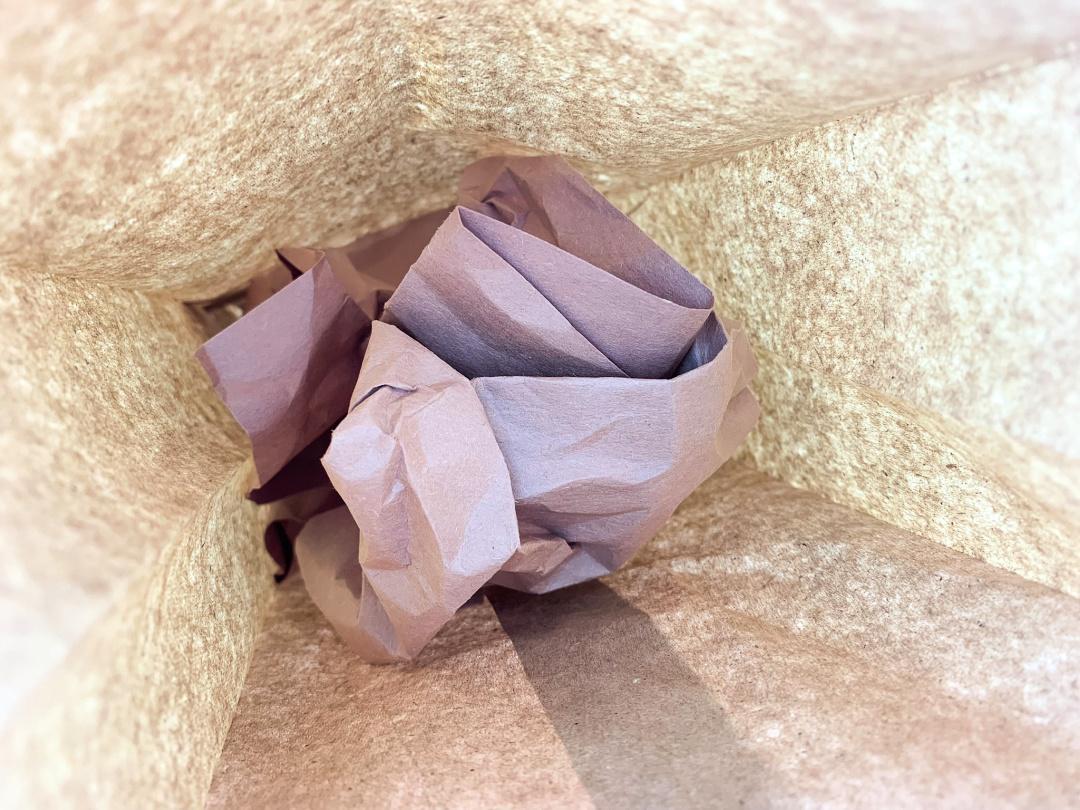
Open the paper bag. Place the crumpled paper into the bag and fill the bag about halfway down.
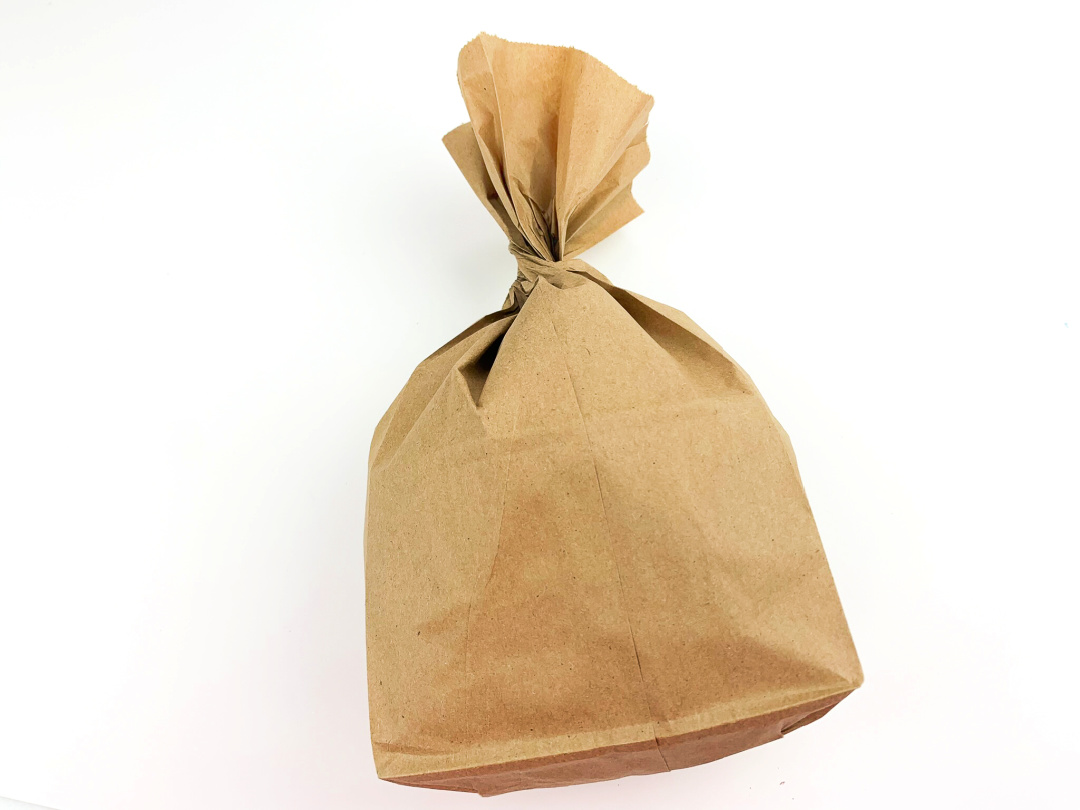
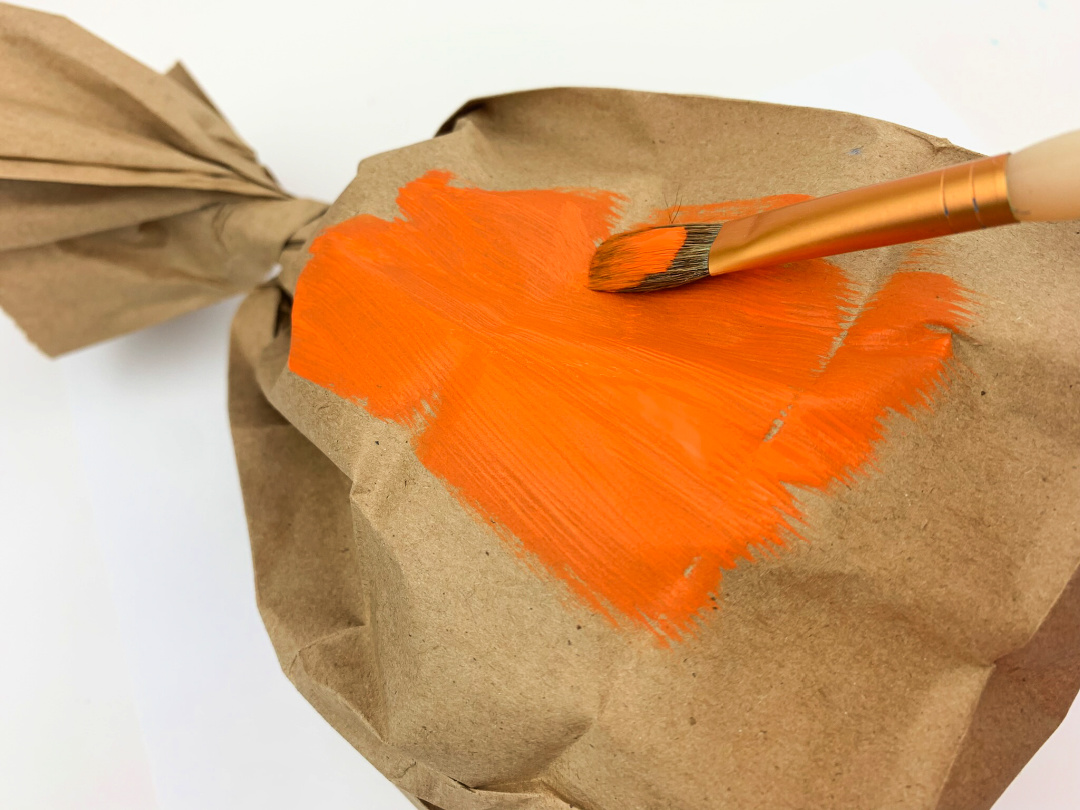
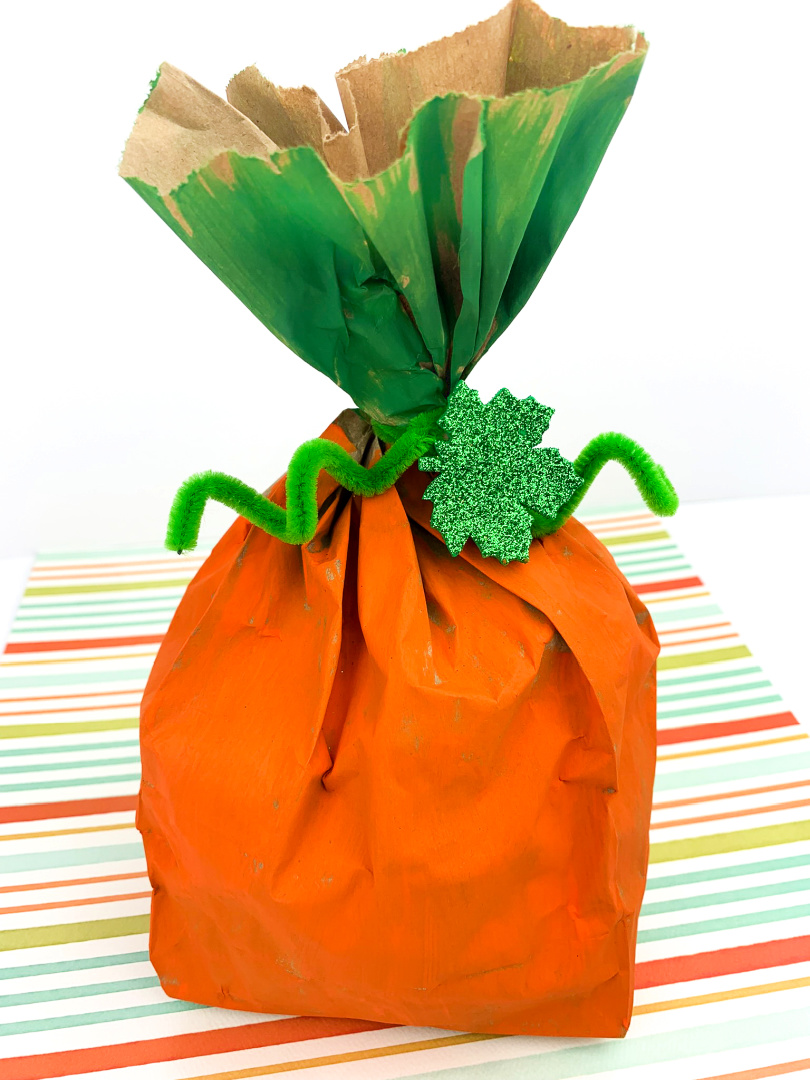
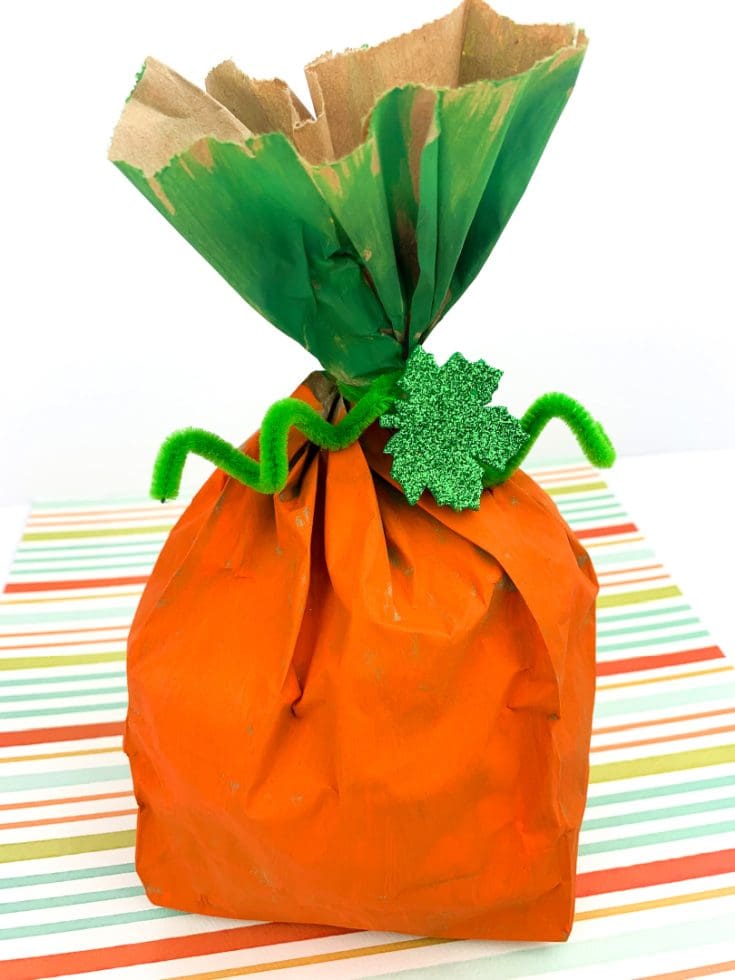
Close the bag. Twist the section that doesn’t have any paper around until you get a stem for the pumpkin.
Paint the bottom part of the pumpkin orange. Set aside to dry.
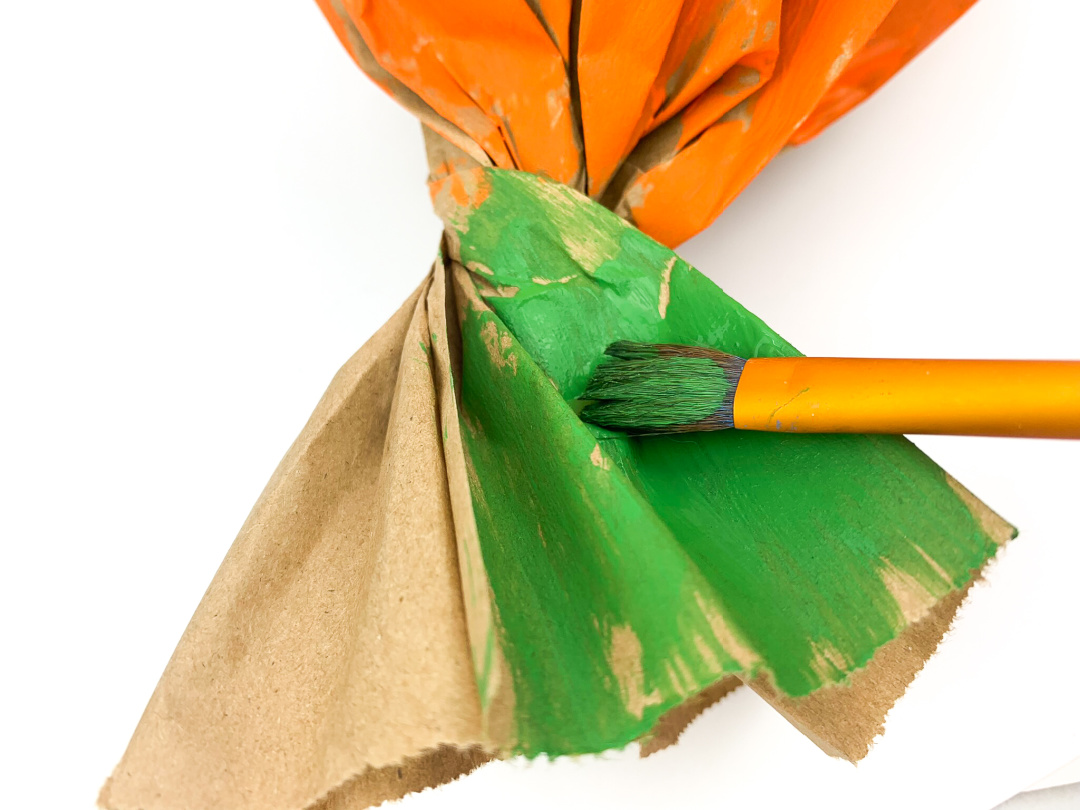
Paint the pumpkin stem green. Set aside to dry.
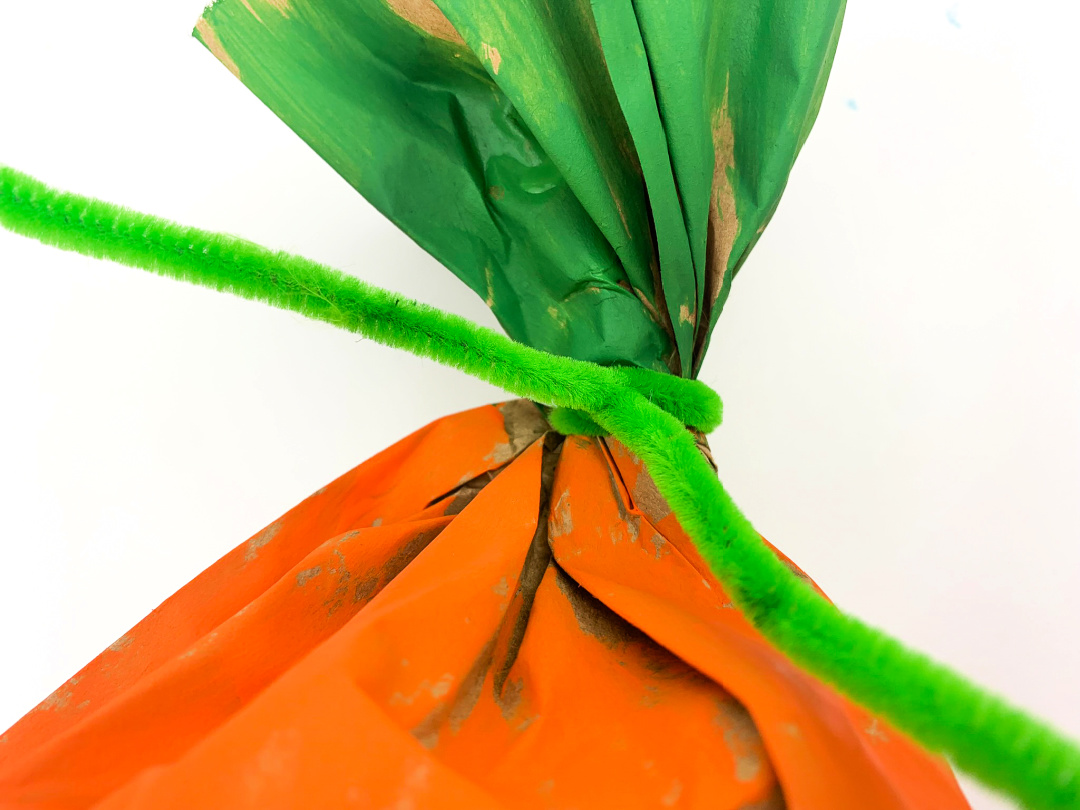
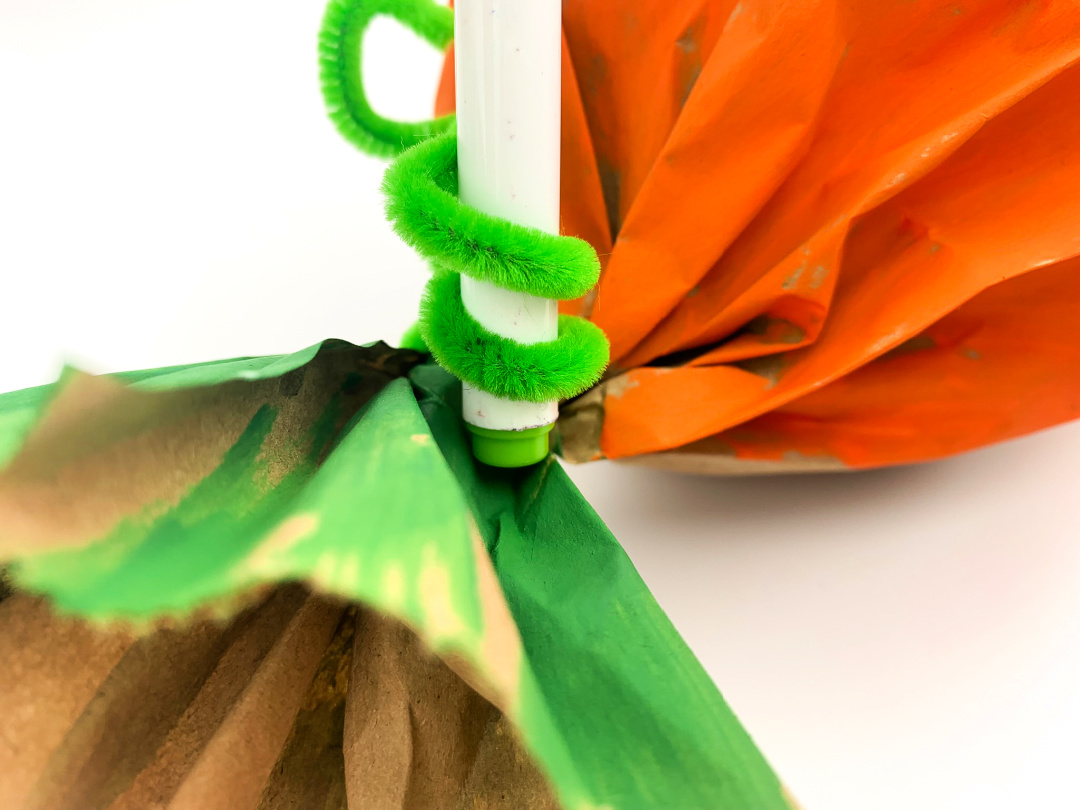
Use the green pipe cleaner to twist around the top of the bag to secure the bag. This will be the “pumpkin vines.”
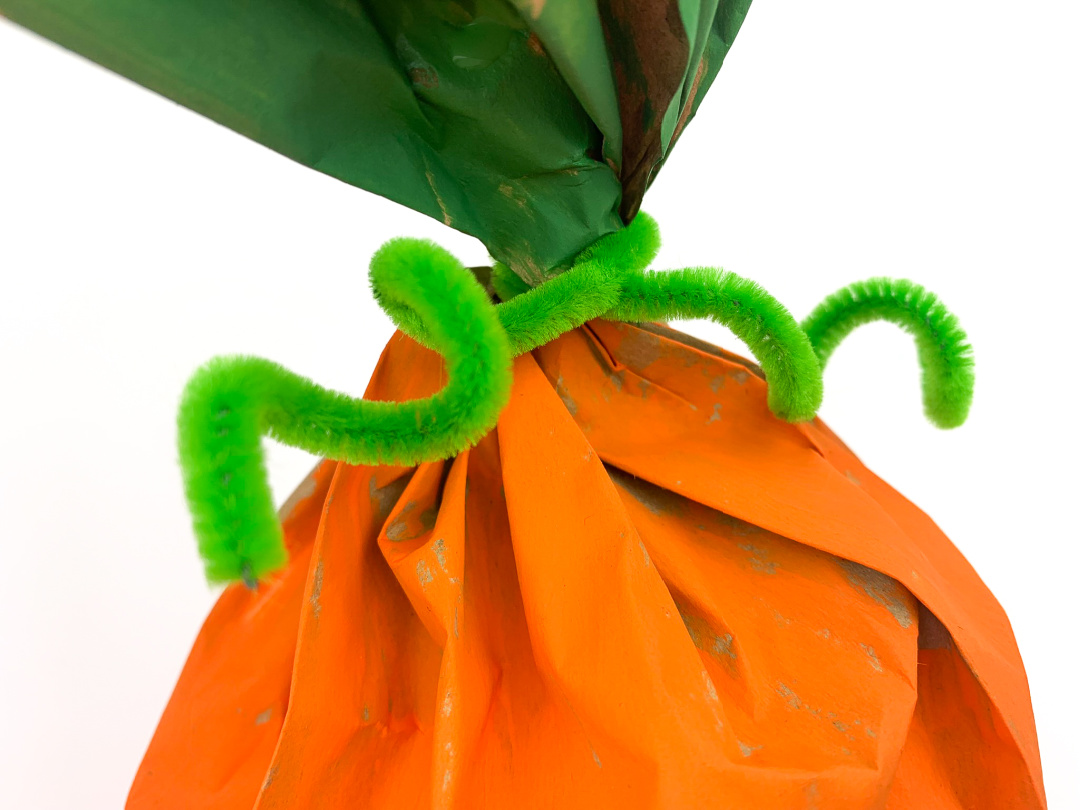
Use a thin marker or pencil and twist the pipe cleaner around the marker to give it the twirly shape.
Attach the leaf sticker to the front of the bag where the vine is located.
Display the pumpkin!

Paper Bag Pumpkin

Materials
- Brown paper bag
- Orange craft paint
- Green craft paint
- Green pipe cleaner
- Green foam leaf sticker
- Paper
- scissors
- marker or pencil
Instructions
Crumple up the paper.
Open the paper bag. Place the crumpled paper into the bag about halfway down in the bag.
Close the bag. Twist the section that doesn’t have any paper around until you get a stem for the pumpkin.
Paint the bottom part of the pumpkin orange. Set aside to dry.
Paint the pumpkin stem green. Set aside to dry.
Use the green pipe cleaner to twist around the top of the bag to secure the bag. This will be the “pumpkin vines.” Use a thin marker or pencil and twist the pipe cleaner around the marker to give it the twirly shape.
Attach the leaf sticker to the front of the bag where the vine is located.
Display the pumpkin!