
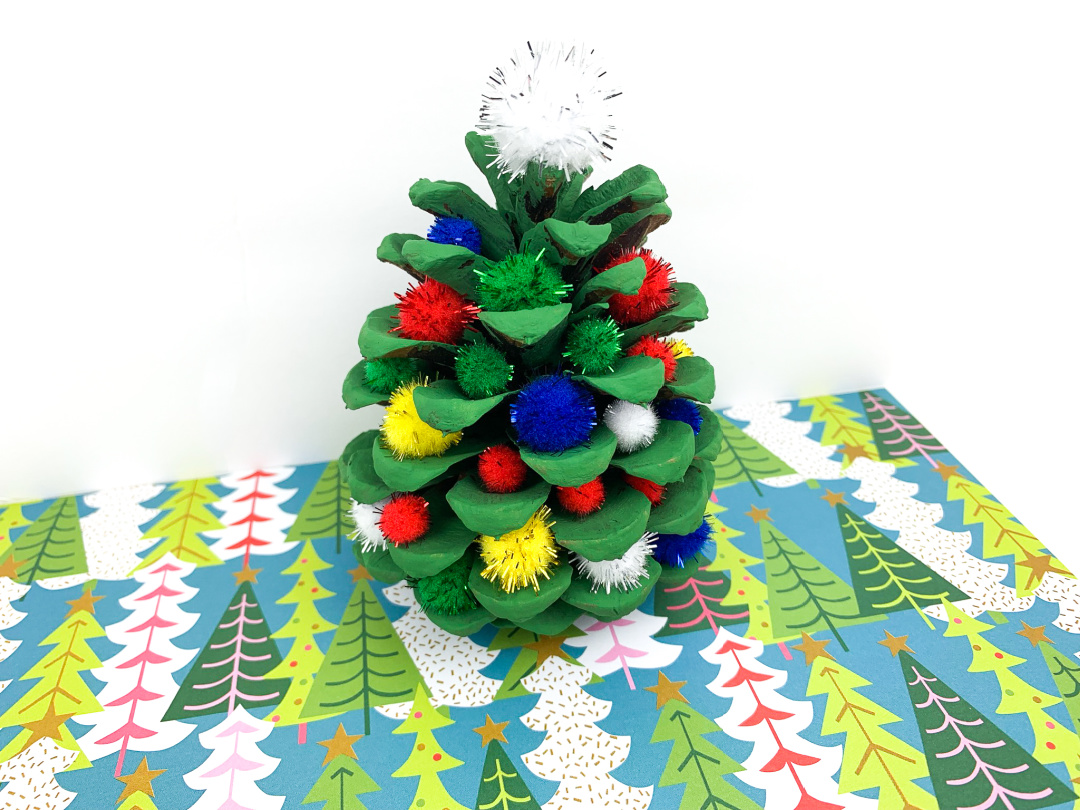
Create this festive and colorful Pine Cone Christmas Tree and display this fun craft in your home or classroom this holiday season!
Pine cone Christmas trees are a cute, natural way to decorate your home for the holidays.
This tutorial will show you how to make one using just a few materials. Plus, it’s easy enough for kids to help with!
- Pine Cone Crafts for Kids
- Pine Cone Reindeer
- Christmas Tree Popsicle Stick Craft
- Christmas Tree Coloring Pages
Need to purchase pine cones in bulk? Purchase natural pine cones in bulk from Amazon!
Why are pine cones associated with Christmas?
Pine cones have been associated with Christmas for centuries.
Some believe that the pine cone symbolizes fertility and new life, making it a perfect symbol for the holiday season.
Others believe that pine cones represent the evergreen trees that are often used as Christmas trees, and thus are a reminder of the holiday season.
Whatever the reason, pine cones have become a staple of Christmas decoration, and can be found adorning everything from wreaths to mantles.
So if you’re ever wondering why pine cones are associated with Christmas, now you know!
Do you have to clean pine cones for crafts?
You don’t necessarily have to clean pine cones before using them for crafts, but it can help to remove any dirt or debris.
If you’re using pine cones for a project like pine cone painting, for example, you’ll want to make sure they’re as clean as possible.
You can clean pine cones by giving them a quick rinse with water, or by wiping them down with a damp cloth.
Once they’re clean, you’re ready to get crafting!
Do you need to bake pine cones before crafting?
There’s no need to bake pine cones before crafting with them, although you may want to give them a light toast beforehand to help release their oils and make them more fragrant.
If you’re working with pine cones that are particularly fresh or resinous, baking can also help to prevent any sap from seeping out and making a mess.

How Do You Make a Pine Cone Christmas Tree
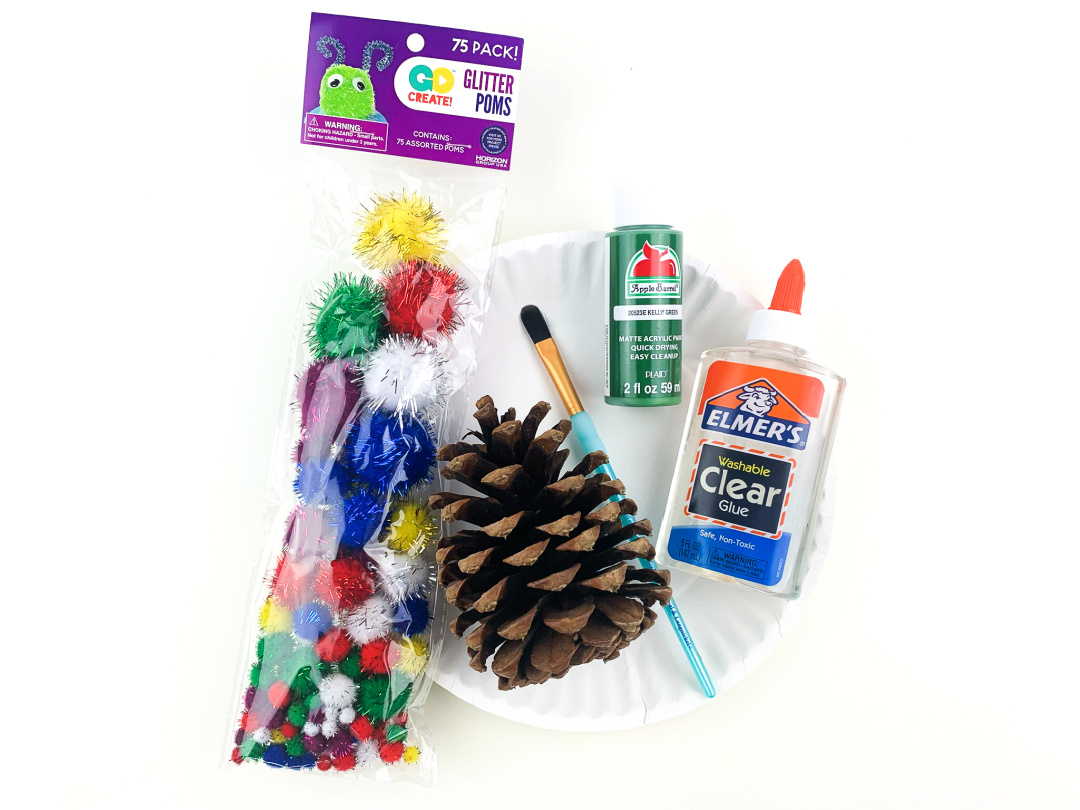
Supplies:
- Large natural pine cone for crafts
- Green craft paint
- Paintbrush
- Small to medium size sparkle pom poms (different colors)
- 1 white pom pom (for the star)
- School glue or hot glue gun with hot glue sticks
- Paper plate
- Small disposable cup
Directions:
Set the pine cone on a paper plate.
Pour a small amount of green paint in the cup.

Paint the pine cone green. Set aside to dry. If needed, add another coat.

Glue the pom poms around the pine cone. Allow to dry.
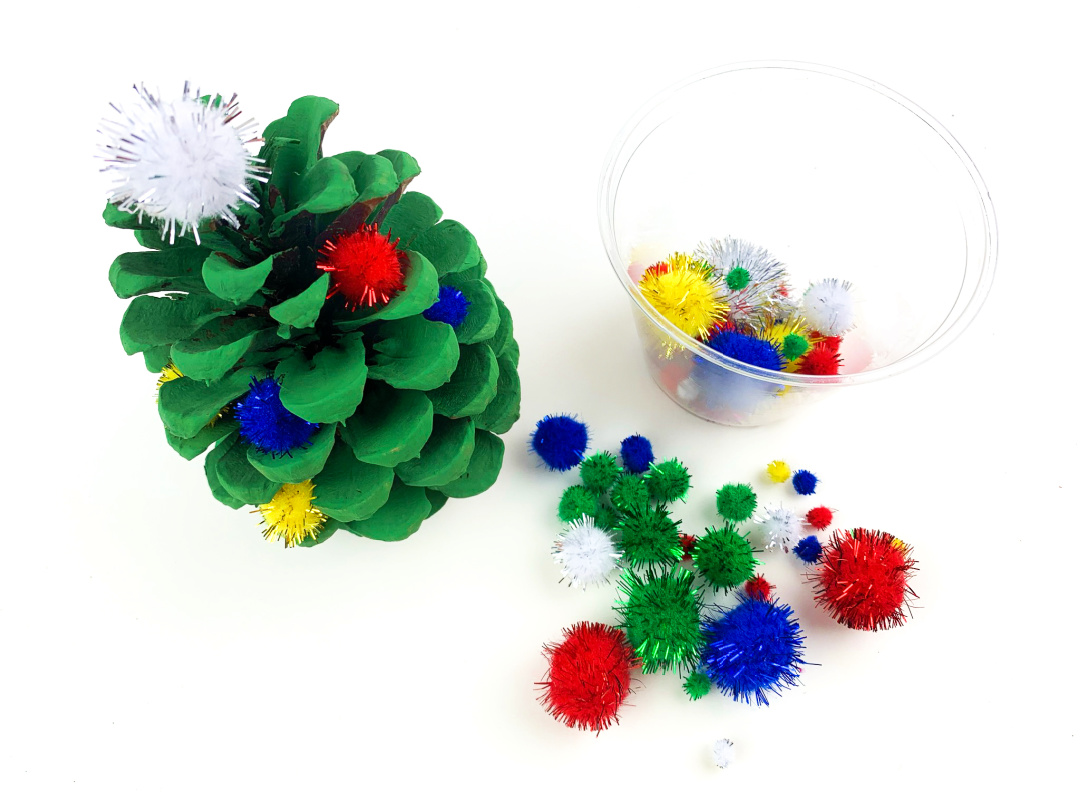
Glue the white pom pom on the top of the pine cone. Allow to dry.
(You may be able to set the pom pom in between top of the pine cone and one of the pine cone seeds to help it stay in place.)
Display this holiday season!


Pine Cone Christmas Tree


Materials
- Pine cone
- Green craft paint
- Paintbrush
- Small to medium size sparkly/glitter pom poms (different colors)
- 1 white pom pom (for the star)
- Glue or hot glue gun
- Paper plate
- Small disposable cup
Instructions
Set the pine cone on a paper plate.
Pour a small amount of green paint in the cup.
Paint the pine cone green. Set aside to dry. If needed, add another coat.
Glue the pom poms around the pine cone. Allow to dry.
Glue the white pom pom on the top of the pine cone. Allow to dry.
(You may be able to set the pom pom in between top of the pine cone and one of the pine cone seeds to help it stay in place.)
Display this holiday season!