-
Halloween Cookie Decorating Kit
It’s that time of year again when the leaves start changing coloring, the days get shorter, and pumpkins start appearing on doorsteps. Yes, Halloween is just around the corner! If you’re like me, you might be looking for some fun Halloween-themed activities to do with your kids. Well, look no further than right here! I’ve…
-
Gnome Coloring Pages
Coloring is a fun activity for all ages, and it can be a great way to relax and de-stress. Today, I’m excited to share some gnome coloring pages with you – for both adults and kids! These whimsical creatures are perfect for adding some fun and imagination to your coloring sessions. Grab your favorite coloring…
-
Christmas Cookie Decorating Kit
It’s that time of the year again–when Christmas lights shine bright, carols are heard on the streets, and delicious treats are everywhere. One way to make the holiday season more special for your kids or even for your parties and events is to order a Christmas Cookie Decorating Kit. Best Cookie Decorating Kits (adorable themes…
-
Best Cookie Decorating Kit
Looking for a fun activity to do with your kids? Why not order a cookie decorating kit and get creative in the kitchen! Kids will love getting messy and coming up with cute designs. Plus, you can enjoy eating your delicious creations afterwards. What are you waiting for? Order your cookie decorating kit today! I’ve…
-
Thanksgiving Cookie Decorating Kit
Thanksgiving is just around the corner, and that means it’s time to start thinking about cookies! This year, why not try something different and order a Thanksgiving Cookie Decorating Kit? You’ll get everything you need to create festive cookies, including templates, sprinkles, and more. Plus, it’s a great way to get the kids involved in…
-
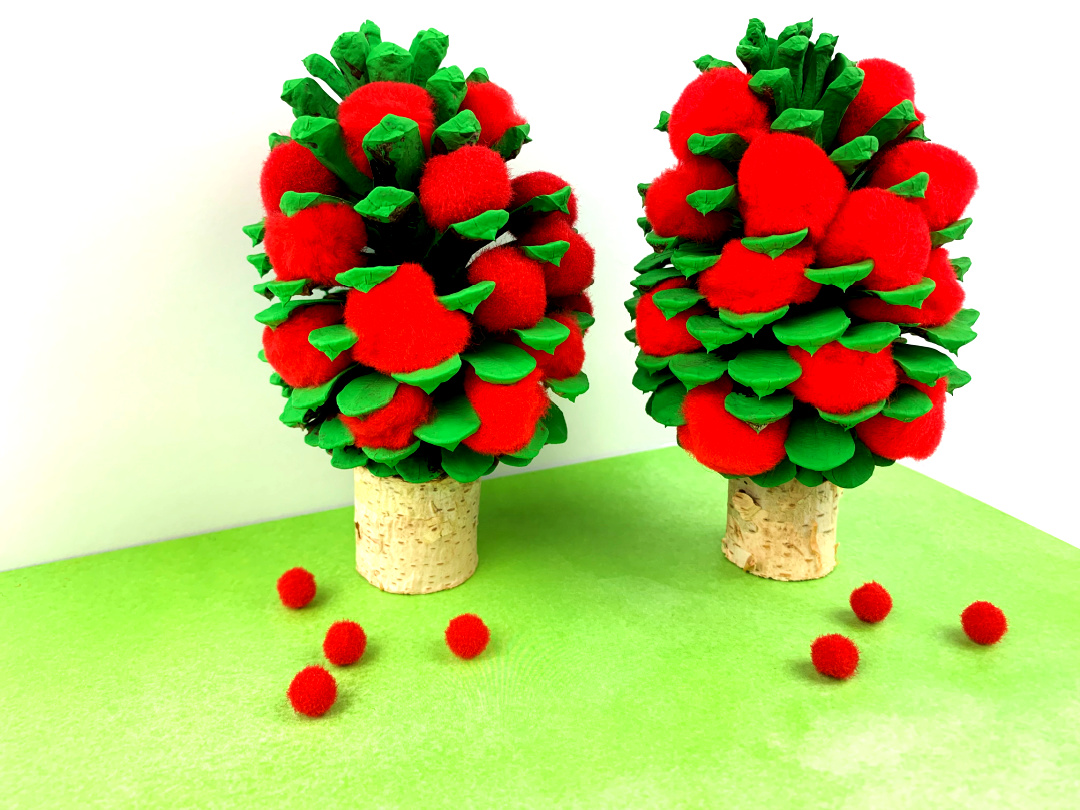
Pine Cone Apple Tree Craft for Kids
Grab a few pine cones on your next nature walk! This Pine Cone Apple Tree craft for kids is super easy and fun to make. When I was a little girl, it was a dream of mine to pick apples from a real apple tree! My dad grew one of the biggest and best gardens…
-
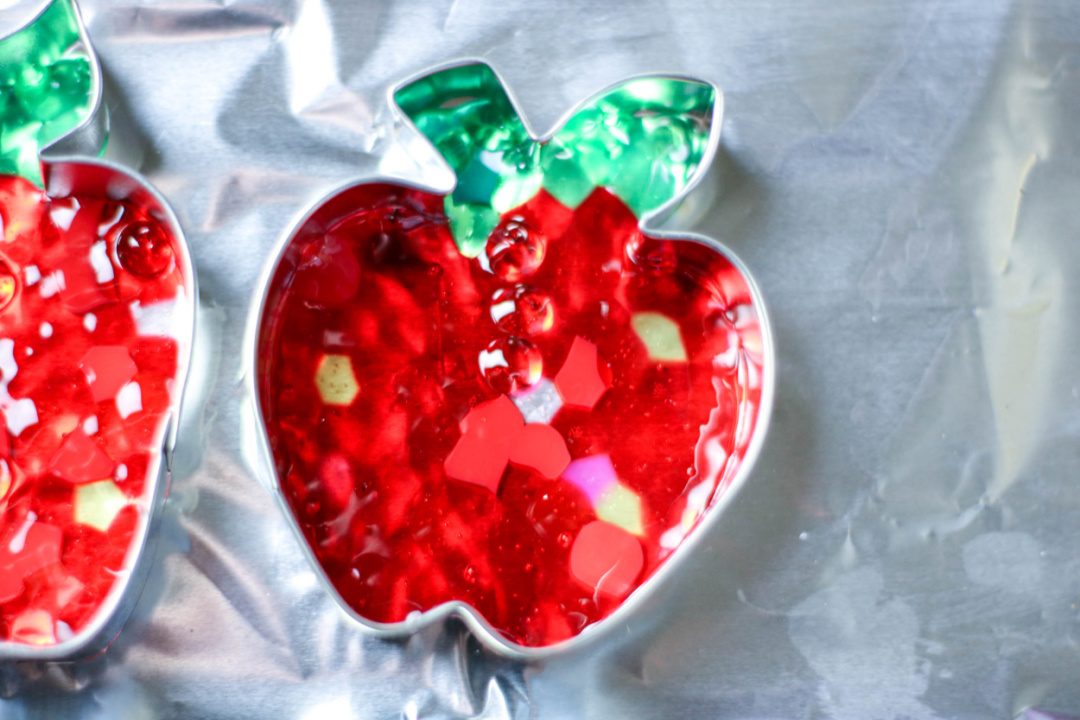
Melted Bead Suncatcher Apple Craft
Create this Melted Bead Suncatcher Apple Craft from melted beads and display it in your home or classroom for the fall or back to school season! There are a lot of fun ways to use pony beads! Many kids love to string them to make jewelry, friendship bracelets, or keychains. You can also use them…