-
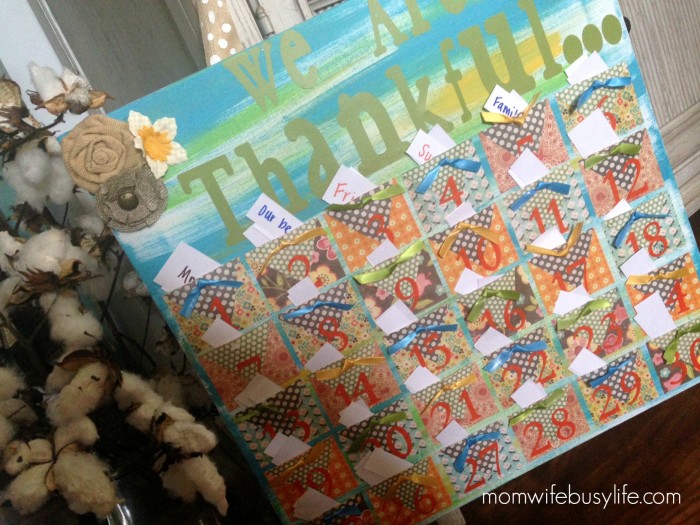
Thankful Board
Thanksgiving is a time to express gratitude and all of the things we are thankful for. Create a Thankful Board this year to show your gratitude! So often, we have to remind our children to be thankful for the many blessings we are given on a daily basis. Especially during this time of year, it’s…
-
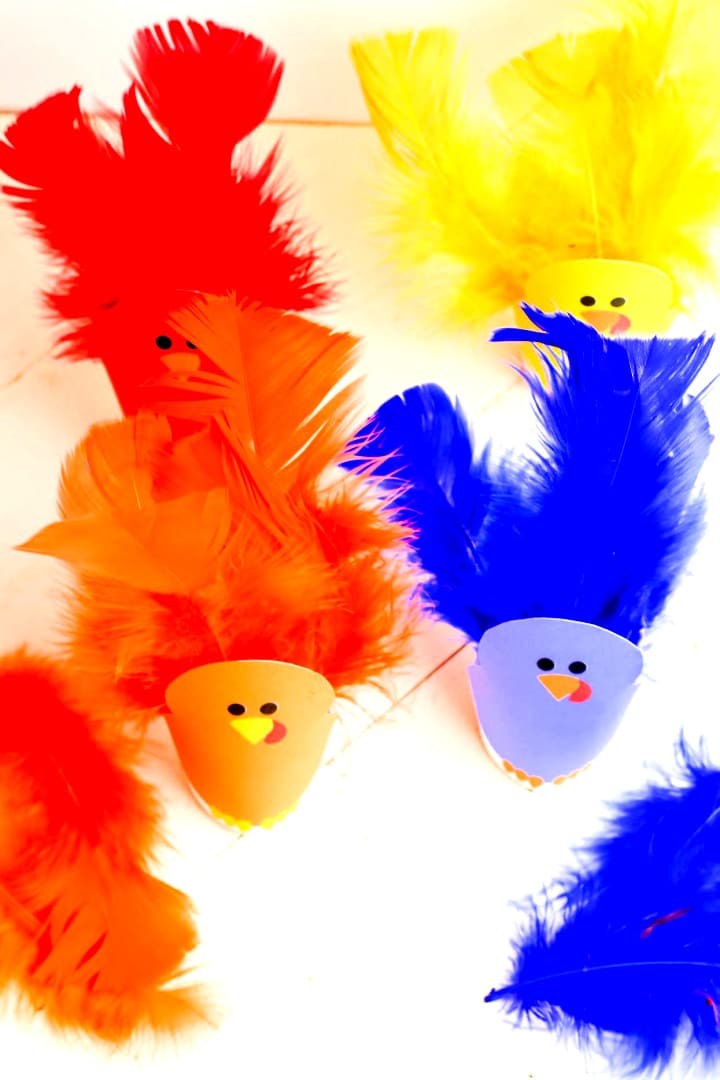
Turkey Feathers Color Matching Game
Are you teaching colors to small children this fall? This is a fun Turkey Feathers Color Matching Game for kids to enjoy this season. Create these adorable turkeys and match their feathers to the correct turkey according to their color. Printable turkeys are included! 7+ Turkey Crafts for Kids If you are teaching colors to…
-
Edible Apple Turkey Craft for Kids
Kids will love creating this adorable Apple Turkey Craft that they can eat when they are finished creating it! Thanksgiving is the time to be thankful for our blessings! I have two little blessings at home that call me, “Mom,” and we have a lot of fun working on crafts and activities during the holidays.…
-
DIY Gingerbread Man Soap Recipe
Try this adorable DIY Gingerbread Man Soap Recipe! This soap recipe is a great gift idea for the holiday season. Gingerbread is one of my FAVORITE flavors during the holiday season. I love anything and everything gingerbread! I really enjoy pairing gingerbread with my coffee. When you think of gingerbread, what comes to mind? You…

-
Toilet Paper Roll Reindeer
Create these adorable Toilet Paper Roll Reindeer to display in your home or classroom this holiday season! Crafting toilet paper roll reindeer is a delightful and engaging activity that brings the holiday spirit to life. Using simple materials like toilet paper rolls, googly eyes, and pom poms, children can transform these ordinary objects into adorable…
-
Toilet Paper Roll Christmas Countdown Poppers
Countdown to Christmas with these fun and festive Toilet Paper Roll Christmas Countdown Poppers! The countdown to Christmas is here! If you have little ones that love to ask, “How many days until Christmas?”, then this activity can help them understand how much longer they’ll have to wait until the BIG day! Create these easy…
-
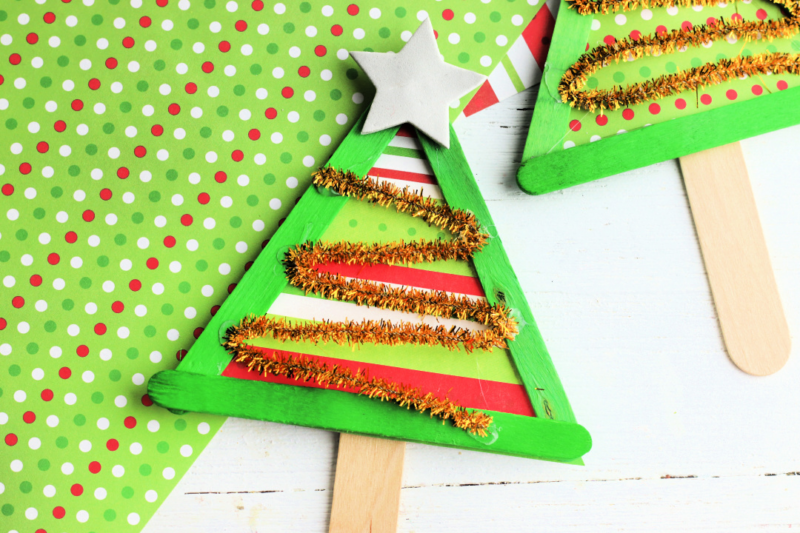
Christmas Tree Popsicle Stick Craft
Create this fun and festive Christmas Tree Popsicle Stick Craft this holiday season with the kids! If you are looking for a simple Christmas craft to work on with the kids this holiday season, consider this Christmas Tree Popsicle Stick Craft! You only need a few supplies to create this fun craft. You may have…