Category: DIY

  • Orange Creamsicle Slime

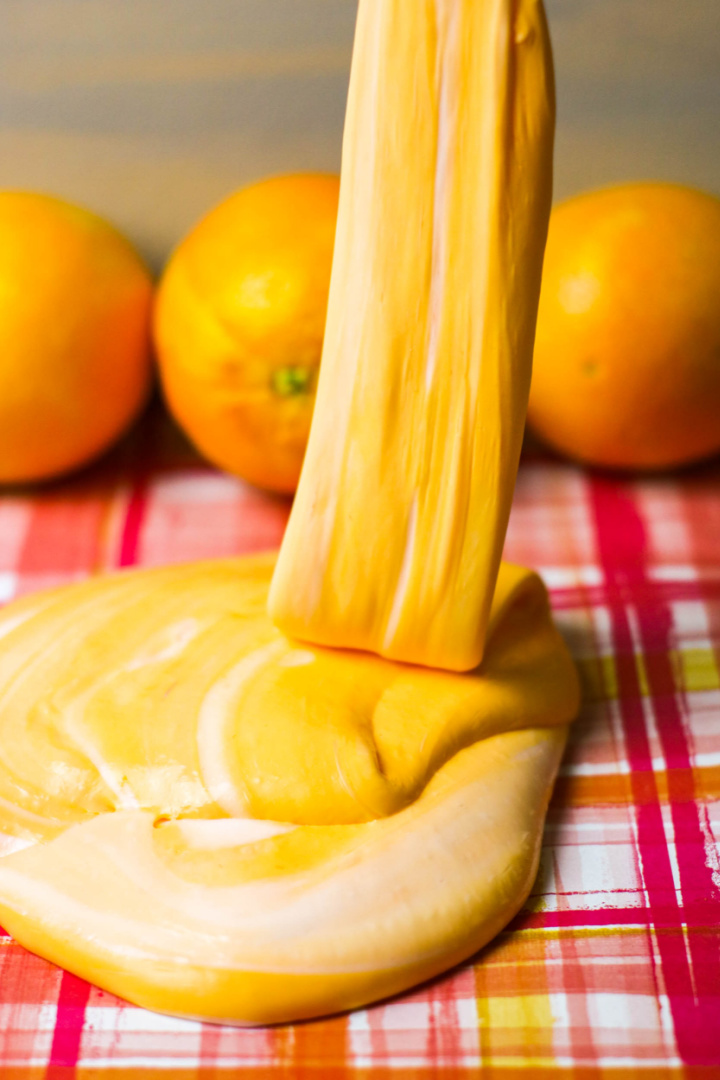
    Learn how to make orange creamsicle slime with this recipe! This slime is orange scented, too!

    Orange Creamsicle Slime

    Orange Creamsicle Slime

    Supplies:

    • 2 (6 ounce) bottles Elmer’s Glue
    • About ½ cup warm water, for each batch
    • ½ teaspoon baking soda, for each batch
    • 1 tablespoon contact lens solution (containing boric acid), for each batch
    • Orange food coloring
    • 1 teaspoon orange essential oil
    • White or iridescent glitter, for the white slime, optional
    • 1 teaspoon vanilla extract, for the white slime
    orange creamsicle slime ingredients

    Directions:

    You will make two separate batches of slime with one in each color.

    Empty the glue into a large bowl. 

    Fill the empty glue bottle about ⅓ full with warm water (about ¼ cup) and seal with the lid. Shake well to combine the remaining glue with the water. Pour into bowl with glue and stir to combine.

    Add the baking soda to the glue and stir to mix thoroughly. 

    If you are adding additional glitter, food coloring, scents, or confetti, stir into the glue mixture before adding the contact lens solution.

    orange creamsicle slime mixed

    Add contact lens solution to the glue mixture and stir well. (Note: regular glue will require less contact lens solution than glitter glue. Add the contact lens solution slowly, mixing between additions, and add only enough to bring the glue together into a soft ball.)

    Remove the slime from the bowl. The slime will be sticky. Begin to play with the slime, stretching or kneading it as you would bread dough, to bring the slime together. The slime is ready when it is no longer sticky.

    orange creamsicle slime

    Best if stored in an airtight container in the refrigerator when not in use.

    orange creamsicle slime

    Orange Creamsicle Slime

    Orange Creamsicle Slime

    Materials

    • 2 (6 ounce) bottles Elmer’s Glue
    • About ½ cup warm water, for each batch
    • ½ teaspoon baking soda, for each batch
    • 1 tablespoon contact lens solution (containing boric acid), for each batch
    • Orange food coloring, for the orange slime
    • 1 teaspoon orange essential oil, for the orange slime
    • White or iridescent glitter, for the white slime, optional
    • 1 teaspoon vanilla extract, for the white slime

    Instructions

    You will make two separate batches of slime with one in each color.

    Empty the glue into a large bowl. 

    Fill the empty glue bottle about ⅓ full with warm water (about ¼ cup) and seal with the lid. Shake well to combine the remaining glue with the water. Pour into bowl with glue and stir to combine.

    Add the baking soda to the glue and stir to mix thoroughly. 

    If you are adding additional glitter, food coloring, scents, or confetti, stir into the glue mixture before adding the contact lens solution.

    Add contact lens solution to the glue mixture and stir well. (Note: regular glue will require less contact lens solution than glitter glue. Add the contact lens solution slowly, mixing between additions, and add only enough to bring the glue together into a soft ball.)

    Remove the slime from the bowl. The slime will be sticky. Begin to play with the slime, stretching or kneading it as you would bread dough, to bring the slime together. The slime is ready when it is no longer sticky.

    Best if stored in an airtight container in the refrigerator when not in use.

  • Elephant Paper Plate Craft

    Elephant Paper Plate Craft

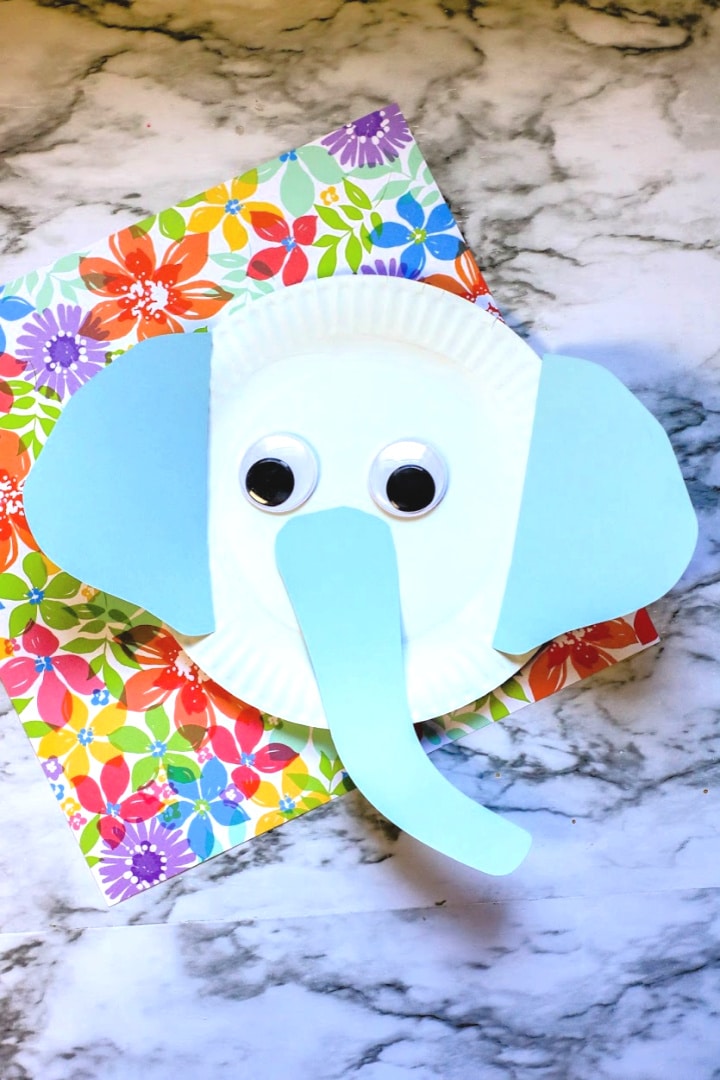
    Turn a paper plate into a cute Elephant! Learn how to make this Elephant Paper Plate Craft with the kids – template included!

    Elephant Paper Plate Craft

    Are you doing a study or lesson on elephants? Maybe you are teaching about the jungle or safari, or doing a study on animals that live in Africa.

    Or, you’re going to visiting a zoo soon to see the elephants!

    Whatever elephant theme you are considering, I’ll be sharing a craft below to help supplement your lesson.

    When studying elephants, you can discuss and show students where elephants live by pointing to the location on a map.

    A great discussion would be to talk about the size and weight of elephants and compare the sizes of elephants to other animals.

    You can also ask kids if they’ve ever seen an elephant in a zoo or on a visit to a safari!

    Other items of discussion when learning about elephants includes: what do elephants eat, what do they use their trunks for, why do elephants flap their ears, and so much more.

    Today, I’m sharing an Elephant Paper Plate Craft to complete with the kids as a fun way to get kids excited about elephants!

    Enjoy more paper plate crafts:

    Elephant Paper Plate Craft

    Supplies:

    • 1 paper plate
    • Gray or light blue paper
    • Gray or light blue paint
    • Jumbo wiggle eyes
    • Pencil
    • Glue
    • Scissors
    • Popsicle stick, if desired
    • Printable Elephant Paper Plate templates *see below

    Get the free elephant template!

      We respect your privacy. Unsubscribe at anytime.

      Elephant Paper Plate Craft

      Directions:

      To use a print and cut device (such as Cricut Explore), use the PNG images below. Upload to your machine software and cut according to manufacturer’s instructions. Resize the pieces as follows:

      Ears = 6 inches in height

      Trunk = 8 inches in height

      If not using the print and cut option, print the PDF and cut pieces apart.

      Paint the paper plate with paint and allow to dry completely.

      Decorate the paper plate by attaching pieces with glue.

      Glue or tape the paper plate to the popsicle stick, if desired.

      Allow the craft to dry completely before playing or displaying.

    • Monkey Toilet Paper Roll Craft

      Monkey Toilet Paper Roll Craft

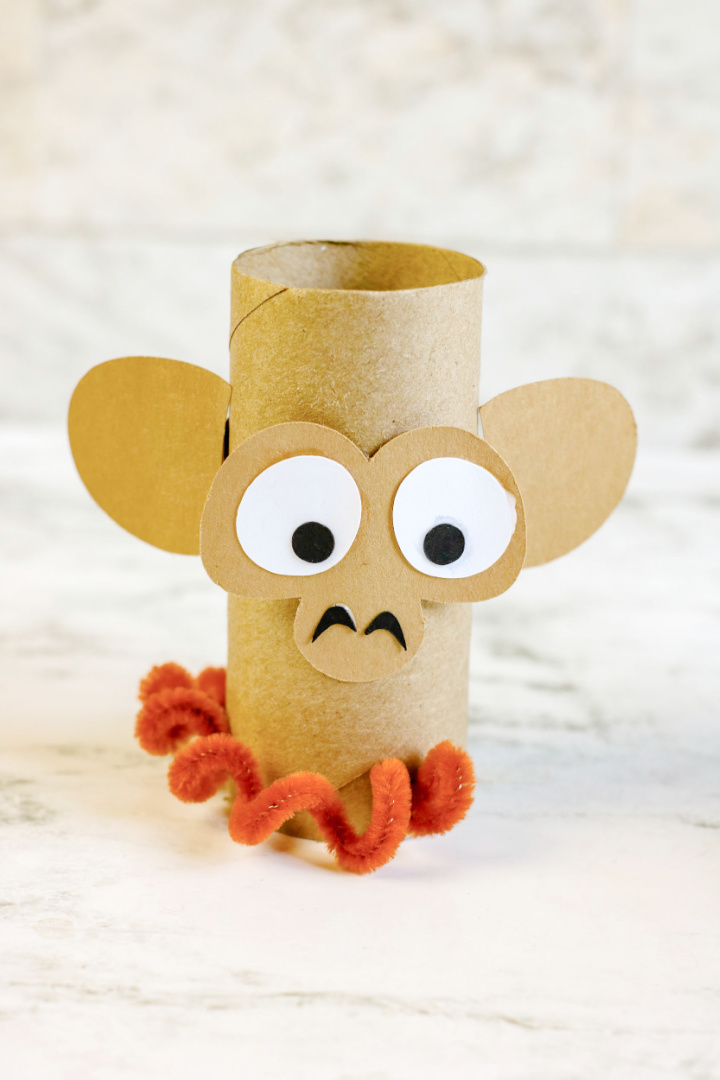
      This adorable Monkey Toilet Paper Roll Craft is fun for kids to make! You’ll get access to a free template, too!

      monkey toilet paper roll craft

      If you are taking a trip to the zoo soon or teaching a unit on zoo animals, consider adding this fun monkey craft to supplement the trip or unit!

      Kids love learning about animals and especially love getting creative with art supplies!

      Save your empty toilet paper rolls and allow the kids to create a variety of crafts with them this year including:

      Today, I’m sharing this monkey toilet paper roll craft with you! I hope you like this as much as I did!

      Monkey Toilet Paper Roll Craft

      Supplies:

      • empty toilet paper roll (you can buy craft rolls in bulk)
      • Printable Monkey Templates *see below
      • brown construction paper
      • brown pipe cleaners
      • school glue
      • scissors
      • pencil

      Get the free monkey template!

        We respect your privacy. Unsubscribe at anytime.

        monkey craft supplies

        Directions:

        (Note: You do not have to use a cutting device for this craft. You can follow the patterns as best as you can if you do not have a device.)

        To use a cutting device (such as Cricut Explore), use the PNG images. Upload to your machine software. Size the images as follows:

        • Monkey face and ears = 6 inches wide
        • White eyes – 2 inches width
        • Black eyes and nostrils = 1.5 inches width

        If you prefer to cover the cardboard tube, cut another sheet of paper to fit the cardboard tube, approximately 4 inches by 6 inches. Glue the paper to the cardboard tube.

        Glue the white eyes, black eyes, and nostrils to face piece.

        monkey face pattern
        monkey face pattern
        monkey face on toilet paper roll

        Cut two small tabs from the remaining scrap paper, approximately 1 inch by 2 inches. Glue these tabs to the inner curved edge of the monkey ears. Allow to dry.

        monkey ears pattern

        Attach the monkey ears to the sides of the cardboard tube and the face to the front.

        monkey ears
        monkey toilet paper roll craft

        Curl the chenille stem around a pencil. Attach one end to the back of the cardboard tube and shape the curling chenille stem around the cardboard tube.

        monkey tail pipe cleaner

        Allow the craft to dry completely before playing or displaying.

        monkey toilet paper roll craft

        Monkey Toilet Paper Roll Craft

        Monkey Toilet Paper Roll Craft

        Materials

        • Empty Toilet Paper Roll
        • Glue
        • Scissors
        • Printable Monkey templates
        • Brown paper
        • Brown chenille stem
        • Pencil

        Instructions

        To use a cutting device (such as Cricut Explore), use the PNG images. Upload to your machine software. Size the images as follows:

        Monkey face and ears = 6 inches wide

        White eyes – 2 inches width

        Black eyes and nostrils = 1.5 inches width

        If you prefer to cover the cardboard tube, cut another sheet of paper to fit the cardboard tube, approximately 4 inches by 6 inches. Glue the paper to the cardboard tube.

        Glue the white eyes, black eyes, and nostrils to face piece.

        Cut two small tabs from the remaining scrap paper, approximately 1 inch by 2 inches. Glue these tabs to the inner curved edge of the monkey ears. Allow to dry.

        Attach the monkey ears to the sides of the cardboard tube and the face to the front.

        Curl the chenille stem around a pencil. Attach one end to the back of the cardboard tube and shape the curling chenille stem around the cardboard tube.

        Allow the craft to dry completely before playing or displaying.


        Monkey Paper Plate Craft

      • Bird Nesting Material and Food Holder

        Learn how to create a Bird Nesting Material and Food Holder using an egg carton for your backyard birds this spring season!

        Bird Nesting Material and Food Holder

        The spring season is approaching! Spring is the season when most birds begin breeding in North America. Once a bird finds a mate, they start to build their nests for their eggs.

        Did you know that you can help birds by providing a safe place to offer nesting material and food?

        Coffee Container Bird Feeder House

        If you’ve ever found an empty birds nest after a bird is finished using it, they are pretty amazing to look at.

        You can find a variety of items included in the nest. I always think it’s neat when I find pieces of colored string in their nests! Birds do gather a variety of materials like sticks, leaves, string, hay, and more to make their nests.

        Don’t forget to check out my DIY Bird Feeders to make for your backyard birds: Orange Bird Feeder, Apple Bird Feeder, Pine Cone Bird Feeder, Sugar Cone Bird Feeder, Egg Carton Bird Feeder, Toilet Paper Roll Bird Feeder, Gelatin Bird Feeder

        This spring, make a bird nesting material and food holder for your backyard birds! This holder includes a mix of items for birds to get a start on their nest! Plus, it offers a healthy snack to keep their energy levels up.

        While you are here, I have a few FREE printable bird activities available for you!

        Bird Nesting Material and Food Holder

        Supplies:

        Bird Nesting Material and Food Holder

        Directions:

        Carefully cut the lid off the egg carton.

        Cut a section of jute cord to desired length and run through the holes in the carton from the bottom, as shown, to create the hanging cord.

        Cut the apple into small cubes.

        Fill each section of the egg carton with all of the different nest materials, the apple cubes, and the bird seed.

        Hang outside in the desired location and watch how grateful your neighborhood birds will be! 

        Bird Nesting Material and Food Holder

        Bird Nesting Material and Food Holder

        Bird Nesting Material and Food Holder

        Materials

        • Empty paper egg carton
        • Birdseed
        • Apple, chopped small
        • Sticks
        • Dry Leaves
        • Natural Material Cord or String
        • Dry Hay
        • Natural Cotton
        • Wool Cloth Strips

        Instructions

        Carefully cut the lid off the egg carton.

        Cut a section of jute cord to desired length and run through the holes in the carton from the bottom, as shown, to create the hanging cord.

        Cut the apple into small cubes.

        Fill each section of the egg carton with all of the different nest materials, the apple cubes, and the bird seed.

        Hang outside in the desired location and watch how grateful your neighborhood birds will be! 

        Enjoy these bird activities with the kids this spring:

        Bird Coloring Pages  40 Printable Bird Coloring Pages for
        Printable Bird Coloring Pages


        Bird Bundle  Anatomy Feather Feet Skeleton Charlotte Mason
        Bird Anatomy Bundle


        Wooden Birds Memory Game Montessori Toys Wood Animals
        Wooden Birds Memory Game


        BACKYARD BIRDS  Montessori Cards  Flash Cards  Three Part
        Backyard Birds Flash Cards


        Toddler Flash Cards Backyard Birds Printable Flashcards
        Backyard Birds Printable Flashcards


      • How to Make Watercolor Paper Hawaiian Leis

        How to Make Watercolor Paper Hawaiian Leis

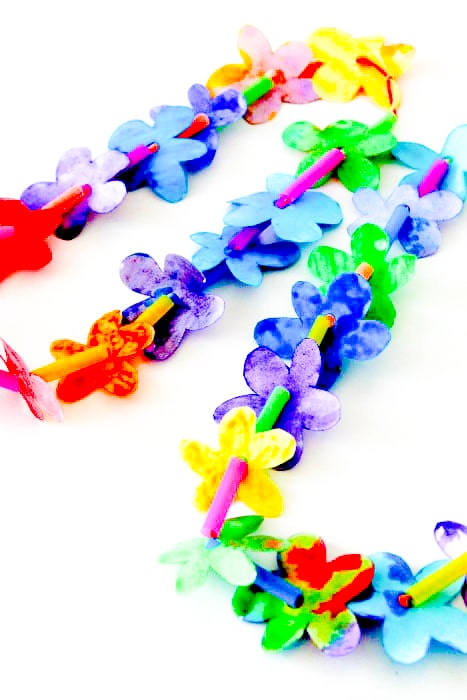
        Learn How to Make Watercolor Paper Hawaiian Leis!

        This is a fun summer activity for kids. Kids will enjoy painting their own flowers and creating their own leis to wear around this summer!

        Hawaiian Leis

        Summer is here, and with it comes the challenge of keeping kids entertained while managing a busy schedule.

        Why not combine creativity with a touch of Hawaiian flair?

        Introducing our fun and easy watercolor Hawaiian paper leis craft that kids can make during the summer months!

        Printable Hawaiian Lei Flower Templates

        Why Make Watercolor Hawaiian Paper Leis?

        1. Simple and Fun: This craft is straightforward and enjoyable for kids of all ages. With just a few supplies, your children can create beautiful, colorful leis that will spark their creativity and keep them occupied for hours.

        2. Educational: Crafting these leis introduces kids to Hawaiian culture and the significance of leis in Hawaiian traditions. It’s a fun way to learn about different cultures while engaging in a hands-on activity.

        3. Bonding Time: Making these leis can be a wonderful opportunity for family bonding. Gather your kids and join in the fun. You’ll create not only beautiful leis but also lasting memories together.

        You May Also Like:

        Summer Activity Pack Printable

        Beach Activity Pack Printable

        When and Where to Make Watercolor Hawaiian Paper Leis

        When:

        • Summer Break: Perfect for long summer afternoons when the kids need something creative to do.
        • Rainy Days: A great indoor activity for those rainy summer days when outdoor play isn’t an option.

        Where:

        • At Home: Set up a crafting station in the kitchen or living room. Lay down some old newspapers to catch any watercolor spills, and let the creativity flow.
        • Outdoor Crafting: If the weather is nice, take the craft outside! A backyard or a local park can be a perfect spot. Just bring along a picnic blanket, some water, and snacks for an enjoyable crafting session in nature.

        Watercolor Paper Leis

        Watercolor Paper Hawaiian Leis

        Watercolor Paper Leis

        Supplies:

        • Pre-cut Flowers (I drew my own and cut them by stacking 5 pieces of paper together.)
        • Hole Punch
        • Scissors
        • Colorful Straws (cut into 1 inch pieces)
        • Watercolor Paint
        • Yarn
        • Paper plates

        Directions: 

        Punch a hole in the middle of the flowers with a hole punch.

        paper flowers

        Lay about seven flowers on a paper plate. Leave enough space between the flowers for painting.

        Paint each flower and set aside and allow to dry.

        painting paper flowers

        When flowers are dry, turn each flower over and paint the other side. Set aside to dry completely. Once all flowers are painted and dry on both sides, they will look a little something like this:

        painted paper flowers

        Cut a piece of yarn big enough to fit comfortably around your child’s neckline. You’ll want a loose and comfortable fit for the leis.

        painted paper flowers

        Tape one end of the yard down on the table so that the flowers and string stay on. Have each child string his/her yarn with a straw and flower pattern. (Straw, flower, straw, flower, straw, flower, etc.)

        stringing flowers

        Leave about 2 inches of yarn at each end straw and flower free for easy tying.

        stringing flowers

        When your child fills up his or her piece of yarn, tie the ends together in a knot.

        hawaiian leis

        The watercolor paper leis are complete and ready to show off!

        watercolor paper leis

        My girls loved this activity and the finished product was better than expected!

        We completed our activity outdoors when the weather was nice and now we have pretty watercolor paper leis to wear this summer.

        hawaiian leis
      • Sugar Cone Bird Feeder

        Sugar Cone Bird Feeder

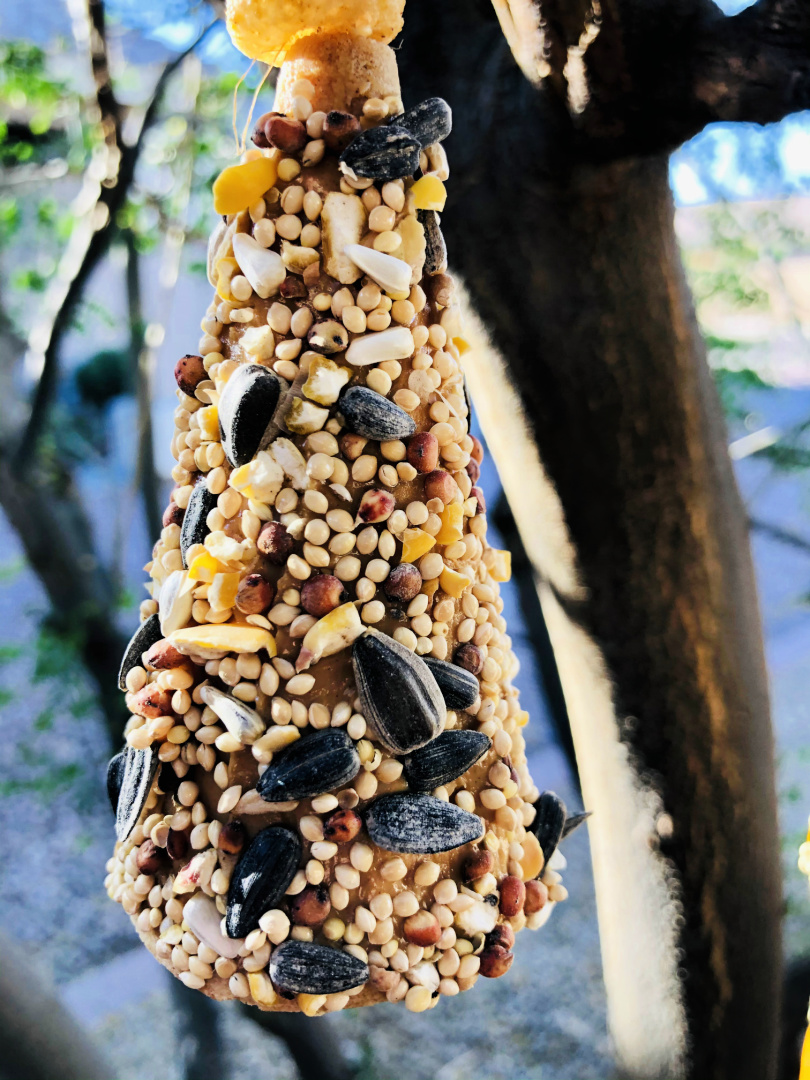
        Learn how to make this simple Sugar Cone Bird Feeder to hang in your backyard this season!

        Sugar Cone Bird Feeder

        If you enjoy birdwatching, consider making homemade birdfeeders for your backyard! There are several varieties of bird feeders that you can make to hang in your backyard this season.

        Today, I’m sharing how to make a Sugar Cone Bird Feeder for your birds to feast on this winter or spring season!

        Here are my other homemade bird feeder options to try, too!

        You need only a few supplies to create this easy to make DIY birdfeeder. Get the kids involved and let them help you make this fun feeder!

        Sugar Cone Bird Feeder

        Supplies:

        Sugar Cone Bird Feeder

        Directions:

        Carefully cut the tips off of the sugar cones, creating an opening just large enough for the jute cord to get through.

        Coat the cones with a thin, even layer of peanut butter.

        Roll the cone in bird seed.

        Cut a piece of jute cord to desired hanging length, tie a knot in the bottom half of the cord.

        Slide the cone, wide side down, over the cord and let the cone rest on the knot.

        Place 8-10 pieces of cereal onto the cord, sliding them down to the tip of the cone. 

        Tie a loop at the top for hanging.

        Hang outside in your backyard and observe the birds that come by for a tasty treat!

        Sugar Cone Bird Feeder

        Sugar Cone Bird Feeder

        Sugar Cone Bird Feeder

        Materials

        • sugar cone ice cream cones
        • birdseed
        • whole grain cereal o’s
        • jute cord
        • peanut butter

        Instructions

        Carefully cut the tips off of the sugar cones, creating an opening just large enough for the jute cord to get through.

        Coat the cones with a thin, even layer of peanut butter.

        Roll the cone in bird seed.

        Cut a piece of jute cord to desired hanging length, tie a knot in the bottom half of the cord.

        Slide the cone, wide side down, over the cord and let the cone rest on the knot.

        Place 8-10 pieces of cereal onto the cord, sliding them down to the tip of the cone. 

        Tie a loop at the top for hanging.

        Place outside.

        Bird Activities for Kids:

        Wooden Birds Memory Game Montessori Toys Wood Animals
        Wooden Birds Memory Game Montessori Toys Wood Animals


        Bird Bingo Cards: Printable bingo 50 cards senior citizen
        Bird Bingo Cards: Printable bingo 50 cards senior citizen


        Bird Coloring Pages  40 Printable Bird Coloring Pages for
        Bird Coloring Pages 40 Printable Bird Coloring Pages for


        30 Printable Preschool Birds Learning Games Download. Games
        30 Printable Preschool Birds Learning Games Download. Games


        Toddler Flash Cards Backyard Birds Printable Flashcards
        Toddler Flash Cards Backyard Birds Printable Flashcards


        Songbirds of the Northeast U.S. Poster and Informational
        Songbirds of the Northeast U.S. Poster and Informational


        Bird Feeder Kit For Kids
        Bird Feeder Kit For Kids


      • Best DIY Bird Feeder Kits for Kids

        Bird watching is a fun activity for the whole family!

        We recently moved to a new location this spring. About a week after we moved, we purchased a few bird feeders to place around our home. Within days, we observed several different types of birds enjoying tasty snacks from our feeders!

        How to Make a Pine Cone Bird Feeder

        Toilet Paper Roll Bird Feeder

        Now that we’ve been here for a few months, we’ve noticed that the birds stick around! We observe cardinals, blue jays, woodpeckers, chickadees, titmice, mourning doves, and other small birds!

        We’ve learned a lot from bird watching this year and we plan to continue to feed our daily visitors as long as they keep coming back!

        If you want to get started with bird watching, here are a few DIY Bird Feeder Kits to help! Kids will love creating their own bird feeder to display in your back yard.


        Stanley Jr Bird Feeder Kit for Kids


        2 Sets DIY Wooden Bird Feeder Kits


        Hapinest Decorate Your Own Window Bird Feeder Kit


        SparkJump Birdhouse Craft Kit


        SparkJump Jr Birdhouse Kit


        Oojami 3 Large Design Your Own Bird House Set Include Bird Feeder and 2 Bird House


        MasterPieces Works of Ahhh Real Wood Small Acrylic Paint & Craft Kit