Category: DIY

  • Glow in the Dark Sensory Bottle

    Glow in the Dark Sensory Bottle

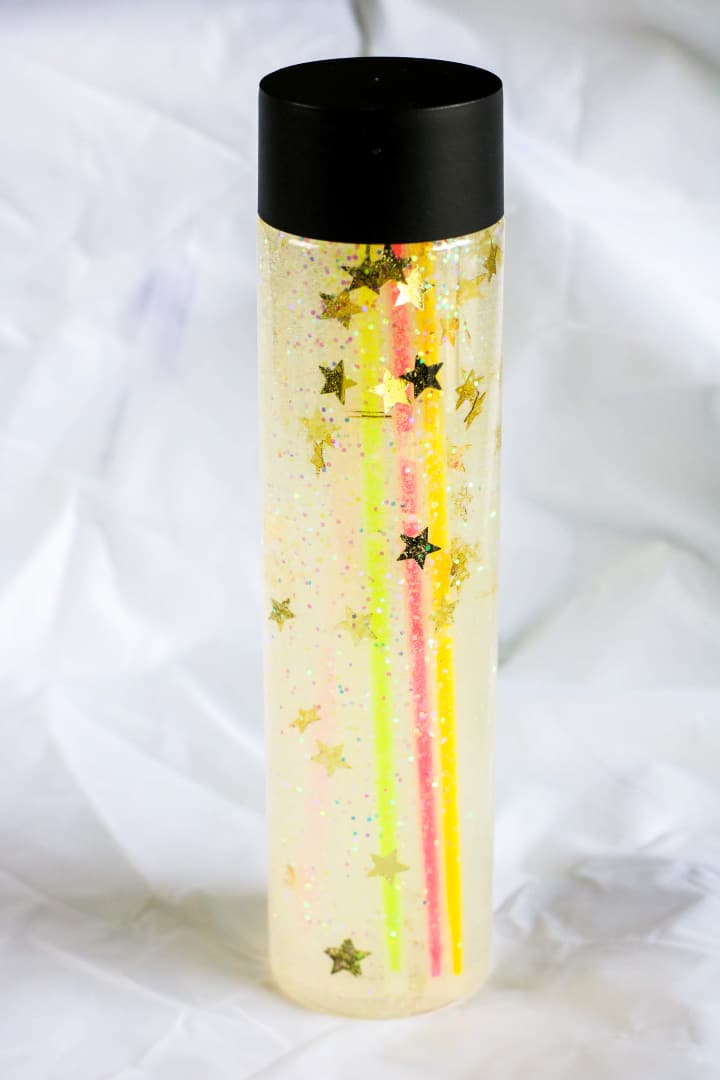
    This glow in the dark sensory bottle is entertaining for children! Learn how to create your own bottle today!

    glow in the dark sensory bottle

    Sensory bottles are a great way for kids to use their senses to make sense of the world around them. Sensory bottles are containers filled with a variety of materials for non-messy play!

    Get as creative as you’d like with your sensory bottles. You can make them just about any time of the year and change up the themes. My toddler enjoys playing with sensory bottles. They have become a regular playtime activity for my tot!

    Benefits of Sensory Bottles

    Today I’ll be showing you how to make a Glow in the Dark Sensory Bottle! Glow in the Dark toys are a big hit with kids. This tutorial below is simple to make and will provide great entertainment for your toddler!

    We have a few holiday themed sensory bottles that you can take a look at below. You can see how easy it is to create holiday themed bottles with a few supplies!

    More Sensory Bottles:

  • New Year’s Sensory Bottle
  • Valentine’s Day Sensory Bottle
  • St. Patrick’s Day Sensory Bottle
  • Patriotic Sensory Bottle
  • Christmas Sensory Bottle
  • Check out our full collection of sensory bottles here.

    glow in the dark sensory bottle

    Glow in the Dark Sensory Bottle

    Supplies:

    For this project, we used:

    You can also try Glow in the dark glitter for this sensory bottle!

    Empty one bottle of glue into the bottle. 

    Fill the empty glue bottle about half full with warm water (about ¼ cup) and seal with the lid. Shake well to combine the remaining glue with the water. Pour into jar with glue and shake or stir to combine.

    If you are adding glitter or toys, add part of the glitter and toys into the glue mixture.

    Seal the jar and shake well.

    Add more warm water if the glitter or confetti does not move easily. If the glitter or confetti moves too quickly, add additional glue. Continue adding in layers with the glitter and toys until you achieve your desired effect. Leave room for the glow sticks.

    When you are ready to achieve the glow in the dark effect, activate the glow sticks and place the glow sticks into the bottle. Note: Replace the glow sticks as desired when they run out of glow.

    When the contents of the bottle move according to your preference, seal the bottle to avoid spills.

    If desired, cover the lid with duct tape or additional decorations.

    Your bottle is ready for sensory play! Go into a dark room and watch this beautiful glow in the dark sensory bottle in action!

    glow in the dark sensory bottle

    This sensory bottle is a favorite of ours! Look at how beautiful it turned out!

    glow in the dark sensory bottle

    Here are a few great articles to read on the importance of sensory play for kids:

    Find more sensory bottle ideas here.

    Don’t forget to stock up on your sensory bottle supplies before you leave!

  • How to Make Hot Chocolate for “The Polar Express” Movie Night

    How to Make Hot Chocolate for “The Polar Express” Movie Night

    How to Make Hot Chocolate for

    Every holiday season, we sit down as a family on Christmas Eve and watch the family friendly movie, The Polar Express.

    There’s a popular scene in the movie when children are riding along in the Polar Express when all of a sudden, characters break out into song and dance and deliver hot chocolate to the children.

    It’s one of our favorite parts of the movie, and to celebrate this holiday season, we are making our own hot chocolate and whipped cream for our Polar Express movie night this year with the help of our new Vitamix Aer Disc Container.

    The Vitamix Aer Disc Container pairs with our Vitamix Explorian Series E310 Blender to create easy recipes, perfect for busy moms!

    How to Make Hot Chocolate for

    If you are like me and love to make your recipes from scratch, this is the way to go! You know exactly what’s going in each recipe for your family.

    Thankfully, for our hot chocolate recipe provided to me by Vitamix, we only need two simple ingredients: skim milk and chocolate chips.

    If you are interested in making whipped cream to go along with your recipe, the recipe for that is included at the bottom of this post.

    How to Make Hot Chocolate for

    Homemade Hot Chocolate Recipe (using the Vitamix Aer™ container)

    Ingredients:
    2 cups skim milk
    ½ cup semi-sweet chocolate chips

    Directions:
    1. Place all ingredients into the Vitamix container in the order listed and secure the lid.
    2. Select the lowest setting. Start the machine, slowly increase to its highest speed, and run for 6 minutes.

    Notes:
    Since the Aer™ container heats ingredients through friction like our blade containers, it will melt the chocolate as it heats the milk, then blend the two together. Optional add-ins: ⅛ teaspoon orange extract, ⅛ teaspoon coconut extract, ⅛ teaspoon vanilla extract, or ⅛ teaspoon peppermint extract.

    You can find the Aer™ Disc Container at Amazon!

    My thoughts on using the Aer™ container to make hot chocolate:

    I was impressed with my new way of making hot chocolate with the Aer™ container.

    In the past, I’ve always purchased a box of ready-made hot chocolate because I really just didn’t think to make my own.

    I never knew you could blend up chocolate chips and milk together to create a frothy treat for the entire family to enjoy!

    First, when I opened up my Vitamix machine and plugged it in, I was startled because the button was pushed to the ‘on’ position! LOL.

    Make sure it’s in off position before plugging in. The Aer™ container fits easily onto the Vitamix machine and was super easy to set up.

    When I read the hot chocolate recipe directions for the first time, I thought 6 minutes to make was a bit long, but I found out why!

    It did take some time for the chocolate chips to mix completely with the milk. I didn’t realize it would heat up as it was mixing but sure enough, it did which was really cool to me.

    There was no need to microwave or heat up the hot chocolate when it was complete!

    How to Make Hot Chocolate

    The machine was a bit louder than expected as you increased the speed, but it didn’t bother me at all because my family was awake and doing things around the house when we made our hot chocolate.

    They are used to me using loud machines like my vacuum while cleaning house or my hand mixer while baking!

    I probably wouldn’t run the machine if my toddler was napping, so make sure you plan accordingly unless your baby can sleep through anything.

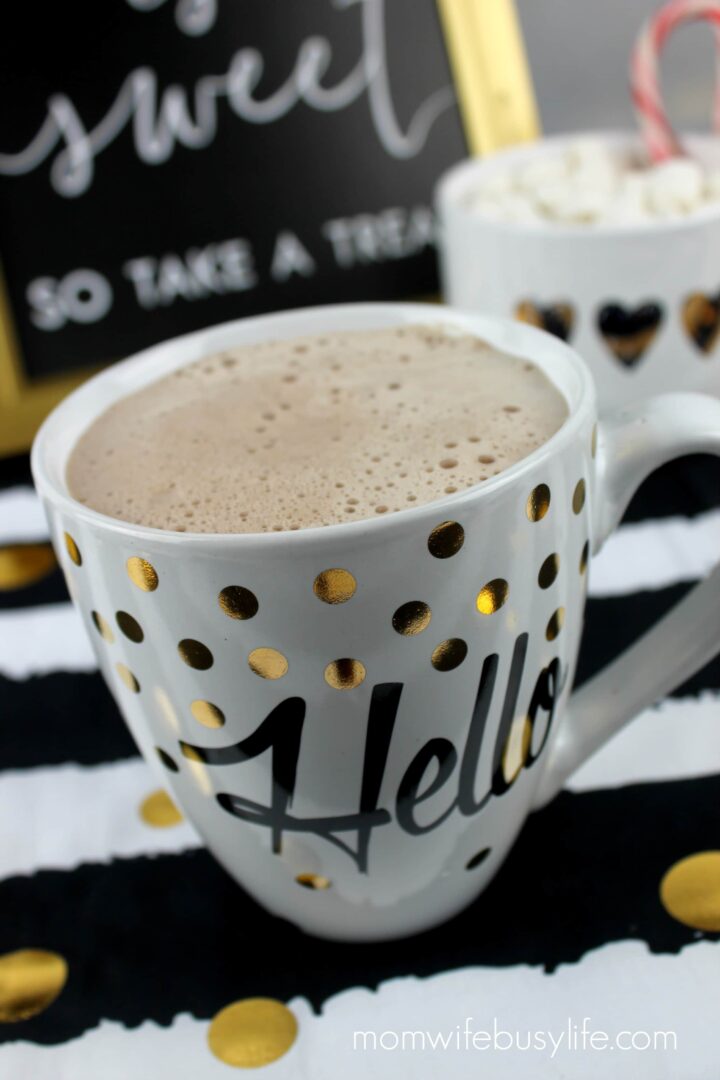
    When my hot chocolate recipe was complete, I immediately poured it into my mug and was amazed by the frothiness of the hot chocolate, something I enjoy.

    Most ordinary hot chocolates aren’t frothy like this recipe is! I think that’s one of the main benefits of using the Aer™ container.

    Instead of paying a lot of frothy drinks elsewhere, I can make them at home and save money this next year!

    Finally, the taste of the hot chocolate is what I was going for. It was the perfect blend of milk chocolate with the right amount of sweetness that I need!

    When I gave my family the taste test, they all seemed to be pleased.

    If you want to add whipped cream to your hot chocolate, you can make the whipped cream using your Aer™ Disc Container as well. It was super easy and delicious.

    How to Make Hot Chocolate

    Whipped Cream Recipe (using the Vitamix Aer™ container)

    Ingredients:
    2 cups (480 ml) heavy cream
    3 Tablespoons granulated sugar (I used Truvia instead of regular sugar.)
    1 teaspoon vanilla extract

    Directions:
    1. Place all ingredients into the Vitamix container and secure lid.
    2. Select Variable 1.
    3. Turn machine on and slowly increase speed to Variable 10, then to High.
    4. Blend for 12 seconds for soft peaks. Do not over mix. Serve within two hours.

    Notes:
    Variations: Substitute other flavorings for vanilla, or use 1 tablespoon flavored coffee creamer, such as hazelnut or Irish cream.

    How to Make Hot Chocolate

    Hot Chocolate Bar

    Make this a fun event for all by setting up a hot chocolate bar and add additional toppings like chocolate chips, crushed peppermint, marshmallows, chocolate syrup for drizzling on top, and more.

    Now I know that we will be ready to enjoy sipping on more hot chocolate made with our Vitamix Aer™ container this Christmas Eve.

    We will be wearing our holiday jammies and warm socks while watching our favorite holiday movie together, The Polar Express.

    Watch The Polar Express tonight!

  • DIY Toddler Table and Chairs Makeover Using Plasti Dip

    This is a sponsored post written by me on behalf of Plasti Dip for IZEA Worldwide. All opinions are 100% mine.

    When we moved to the Pacific Northwest over a year ago, I had no idea how I was going to decorate my toddler’s new room. For a few months, the room sat empty for the most part with the exception of his crib, baby monitor, and a rocking chair. There were no decorations on the walls until my friend gave us a large framed picture of an airplane. I thought the airplane photo was a good start to decorating his room. Shortly after, another friend gave us a small toddler table that I could use in my son’s room so that I could place his lamp on it along with a few books. The table was light brown and I decided to paint the table green to match one of the colors in the airplane photo.

    For several months, the room decor was based on that one airplane photo, until I started to add nautical themed decor little by little. Now that the colors were changing from green to a blue and red theme, the table stood out and no longer matched the room. I was able to pass on the airplane photo to another interested family. The little green table became an eye sore to me, until I decided to change it to match my son’s new theme. By this time, I had acquired two new toddler table chairs at a swap to go with the table. These two chairs were also green and would need to be repainted, too.

    My thoughts were to paint the green table blue, the green chairs red, and a little brown plant container white. The plant container would be the new addition to place on top of the table that would hold my son’s books. I chose Plasti Dip paint for my new project. It’s like spray paint, but better in my opinion. One of the reasons why I like Plasti Dip is that in the future, if the room decor changes, I can peel the paint off and use new colors. Yes, Plasti Dip is peelable off of most surfaces and you can easily get yours at Amazon!

    For this DIY toddler table and chairs makeover project, I used about 1 1/2 cans of blue Plasti Dip for the table. I applied a few coats until the green wasn’t showing through. I used two full cans of red for the chairs. The chairs were more challenging to cover because they were made of a different material than the table, but I managed to cover them well. I used less than one can to cover the brown piece for his books. Here are the results:

    After setting up my son’s table and chairs in his room, it was time to reveal his new surprise to him! I placed a few of his favorite books in the white container. I allowed him to walk into his room after his bath time so that I could see his reaction to his new table set. I don’t think he was disappointed! Look at this smile:

    My son now has a cozy place to call his for reading time. He loves it, and we do, too. If you have a project that you are considering re-doing any time soon, consider Plasti Dip. Plasti Dip Crafts comes in 7 colors and 3 enhancers:

    • Crisp White
    • Lemon Yellow
    • Tin Roof Red
    • Pumpkin Spice
    • Midnight Black
    • Gulf Coast Blue
    • Gator Green
    • Glossifier Enhancer
    • Silver Metalizer Enhancer
    • White Pearlizer Enhancer

    Whatever your project is, I’m sure you can find a great Plasti Dip color to use to bring back life into your piece(s). Just find a retailer near you! Overall, this project was fun and I was pleased with the results of the before and after.

    Visit Sponsors Site

  • How to Make Your Own Popsicles

    How to Make Your Own Popsicles

    How to Make Your Own Popsicles

    The warmer months are here to stay for a while and that means you’ll find us outdoors often with the family. We love this time of year because we are able to get outside and enjoy the weather together. Our favorite outdoor activities include going to the park, the swimming pool, taking nature walks, and playing in the yard. After long periods of time outdoors, my kids are ready for a delicious drink to enjoy when they come inside.

    I have many memories of Kool-Aid when I was a young girl. My mom would buy Kool-Aid packets (they were only $0.10 a packet!) by the dozen and we would make this delicious drink when we were kids. We’d pour the sugar into a pitcher, pour the contents of the packet in and fill the pitcher with water. Between four kids, the pitcher of Kool-Aid didn’t last very long. It was our favorite childhood drink growing up.

    Fast forward to adulthood. I now have three children that enjoy tasty beverages.

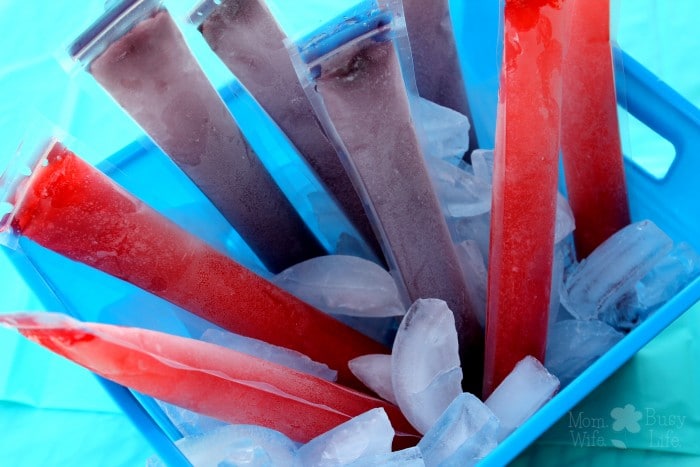
    I usually keep the freezer stocked with popsicles and we go through them so fast. This year, I decided I wanted to try to make our own popsicles made with Kool-Aid.

    How to Make Your Own Popsicles

    How to Make Your Own Popsicles

    Ingredients:

    • Kool-Aid Mix (Tropical, Cherry, or Grape flavor)
    • cold water
    • Pitcher
    • Spoon to stir
    • Funnel
    • Icy pop molds (I recommend these clear ice pop molds!)

    Directions:

    1. Make a batch of Kool-Aid by following the directions on the package.
    2. Open the clear ice pop mold and place the funnel tube inside.
    3. Pour Kool-Aid drink to the fill line and then zip to close.
    4. Place the icy pops in the freezer until frozen.

    Serve and enjoy!

    How to Make Your Own Popsicles

    Ice pops are easy to make! My kids are begging me for ice pops daily and I made plenty to last a while! I’m glad that I can give them tasty treats this spring and summer after their playtime that I know they will love.

    Here are more great popsicle recipes to enjoy:

    Homemade Popsicles: 5 Different Frozen Summer Treats

    Check out these popsicle idea books below:

    What flavor do you think your kids would like best?

    How to Create a Summer “Sundae Fundae”

  • How to Create a Cute Cat Feeding Station

    How to Create a Cute Cat Feeding Station

    Disclosure: This shop has been compensated by Collective Bias, Inc. and its advertiser. All opinions are mine alone. #IAMSCat #CollectiveBias

    cat feeding station

    When my family and my calico cat moved into the house we are currently living in last May, I noticed something. Just about everything we had for home decor was brown. In our last home, the carpet and floors were a light color, so having brown furniture and decor wasn’t too bad. Now that we live in a home that has brown laminate flooring and brown cabinets, I needed to update my home decor and freshen up my space a bit. Out went the brown rustic stars that hung on the wall, out went the brown photo frames, and in came some fresh new color. The colors I chose for our home decor update were turquoise, yellow, gray, and white.

    After re-finishing three pieces of furniture, (1 piece yellow and 2 pieces turquoise) I placed them around my home and they made a world of a difference. These pieces of furniture led me to purchase matching rugs, pillows, blankets, and more. After sprucing up our downstairs area with more color, patterns, and prints, I was satisfied with the new look. This also inspired me to change the colors here at Mom. Wife. Busy Life. as you see my design includes these colors! 

    cat feeding station

    One area in the house that I decided to focus on here recently was the cat feeding station. The current cat feeding station wasn’t too appealing to the eyes and I wanted to add some home decor to Candie’s food and water area. We were using a large black bowl as her food dish and a red plastic dish for her water. I wanted to create a space that matched the rest of our home decor and make this a nice cat feeding station for Candie. Search #CandieCat on Instagram to find more photos of our sweet girl!

    cat feeding station

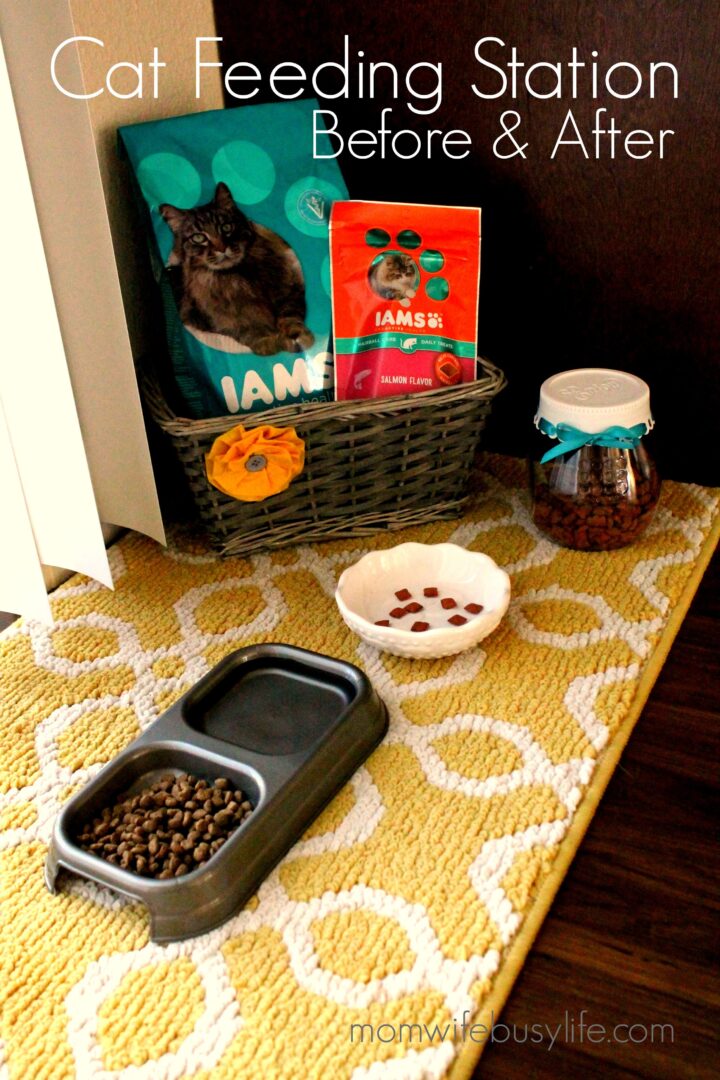
    Knowing that our cat is a bit overweight, I had to choose a pet dish that would allow me to control the portions of her food. I needed something smaller, so I found a gray food and water dish for her daily feedings. I also found a cute white dish for her treats! The yellow rug will brighten up her area and the storage basket we chose will add some personality to the space and make it a bit more fun!

    How to Create a Cute Cat Feeding Station

    1. Add a small colorful rug.

    cat feeding station

    2. Choose pretty cat dishes that match your surrounding home decor.

    cat feeding station

    3. Add a basket to hold cat food and cat treats.

    cat feeding station

    4. A treat holder comes in handy, too!

    cat feeding station

    We choose IAMS™ cat food and treats for Candie’s dietary needs. Candie has long hair, so the IAMS™ Hairball Care food and treats are perfect for Candie. IAMS™ also offers treats for other specific dietary needs including Digestive Health and Oral Care.

    cat feeding station

    Candie gets 10 IAMS™ treats per day!

    cat feeding station

    5. Candie’s cat feeding station is complete!

    cat feeding station

    Let’s call Candie over here to see what she thinks!

    cat feeding station

    So far, so good! I think she likes it!

    cat feeding station

    My husband and I both love having a new special treat bowl for Candie.

    cat feeding station

    Licking her lips — the IAMS™ treats are delicious!

    cat feeding station

    Candie is one satisfied kitty, thanks to her new cat feeding station. Since creating this new cat feeding station, I’ve seen Candie at her new space often. I think she likes the special change and we are all one happy family.

    Do you have a special feeding station for your pet? What would you add?