This Fluffy Unicorn Slime Recipe is super cool and fun to make! This colorful recipe will keep your kids entertained for a while! Create your slime today.
When I was a young girl, I collected unicorns. When I saw unicorns making a come back over the last few years, I was super excited, especially since I have two girls that love them, too.
I collected ceramic unicorns as a child and can remember what they look like today. I no longer have them, but the memories are there!
Now that my girls are older, unicorns are popular again. I’ve seen a variety of unicorn themed activities and products, from birthday parties, backpacks, and even unicorn crafts!
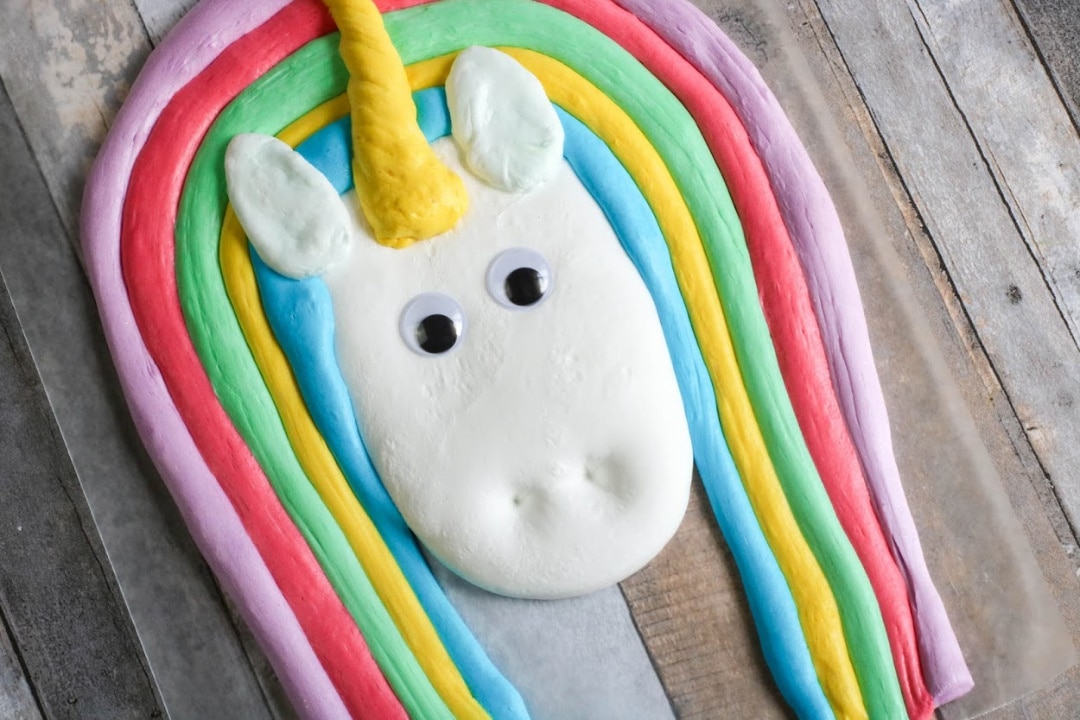
Today, I’m going to be sharing a unicorn themed slime activity that you can create with your children. This beautiful unicorn is sure to be a big hit because of the beautiful colors and the steps from start to finish to create this piece of art!
Check out these adorable slime sets while you are here:
The following recipe is the basic recipe for each color of the unicorn, including white:
Empty the glue into a large mixing bowl.
Whisk in the shaving cream.
Add the baking soda to the glue mixture and stir to mix thoroughly.
If you are adding coloring, stir these ingredients into the glue mixture.
Fold in the shaving cream.
Add contact lens solution to the mixture and stir well. (Note: regular glue will require less contact lens solution than glitter glue. Add the contact lens solution slowly, mixing between additions, and add only enough to bring the glue together into a soft ball.)
The slime will be sticky. Begin to play with the slime, kneading it as you would bread dough, to bring the slime together. The slime is ready when no longer sticky.
To create the unicorn’s mane, add all colors together as seen below.
To create the face of the unicorn, create a shape similar to the one below using the white slime. Save some white slime for the ears to add on later.
Add the mane around the unicorn’s face.
Using the remainder of the white slime, create the ears.
Set the ears onto the face.
Create the unicorn’s horn with the yellow slime.
Place the unicorn’s horn on the head of the unicorn.
Add the wiggly eyes to the face.
Add the nose to the unicorn.
Your unicorn is ready! Enjoy this beautiful slime activity with your family!
How to Store: After playing with this slime, Fluffy Unicorn Slime Recipe is best if stored in an airtight container in the refrigerator when not in use.
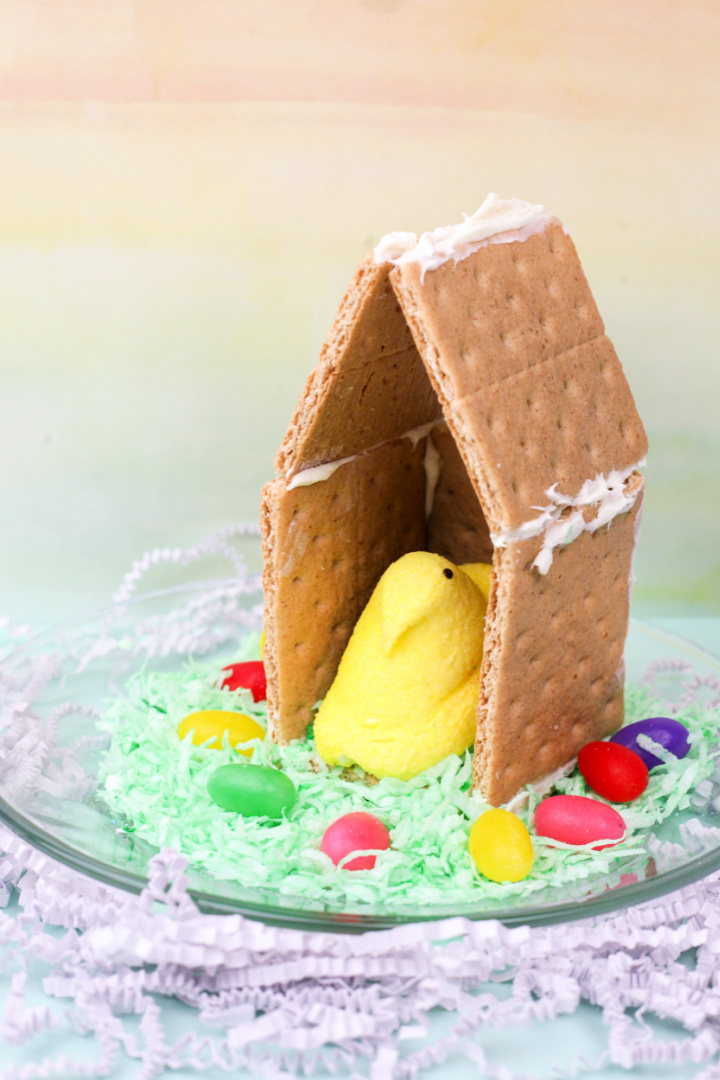
This Easter, get your kids to help make this fun Peeps House with graham crackers! It’ll provide them with a delicious snack and a fun activity to do together.
I always get so excited when Easter comes around, because it means I can make my Peeps house!
In this blog post, I will show you how to make your own Peeps house.
It’s really easy, and it’s a lot of fun!
So, if you’re looking for a fun activity to do with your kids this Easter, be sure to check out this blog post! You won’t regret it!
The best part? When you are finished creating your peeps house, you can eat it!
Peeps House with Graham Crackers
Supplies:
1 box of Graham Crackers
1 Package of Peeps
Coconut Flakes
Green Food Coloring
Jellybeans to represent peep eggs
Vanilla Frosting
Ziplock sandwich bags for coloring coconut flakes
1 paper plate or paper towel
Directions:
To make green coconut flakes:
Put 1 cup of coconut flakes into a sandwich bag.
Add 4 drops of green food dye for light green flakes or 8 drops for darker green flakes.
Close the Ziplock bag and shake vigorously for 1 minute.
Lay the coconut flakes flat on the paper plate and let dry for 1 hour.
To make graham cracker peeps house:
Break three graham crackers in half and put a side.
Grab a spoon or knife and add vanilla frosting onto the sides of each graham cracker.
Line the graham crackers up so that each side lays on top of a single half of a graham cracker.
For the roof add frosting on both the top of the walls and bottom of the roof and then add extra frosting down the middle of the roof so it sticks better.
Allow to dry for at least 1 hour, or overnight for best results.
Place some of the green coconut into the house and add a peep.
For best results, have a peep lay on a jelly been to provide better stabilization
Use jelly beans to represent the eggs of the peeps.
Thisliquid sidewalk chalk recipe is super easy and simple to make. You only need a few simple supplies to make this recipe!
Our kids love making sidewalk chalk and drawing fun pictures on the sidewalk during the spring and summer months.
Create this DIY sidewalk chalk recipe today and get creative outdoors!
We spend a lot of time outdoors. My kids along with many of the neighbors’ kids love to come over to play in and around our yard and on our driveway.
I usually have a lot of fun activities for them to do and the fact that it’s shaded in the evening makes it a bit more enticing to the kids. Who wants to play in the hot beaming sun when you can enjoy the shade?
Recently, the kids found my stash of Crayola sidewalk paint. Before I could really say anything, they had poured most of it out and used up the majority of my paint within minutes! I wasn’t upset, but I realized that I was out of paint and I thought it would last me all summer!
Instead of buying more paint, I decided to make my own.
I’ve heard about making sidewalk paint before but never tried it. If I would have known how easy it was to make a while ago, I would have been making it for years instead of purchasing it from the store!
To make sidewalk chalk paint, all you need is corn starch, water, and food coloring!
I actually had all of these ingredients at my house at the time, so there was no need to run to the store to purchase anything.
For this recipe below, yes, we do add food coloring. The food coloring is added to the corn starch and water mixture.
Does food coloring stain sidewalks?
The answer is yes, it “can” stain sidewalks. However, this recipe has never stained the sidewalks or driveways that we’ve painted on.
I recommend doing a color test on your sidewalk. You can always adjust the amount of food coloring you use in your recipe.
If you see staining during the stain test, use less food coloring and continue this until you see that your sidewalk does not stain.
Can you use liquid chalk on sidewalks?
Absolutely! I recommend using your personal driveway and sidewalk for liquid chalk. I wouldn’t recommend using liquid chalk around other people’s property or on public sidewalks, simply because it’s tough to do a stain test on these areas and clean up the art when finished.
How long does sidewalk chalk art last?
The chalk art usually stays on the sidewalk until the area is washed with a water hose or if the rain washes it away!
Easy Sidewalk Chalk Art Ideas
If you are wondering what you can draw with your sidewalk chalk paint, easy ideas include drawing stick figures, animals, flowers, a sun, clouds, trees, rainbows, leaves, food, faces with expressions, transportation (cars, boats, airplanes), and more!
Chalk Paint Bottles
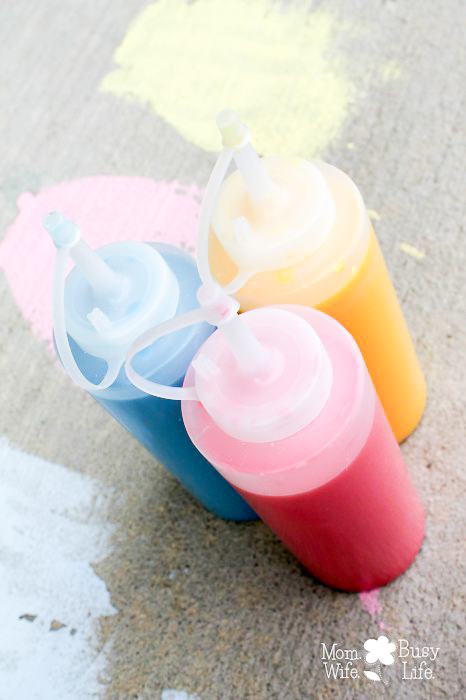
These plastic squeeze bottles are great to use for your sidewalk chalk paint! This is a set of 6 bottles and you can create a variety of colors to use for your art ideas and painting needs.
How to Store Sidewalk Chalk Paint
Unfortunately, I do not recommend storing liquid sidewalk chalk paint. This paint is best used all at once and disposed of when finished.
If you are looking for basic sidewalk chalk to play with this summer, here are some great finds:
In a two cup measuring cup, add one cup of water and one cup of corn starch.*
Add about 10 drops of food coloring.**
Stir well and pour the mixture into the squeeze bottle.
Shake well before using!
Squeeze mixture into a small cup or container.
Using paintbrushes, paint the sidewalk with the sidewalk chalk paint!
*When working with the corn starch, it can get messy! I recommend placing something like a paper towel or pan under the area you’ll be working with to prevent corn starch from getting all over the place.
**Please note: You can add more food coloring for brightness, but make sure you do a color test on your sidewalk to make sure it doesn’t stain. By adding more food coloring, the chances of the sidewalk paint leaving a stain is higher. Keep reading to see how my stain test went.
Gather Your Paint Brushes and Painting Cups
We used several types of paintbrushes as well as small cups to hold our paint mixture while painting. If there’s paint left after painting, you can easily pour the sidewalk chalk paint mixture into the squeeze bottles so that it’s not wasted!
Complete a Stain Test Before Using
I completed a stain test on my sidewalk before using our paint. I have a small power washer that I use to clean our driveway off, so after painting, I let it dry and made sure the paint washed off well with the power washer. I did use more blue food coloring than red or yellow, so my blue section did stain a little and the others did not. I poured a small amount of the mixture out and diluted it with water, ran the test again, and it didn’t stain.
I also recommend the kids wearing play clothes when using this paint since it can stain clothing!
Paint Fun Pictures!
Get creative with your paint and let the kids paint fun designs on the sidewalk! When not in use, contents will settle in the bottles. Simply shake the bottles up well before using again!
Did you try this recipe? Leave a comment below with your thoughts on this DIY sidewalk chalk paint!
Create this colorful Earth Day Tree Craft for Kids this year to celebrate Earth Day!
Earth Day is coming up on April 22!
Earth Day is the perfect time to get outdoors with the kids to enjoy activities like planting trees, starting a garden, picking up trash, or simply as a way to get out to take in fresh air!
Create this fun Easter Egg Letter Matching Game for the kids to play this Easter season!
It’s hard to believe that my daughter is almost finished with her first year at school as a kindergartner.
It seems like we sent her off on the bus for the first time just yesterday. In a few short months the summer break will be here and she will be getting ready for first grade.
During her first year of Kindergarten, she has learned quite a bit. She learned her ABC’s and knows most of her sight words. She’s putting sounds together as she’s reading.
We are working with her at home to practice what she’s learning so that she can end the year on a successful note.
One of the basic skills for Kindergarten is letter matching. Learning the upper case and lower case letters for some students can prove to be tricky!
Then you have letters like p and b and d and g that all look similar in some ways. It’s easy for kids to get mixed up on letters at times.
Now that the Easter holiday is approaching, I wanted to make a fun game for my daughter to play so that she can practice her letter matching before we finish out the year.
This Easter egg matching game below is a great review game for her.
Easter Egg Letter Matching Game
Supplies:
plastic Easter eggs
black permanent marker
Easter basket
Directions:
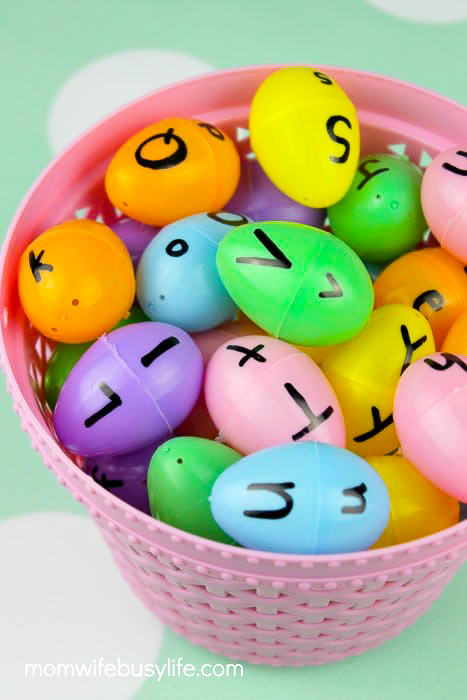
Take each egg and write one letter of the alphabet on each egg with permanent marker. You’ll write the upper case letter on one half of the egg and the lower case letter on the bottom half of the egg.
Take the eggs apart and put them in a basket.
Let your child match the upper case letter to the lower case letter until they have completed the whole alphabet!
My daughter enjoyed this game!
If you need to practice other areas with your child, feel free to switch things up! You can create word family eggs, addition and subtraction eggs, money eggs, and more!
Easter Egg Letter Matching Game
Materials
plastic Easter eggs
black permanent marker
basket
Instructions
Take each egg and write one letter of the alphabet on each egg with permanent marker. You’ll write the upper case letter on one half of the egg and the lower case letter on the bottom half of the egg.
Take the eggs apart and put them in a basket.
Let your child match the upper case letter to the lower case letter until they have completed the whole alphabet!
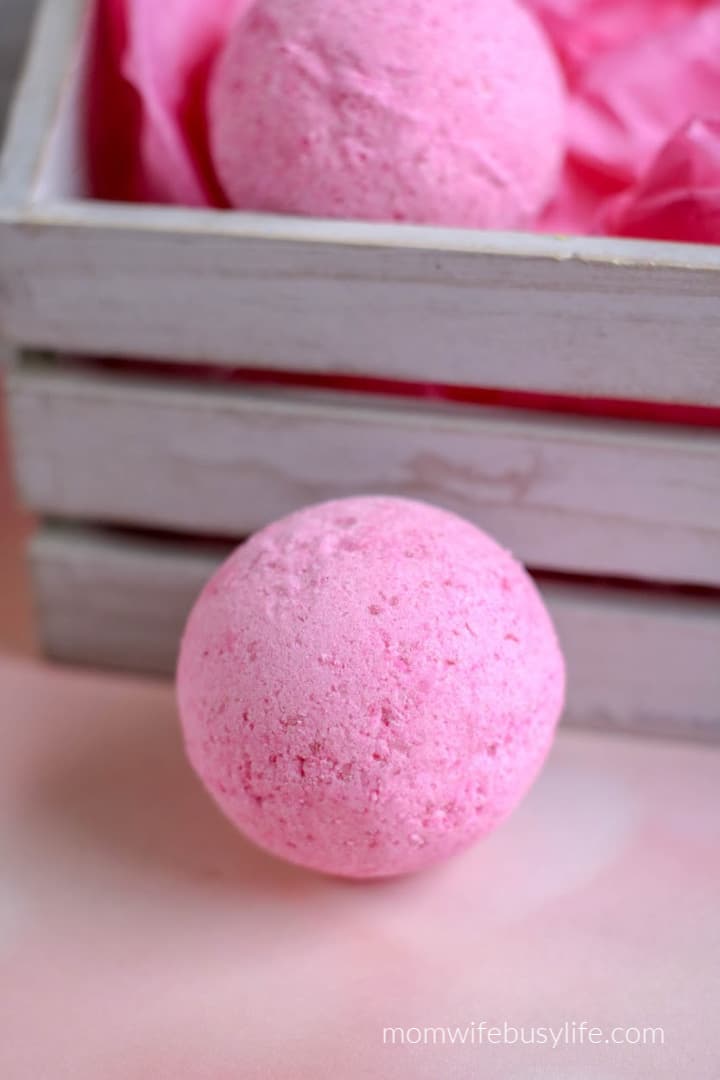
In a large bowl, whisk together cornstarch, citric acid, salt, baking soda, and mica powder. If making more than one color, divide the mixture into separate bowls.
In a small measuring cup, whisk together essential oil, coconut oil, and water. Note: If making more than one color, divide the mixture into separate bowls.
Very slowly (to avoid as much fizzing as possible) add the water solution to the dry ingredients. Stir and mash together until it resembles sand.
Immediately transfer bath bomb mixture into bath bomb molds, pressing mixture tightly into each side and adding a little to overflow each side of the mold.
Press the mold together, twisting until closed.
Allow bath bombs to rest (and dry) for at least 24 hours.
To remove the bath bombs from the molds, tap the outside of the mold gently. Then, twist each side of the mold and pull to remove the bath bomb.
To give as a gift, wrap tightly in plastic wrap or place in an airtight jar.
Time to Recharge:
Now comes the most rewarding part—taking time for yourself. Draw a warm bath, dim the lights, light some candles, and drop one of your DIY bath bombs into the water.
Watch it fizz and release its enchanting scent. Allow the Epsom salt to soothe your muscles and the essential oils to calm your mind. This is your well-deserved moment of relaxation and rejuvenation.
Frequently Asked Questions:
What are bath bombs, and how do they work?
Bath bombs are fizzy, scented balls that dissolve in water when added to your bath. They contain citric acid and baking soda, which react when they come into contact with water, creating carbon dioxide bubbles that make the bomb fizz and disperse essential oils and other ingredients.
Are homemade bath bombs safe for the skin?
When made with the right ingredients and in proper proportions, homemade bath bombs are generally safe for the skin. However, some people with sensitive skin may experience irritation due to the essential oils or other additives. It’s essential to do a patch test before using a bath bomb to ensure you don’t have any adverse reactions.
Can I use food coloring to dye my bath bombs?
You can use food coloring to dye your bath bombs. However, make sure to use gel or powdered food coloring to avoid adding too much liquid, which could activate the fizzing prematurely.
How can I prevent my bath bombs from losing their fizz?
To prevent bath bombs from losing their fizz, store them in an airtight container in a dry place, away from moisture and humidity. Adding a moisture-absorbing packet or silica gel can help preserve their freshness.
What is the best mold for making bath bombs?
Silicone molds work best for making bath bombs because they are flexible and easy to remove the finished product from. You can find various shapes and sizes, including spheres, hearts, flowers, and more.
Can I add other ingredients like dried flowers or glitter to my bath bombs?
You can add dried flowers or glitter to your bath bombs to enhance their appearance and experience. Always use skin-safe, biodegradable glitter that’s designed for use in soap and bath products.
How long do homemade bath bombs last?
Homemade bath bombs typically have a shelf life of 3 to 6 months if stored properly. After this period, their effectiveness and scent might start to diminish.
Can I customize the scent of my bath bombs?
One of the best things about making your own bath bombs is the ability to customize the scent. You can use different essential oils or fragrance oils to create your preferred fragrance combinations.
How do I avoid bath bombs from crumbling when removing them from the mold?
If your bath bombs are crumbling, the mixture might be too dry. To fix this, try adding a few spritzes of witch hazel or water to the mixture and mix thoroughly until it holds together when squeezed.
Can I sell homemade bath bombs?
You can sell homemade bath bombs, but it’s essential to comply with local regulations, including proper labeling, ingredient listing, and safety assessments. Make sure to do thorough research and follow all necessary guidelines.
Remember that while making DIY bath bombs can be a fun and rewarding activity, it’s essential to use safe and high-quality ingredients and be cautious with any allergens or irritants.
Always test your bath bombs on a small patch of skin and consider consulting a dermatologist if you have any concerns.
Homemade Bath Bombs
Materials
½ cup cornstarch
½ cup citric acid
½ cup Epsom salt
1 cup baking soda
1 teaspoon Mica powdered soap dye, if desired
10 drops essential oil
2 ½ tablespoons coconut oil, melted
1 tablespoon water
8 to 10 bath bomb molds
Instructions
In a large bowl, whisk together cornstarch, citric acid, salt, baking soda, and mica powder. If making more than one color, divide the mixture into separate bowls.
In a small measuring cup, whisk together essential oil, coconut oil, and water. Note: If making more than one color, divide the mixture into separate bowls.
Very slowly (to avoid as much fizzing as possible) add the water solution to the dry ingredients. Stir and mash together until it resembles sand.
Immediately transfer bath bomb mixture into bath bomb molds, pressing mixture tightly into each side and adding a little to overflow each side of the mold. Press the mold together, twisting until closed.
Allow bath bombs to rest (and dry) for at least 24 hours.
To remove the bath bombs from the molds, tap the outside of the mold gently. Then, twist each side of the mold and pull to remove the bath bomb.
To give as a gift, wrap tightly in plastic wrap or place in an airtight jar.
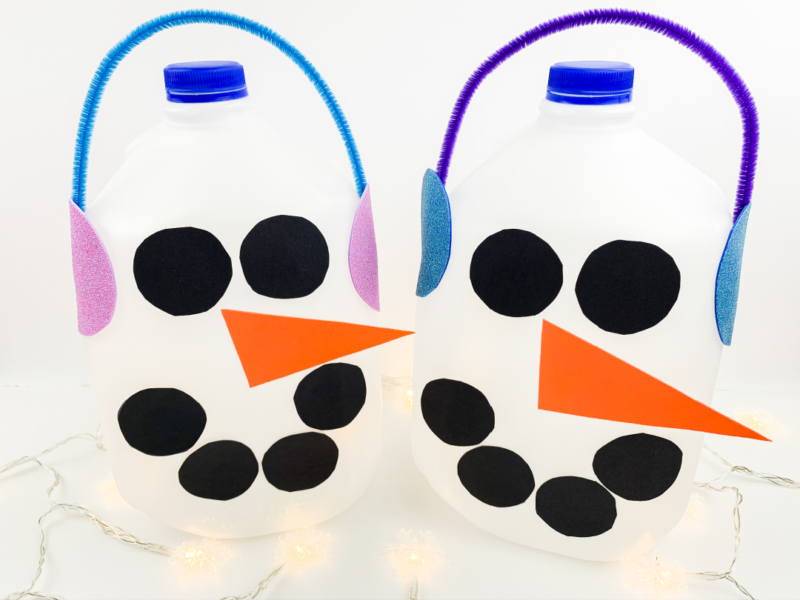
Create this adorable Milk Jug Snowman Craft to display in your home this holiday season!
If you are looking for a fun indoor winter craft to make with the kids this season, consider creating these snow men made out of clean and empty milk jugs!
Trace the milk jug lid on the black construction paper six times. (2 circles for eyes, 4 circles for mouth). You can trace more circles depending on how many snowmen you want to make.
Cut out the circles.
Cut out a carrot shape for the nose using the orange construction paper.
Glue the eyes and nose onto the milk jug.
To see what type of paper I’m using for the earmuffs for this craft, check out the image below. The backing pulls away from the paper like a sticker. You can find self adhesive glitter foam sticker sheets here.
Using the lid from a small jar, trace circles on the glitter paper.
Cut out the circles.
Remove the sticky backing.
Stick one end of the pipe cleaner on the sticky side.
Stick to the side of snowman.
Using the other sticky circle, stick the other end of the pipe cleaner on the other side of the milk jug to complete the ear muffs!
If desired, use the X-acto knife to cut a square out of the back of the milk jug. Insert the lights for a light up snow man!
Milk Jug Snowman Craft
Materials
Empty milk jug with lid (cleaned)
Black construction paper
Orange construction paper
White pencil
Scissors
Glue stick
Glitter paper with sticky backing
Lid from small jar
Pipe cleaners
String of lights (battery operated or LED)
X-acto knife
Instructions
Trace the milk jug lid on the black construction paper six times. (2 circles for eyes, 4 circles for mouth)
Cut out the circles.
Cut out a carrot shape for the nose using the orange construction paper.
Glue the eyes and nose onto the milk jug.
Using the lid from a small jar, trace circles on the glitter paper.
Cut out the circles. Remove the sticky backing.
Stick one end of the pipe cleaner on the sticky side. Stick to the side of snowman.
Using the other sticky circle, stick the other end of the pipe cleaner on the other side of the milk jug to complete the ear muffs!
If desired, use the X-acto knife to cut a square out of the back of the milk jug. Insert the lights for a light up snow man!
This website uses cookies to improve your experience. We'll assume you're ok with this, but you can opt-out if you wish.AcceptRejectRead More
Privacy & Cookies Policy
Privacy Overview
This website uses cookies to improve your experience while you navigate through the website. Out of these, the cookies that are categorized as necessary are stored on your browser as they are essential for the working of basic functionalities of the website. We also use third-party cookies that help us analyze and understand how you use this website. These cookies will be stored in your browser only with your consent. You also have the option to opt-out of these cookies. But opting out of some of these cookies may affect your browsing experience.
Necessary cookies are absolutely essential for the website to function properly. This category only includes cookies that ensures basic functionalities and security features of the website. These cookies do not store any personal information.
Any cookies that may not be particularly necessary for the website to function and is used specifically to collect user personal data via analytics, ads, other embedded contents are termed as non-necessary cookies. It is mandatory to procure user consent prior to running these cookies on your website.