-
Printable St. Patrick’s Day Coloring Pages
Enjoy this list of printable St. Patrick’s Day Coloring Pages! Coloring is a great way to keep the kids entertained while celebrating this fun holiday. Happy St. Patrick’s Day! Celebrate this special day with some fun printable coloring pages. Print these out and let your kids have a blast coloring in all the details of…
-
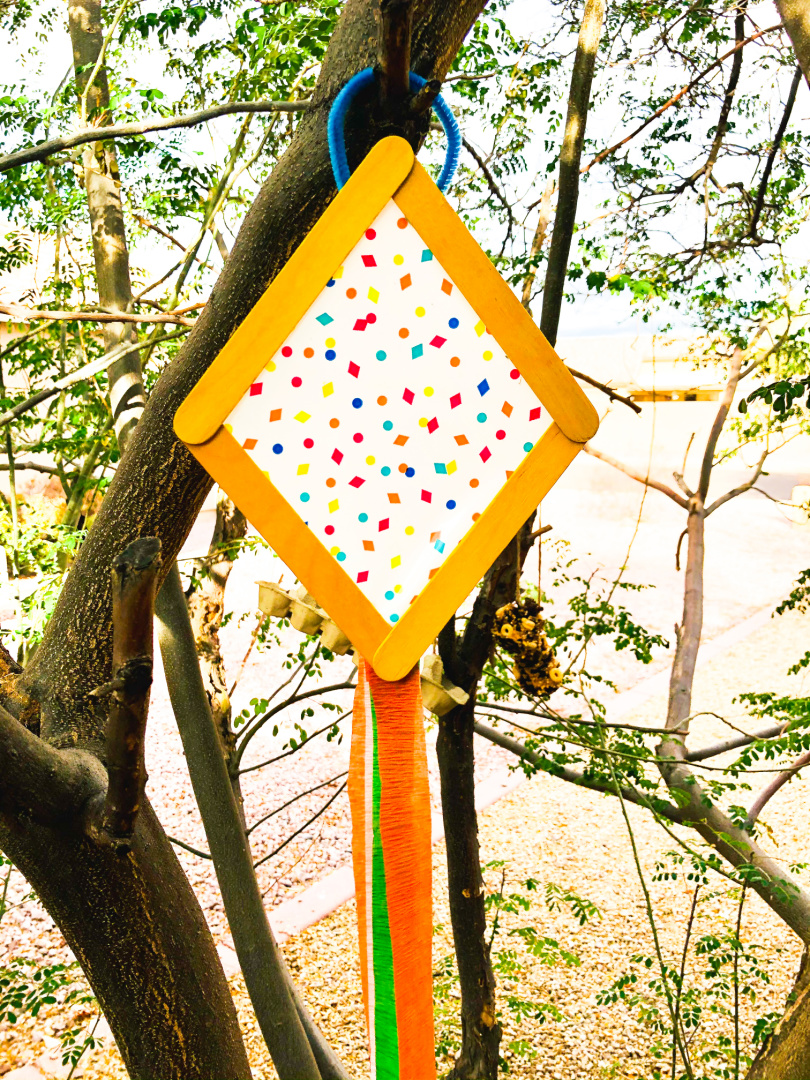
Kite Popsicle Stick Craft
Kids will love making their own Kite Popsicle Stick Craft this spring season! Check out this easy tutorial to learn how to make them. The spring season is here and we are already spending a lot of time outdoors! My son loves flying kites. He takes his kite and runs up and down the street…
-
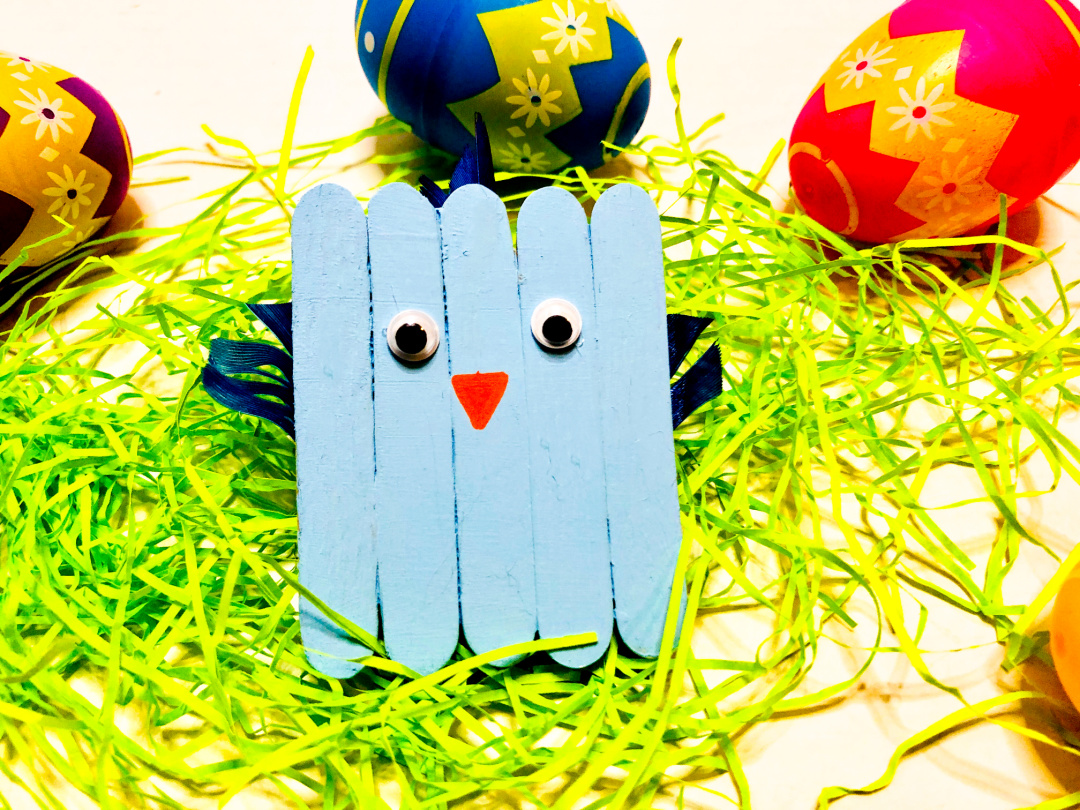
Blue Bird Popsicle Stick Craft
Create this adorable Blue Bird Popsicle Stick Craft with the kids this spring season using popsicle sticks and feathers! Popsicle crafts are a lot of fun to make! You can make many crafts using popsicle sticks, including birds. Today I’ll be sharing a tutorial for how to make a blue bird out of popsicle sticks!…
-
Love Bug Popsicle Stick Craft
Popsicle stick crafts are fun and simple to make! Create this adorable Love Bug Popsicle Stick Craft for Valentine’s Day this year. Get out your craft supplies and create this adorable Love Bug Popsicle Stick Craft with the kids this February to display in your home or classroom. Or, have your child wrap this as…
-
Puppy Dog Popsicle Stick Craft
Create this adorable Puppy Dog Popsicle Stick Craft for Valentine’s Day! Valentine’s Day is coming up! Get ready to create fun crafts this year! Today I’m sharing my tutorial for how to make a puppy dog using popsicle sticks. This craft includes a free printable template for the puppy dog ears and nose. Printable Dog…
-
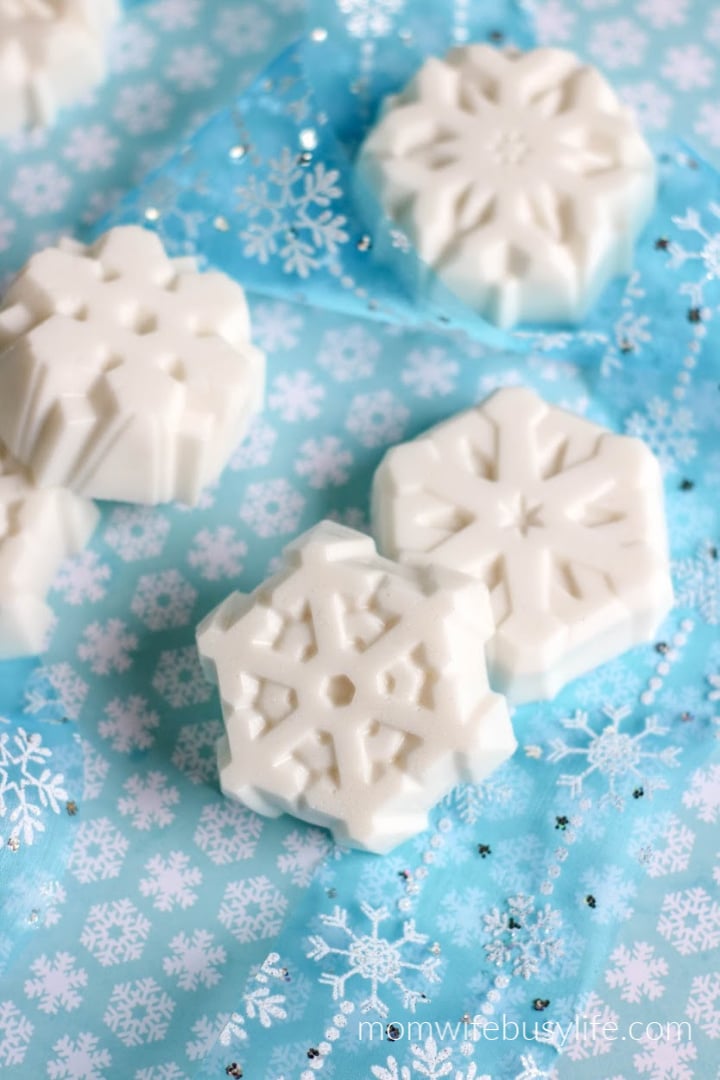
Snowflake Soap
Get crafty this winter and create this beautiful winter Snowflake Soap! Perfect for personal use or to give as a gift. When you think of winter, what comes to mind? You probably think of cold temps and SNOW! While we haven’t seen snow this year just yet, I’m sure we will have a few days…
-
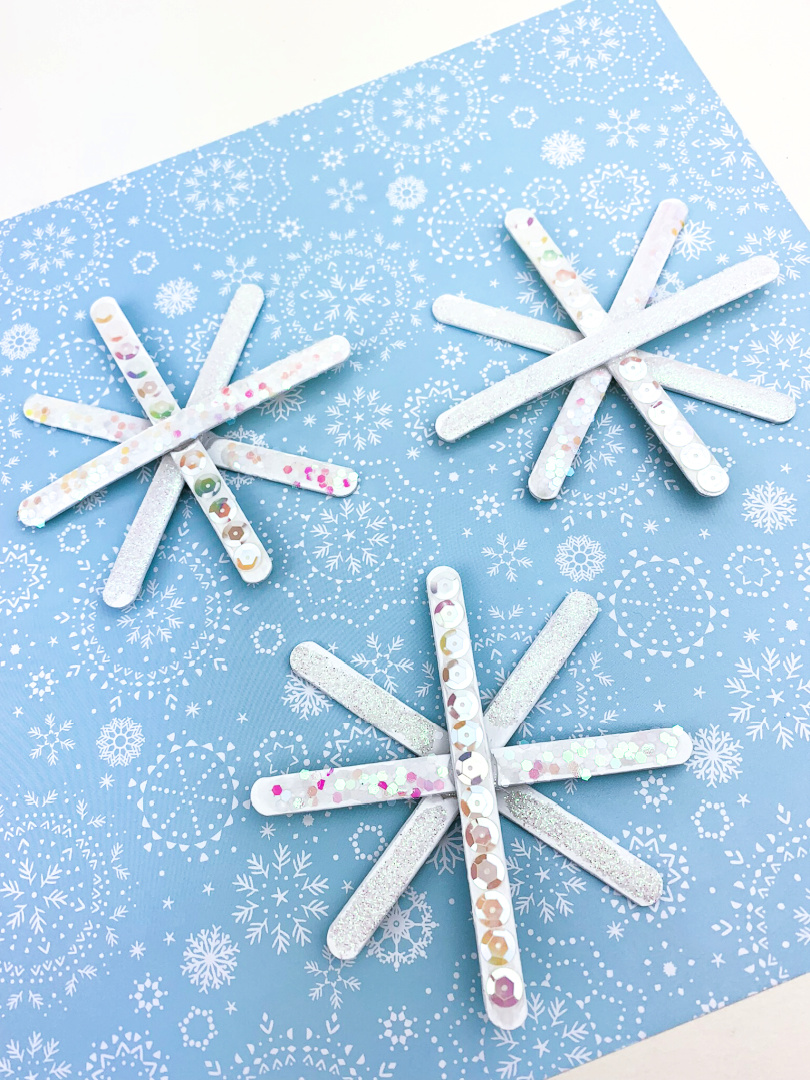
Snowflake Popsicle Stick Craft
Looking for a fun (and easy) winter craft project that both you and your kids will love? Try making this snowflake popsicle stick craft! This simple project is perfect for little ones who are just learning how to craft, and it’s a great way to use up any extra popsicle sticks you might have lying…