Category: Tips & Tricks

  • How to Get Kids to Try New Foods

    Getting fussy eaters to eat is a challenge. Getting fussy eaters to eat a variety of food is an even bigger challenge. More often than not, to avoid turning mealtimes into a battle zone, many parents reluctantly give in and let the kids eat whatever they want, as long as they eat something.

    However, this will only encourage bad eating habits in the long run. All is not lost, though. There are tips that parents can use to help their children try new food. After all, eating a variety of foods is key to good health. Here’s how parents can give their kids a variety of healthy foods.

    Take Children Food Shopping

    Kids will show an interest in food if they have a role in choosing their own food. Take children food shopping whenever possible. Don’t linger around aisle with junk food, sweets and processed foods, though. Spend more time in the fresh meat, fruit and vegetable areas. Actively look for new fruit and vegetable to try with the kids.

    Colors appeal to kids. And fresh fruits and vegetables with bright, vibrant colors are often packed with nutrients and antioxidants. Go for a wide range of colors of fresh foods as much as possible.

    Plant Greens in the Garden

    If there is space in the backyard, consider setting up a vegetable plot. Tomatoes, beans and herbs are easy to grow. Get the children to help out. They will enjoy watering vegetables and harvesting them. Since the children have a major role in the food production, they will eat their greens!

    Related: How to Start a Container Garden with Kids

    Related: Best Gardening Supplies for Kids

    Get Kids to Help in the Kitchen

    While some parents think that kids are only a hindrance in the kitchen, others have successfully turned their kids’ interest in meal preparation into something useful. The latter get little kitchen helpers and little people who will eat their meals.

    To get kids to help in the kitchen, keep their tasks simple. For example, mom can peel and cut a variety of vegetables while the child can place the various pieces in saucepans ready to be put on the stove. The child will quickly make her way to the dining table when it’s mealtime to sample “her” cooking.

    Present Foods in Fun Ways

    Like colors, shapes have a special place in children’s heart. Not surprisingly, breads and cookies with animal shapes are a big hit with kids. Use the same strategy when presenting healthier food choices. To encourage kids to eat vegetable salads, why not cut the vegetables up in pieces and sticks that can make a face on a plate? Putting the pieces into a skewer is fun, too. To make whole grain breads more interesting, use sandwich cutters for kids to cut out fun shapes for the kids to eat.

    Children do need a bit of encouragement when it comes to trying new foods. They are often more cooperative when they have a role in choosing and preparing their food. Take kids food shopping, plant greens in the family garden, and get kids to help in the kitchen. Another good idea to help kids try new foods is to present them in fun and interesting ways.

    https://momwifebusylife.com/gardening-supplies-for-kids-create-a-garden-this-spring/
    How to Get Kids to Try New Foods
  • How to Teach Your Kids Responsibility

    How to Teach Your Kids Responsibility

    How to Teach Your Kids Responsibility

    Does it seem like every time you turn around, your kids are constantly expecting you to do something for them that they really could do themselves? From leaving their toys and clothes on the floor to asking you to get them a drink or a snack, it’s like our children forget that we are separate people–not just maids whose lives are dedicated to serving them.

    While this type of attitude is healthy and beneficial for newborns, who truly are entirely dependent on us, it quickly becomes time-consuming and annoying once our darling little children are old enough to do things for themselves.

    Thankfully, bad habits can be broken, and they should be. Not only will this free up plenty of extra time for you, but it will also give your children a sense of responsibility, independence and capability–three things they crave now and desperately need for later.

    So how do you teach your children to be more responsible for themselves? Here are three steps.

    1. Stop Doing Things for Them that They Can Do Themselves

    As long as you keep doing things for your children that they can do themselves, they will expect you to continue to do them. This doesn’t mean that you should never do anything for your children, of course, only that you should politely excuse yourself from your role as their servant.

    If your children are old enough to put their toys away, pack their own lunches, remember their backpacks or do their own laundry–let them! Chores like these should be their job, not yours. (Again, not that you should never help out, but eventually, they need to learn to take responsibility.)

    *Make sure you have a discussion with your children in which you tell them that these are now their responsibilities. That way they know what to expect and aren’t blindsided.

    2. Let Them Experience the Consequences

    Once you’ve handed the responsibilities over to your children, step away and let them be responsible! Sure, they will fail from time to time, but experience is the best teacher, and it is MUCH better for you children to learn personal responsibility now than to learn it the hard way later.

    Did your child forget his homework? You don’t need to bring it to him, nag him to remember or lecture him after the fact. The only way he is going to learn to remember is if he experiences the consequences of his action. Let consequences be the teacher.

    3. Talk Through the Issues With Them

    Of course, as loving parents it is only natural to not what to let your babies fend for themselves. Thankfully you don’t have to. You can still help out from time to time because you want to. And you should absolutely talk through the issues with them to help them learn the right lessons and to reflect on what they have learned. The difference, however, is that you will be guiding and teaching your child in a way that is loving and effective (if a little harsh at first), instead of constantly feeling run-down and taken advantage of because all of this help is taken for granted.

    Are your children pretty independent or do they still expect you to do things for you that they are capable of doing themselves? What is one task or chore you can hand back over to your children?

  • Potty Training Tips for Public Restrooms

    Potty Training Tips for Public Restrooms

    Potty training in public restrooms isn’t optimal, but when armed with antibacterial wipes and a folding potty seat, toilet germs can be avoided.

    Potty training is challenging in the best of situations, but taking potty training to a public restroom adds a new level to the challenge. Public restrooms aren’t known to be the cleanest of places, but toilet germs pose a special threat to a potty training toddler. Automatic toilets are scary to small children. A few potty training tips will help ease the transition so the experience will be as pleasant as possible.

    Automatic Toilets

    Automatic toilets can scare the oldest of children and can prove terrifying to a small child. Prepare the toddler ahead of time so he’ll will know what to expect. Let him know that even if it flushes while he’s on it, it won’t affect him. A piece of paper with adhesive on it can be tacked across the sensor which will help prevent the toilet from prematurely flushing.

    Folding Potty Seat

    Portable folding potty seats are available in most children’s departments. Some of these seats are made from hard plastic while others are cushioned. The seats are easy to wash and sanitize after a family outing. The germy surface folds in on itself so only the cleaner side is facing out. For additional germ protection, carry along a plastic bag to place the folding potty seat in after each use. This will keep the other items in a diaper bag clean and sanitary.

    Related: Potty Training Tips for Girls

    Anti-Bacterial Wipes

    Anti-bacterial wipes are wonderful for sanitizing surfaces that the folding potty seat won’t cover. Toddlers are notorious for touching everything in sight. Wipe the toilet seat, the outside front of the toilet bowl and any other surface within a toddler’s reach.

    Toilet Germs

    Toilets are by nature germy places, but public toilet germs seem worse than familiar home toilets. Teach the toddler to be careful when entering a toilet stall. Explain about toilet germs and that even if he can’t see them, the germs are there. Teach him to be careful when he’s pushing down his pants so his underwear won’t touch against the unsanitary part of the toilet. If at all possible, don’t let his pants or clothes come in contact with the floor.

    Hand Sanitizers

    Even if a sink with soap and water is expected to be available, carry along containers of hand sanitizer for the times the soap dispenser is broken or empty. Hand sanitizer should be used with caution. The solution contains alcohol and can make a toddler sick if he ingests it. Some sanitizers smell so good that the toddler might want to take a taste. Let him know that isn’t a safe practice. Make sure the solution air dries completely for maximum effectiveness.

    Public restrooms and their toilet germs can be avoided by following these simple potty training tips. Replace the diaper bag with a smaller tote bag and fill it with the folding potty seat, anti-bacterial wipes, hand sanitizers and a self-adhesive notepad. The potty training can continue with relative ease.

  • How to Make Hot Chocolate for “The Polar Express” Movie Night

    How to Make Hot Chocolate for “The Polar Express” Movie Night

    How to Make Hot Chocolate for

    Every holiday season, we sit down as a family on Christmas Eve and watch the family friendly movie, The Polar Express.

    There’s a popular scene in the movie when children are riding along in the Polar Express when all of a sudden, characters break out into song and dance and deliver hot chocolate to the children.

    It’s one of our favorite parts of the movie, and to celebrate this holiday season, we are making our own hot chocolate and whipped cream for our Polar Express movie night this year with the help of our new Vitamix Aer Disc Container.

    The Vitamix Aer Disc Container pairs with our Vitamix Explorian Series E310 Blender to create easy recipes, perfect for busy moms!

    How to Make Hot Chocolate for

    If you are like me and love to make your recipes from scratch, this is the way to go! You know exactly what’s going in each recipe for your family.

    Thankfully, for our hot chocolate recipe provided to me by Vitamix, we only need two simple ingredients: skim milk and chocolate chips.

    If you are interested in making whipped cream to go along with your recipe, the recipe for that is included at the bottom of this post.

    How to Make Hot Chocolate for

    Homemade Hot Chocolate Recipe (using the Vitamix Aer™ container)

    Ingredients:
    2 cups skim milk
    ½ cup semi-sweet chocolate chips

    Directions:
    1. Place all ingredients into the Vitamix container in the order listed and secure the lid.
    2. Select the lowest setting. Start the machine, slowly increase to its highest speed, and run for 6 minutes.

    Notes:
    Since the Aer™ container heats ingredients through friction like our blade containers, it will melt the chocolate as it heats the milk, then blend the two together. Optional add-ins: ⅛ teaspoon orange extract, ⅛ teaspoon coconut extract, ⅛ teaspoon vanilla extract, or ⅛ teaspoon peppermint extract.

    You can find the Aer™ Disc Container at Amazon!

    My thoughts on using the Aer™ container to make hot chocolate:

    I was impressed with my new way of making hot chocolate with the Aer™ container.

    In the past, I’ve always purchased a box of ready-made hot chocolate because I really just didn’t think to make my own.

    I never knew you could blend up chocolate chips and milk together to create a frothy treat for the entire family to enjoy!

    First, when I opened up my Vitamix machine and plugged it in, I was startled because the button was pushed to the ‘on’ position! LOL.

    Make sure it’s in off position before plugging in. The Aer™ container fits easily onto the Vitamix machine and was super easy to set up.

    When I read the hot chocolate recipe directions for the first time, I thought 6 minutes to make was a bit long, but I found out why!

    It did take some time for the chocolate chips to mix completely with the milk. I didn’t realize it would heat up as it was mixing but sure enough, it did which was really cool to me.

    There was no need to microwave or heat up the hot chocolate when it was complete!

    How to Make Hot Chocolate

    The machine was a bit louder than expected as you increased the speed, but it didn’t bother me at all because my family was awake and doing things around the house when we made our hot chocolate.

    They are used to me using loud machines like my vacuum while cleaning house or my hand mixer while baking!

    I probably wouldn’t run the machine if my toddler was napping, so make sure you plan accordingly unless your baby can sleep through anything.

    When my hot chocolate recipe was complete, I immediately poured it into my mug and was amazed by the frothiness of the hot chocolate, something I enjoy.

    Most ordinary hot chocolates aren’t frothy like this recipe is! I think that’s one of the main benefits of using the Aer™ container.

    Instead of paying a lot of frothy drinks elsewhere, I can make them at home and save money this next year!

    Finally, the taste of the hot chocolate is what I was going for. It was the perfect blend of milk chocolate with the right amount of sweetness that I need!

    When I gave my family the taste test, they all seemed to be pleased.

    If you want to add whipped cream to your hot chocolate, you can make the whipped cream using your Aer™ Disc Container as well. It was super easy and delicious.

    How to Make Hot Chocolate

    Whipped Cream Recipe (using the Vitamix Aer™ container)

    Ingredients:
    2 cups (480 ml) heavy cream
    3 Tablespoons granulated sugar (I used Truvia instead of regular sugar.)
    1 teaspoon vanilla extract

    Directions:
    1. Place all ingredients into the Vitamix container and secure lid.
    2. Select Variable 1.
    3. Turn machine on and slowly increase speed to Variable 10, then to High.
    4. Blend for 12 seconds for soft peaks. Do not over mix. Serve within two hours.

    Notes:
    Variations: Substitute other flavorings for vanilla, or use 1 tablespoon flavored coffee creamer, such as hazelnut or Irish cream.

    How to Make Hot Chocolate

    Hot Chocolate Bar

    Make this a fun event for all by setting up a hot chocolate bar and add additional toppings like chocolate chips, crushed peppermint, marshmallows, chocolate syrup for drizzling on top, and more.

    Now I know that we will be ready to enjoy sipping on more hot chocolate made with our Vitamix Aer™ container this Christmas Eve.

    We will be wearing our holiday jammies and warm socks while watching our favorite holiday movie together, The Polar Express.

    Watch The Polar Express tonight!

  • Home Holiday Prepping

    Home Holiday Prepping

    Are you planning to have company over during the holidays? Read my home holiday prepping tips to help you plan and prepare this holiday season!

    Home Holiday Prepping

    This holiday season has been filled with fun activities and visits with family and friends. My sister and my nephew just left after visiting for a week for the first time here in the Pacific Northwest. In a couple of weeks, my in-laws will be visiting and staying through Christmas! With family arriving in mid-December, I need to find the time to make sure I deep clean my home and get it in tip top shape!

    As a busy mom, I don’t always have the time to clean my house the way I would like. I spend a lot of time running a business at home with a very busy toddler. I also have two school-aged children at home. I can spend hours cleaning and organizing my home only to turn around and find that things have been “undone.” Sometimes I feel like throwing my hands up in the air when it comes to trying to keep my home tidy! I’ve always loved the saying, “Trying to clean a home with kids is like trying to brush your teeth while eating Oreos!” It can be difficult!

    Thankfully, I have a plan in place this holiday season for prepping my home for the holidays. I’ve scheduled a week of deep cleaning so that my home will be ready before my guests arrive. In the past, I tried to get everything done about a day or two before. That doesn’t work anymore with my busy schedule and that’s why I’ve planned a week of cleaning ahead of time.

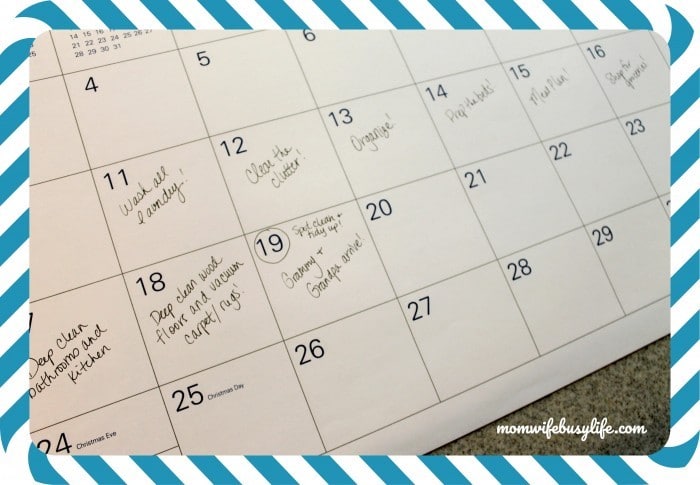
    My guests will arrive December 19. Here’s my plan for cleaning before they arrive.

    Home Holiday Prepping

    Monday, December 11 – Wash all laundry. I’m completing one load of laundry per day and putting laundry away as soon as it’s folded or hung up. This includes making sure all guest bath towels, wash cloths, and hand towels are clean and put away in the guest bathroom.

    Tuesday, December 12 – Clear the clutter. This includes clutter on counter tops and in the guest rooms, as well as other areas around my home, including the living room. I’ll be putting away most of the excess toys and keeping out only a select few.

    Wednesday, December 13 – Organize. I will set aside time to make sure my pantry, refrigerator, and freezer are organized and tidy.

    Thursday, December 14 – Prep the beds. I am going to wash all of the bed sheets and start getting beds ready for guests.

    Friday, December 15 – Meal plan. My husband and I will make the menu and create our list of what we will need for our guests.

    Saturday, December 16 – Shop for Groceries. I will shop for all food and drinks to have a well stocked pantry, refrigerator, and freezer.

    Sunday, December 17 – Deep clean the bathrooms and kitchen. This includes wiping down all countertops and stove in the kitchen, as well as cleaning toilets, scrubbing bathtubs, and stocking with toilet paper in the bathrooms. I’ll also complete my sweeping and mopping in the kitchens and bathrooms.

    Monday, December 18 – Deep clean the wood floors and vacuum all bedrooms and rugs. This holiday season, I’ll be deep cleaning my wood floors. With kids and pets, I’ll be taking my time to make sure I do a great job cleaning the floors so that they shine!

    Bona Mop 5
    bona 3

    I don’t have to worry about my little boy playing on dirty floors after I clean them!

    baby boy

    Tuesday, December 19 – Spot clean and tidy up before guests arrive! I plan to go around the my home and make sure all toys are picked up and that everything has a home. This includes taking out all trash and making sure all dishes have been washed and put away.

    By having a plan in place this holiday season, cleaning my home will be easier and less stressful. I’ll be giving myself plenty of time to prep my home for the holidays!

    How do you prep your home for the holidays?

  • How to Simplify Gift Giving this Holiday Season

    How to Simplify Gift Giving this Holiday Season

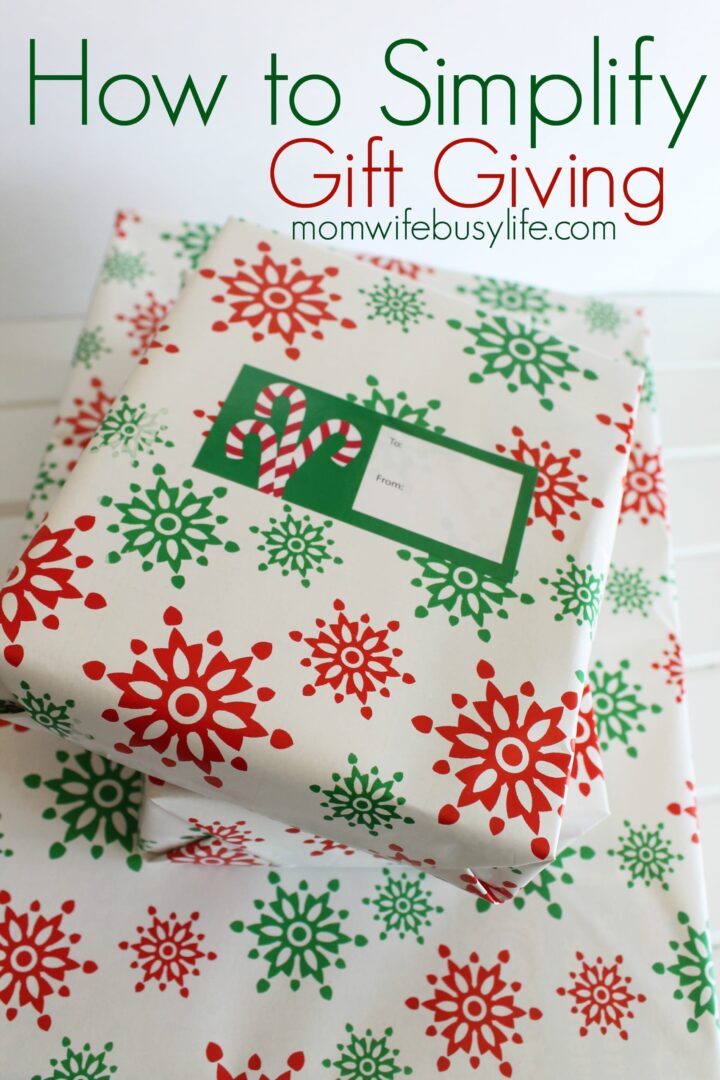
    How to Simplify Gift Giving

    The holidays are approaching quickly and I admit that I do not have my holiday shopping completed. There’s still gifts to buy, gifts to wrap, and stockings to fill. Time is running out. I need to get myself organized and plan for the holidays as soon as possible and start my holiday shopping soon.

    As a mom of 3 children, the amount of presents that each child receives during the holidays can add up. It seems that on each and every Christmas Eve, I take a step back to admire all of the gifts that Santa has left for our children. It’s usually at that moment that I realize that we may have overdone it again on buying. Not only do my children get a lot of presents from Santa, they also get a lot of presents from family and friends.

    This year, I challenge you to rethink holiday generosity with me. I’d like to make a few changes to the way we shop during the holidays. For the past few years, I’ve seen this way of giving below as a way to simplify giving during the holiday season. I think it’s a brilliant idea. Plus, it’s a great way to keep within your holiday budget when you plan ahead and give every dollar a name!

    How to Simplify Gift Giving this Holiday Season – Something they want, Something they need, Something to wear, Something to read…

    1. Something they want.

    This year, my oldest daughter wants a new American Girl Doll. My youngest daughter wants a new baby doll with accessories. Baby boy wants a musical toy.

    (Want Examples: Toys, Electronics, Movies, Games, Gift Cards, etc.)

    2. Something they need.

    My girls always need new replacement toothbrushes and they always beg me for spin brushes while we are out shopping. This year, they will each get a spin brush that they can actually decorate with decorative tape. Baby boy needs spoons for solid foods.

    (Need Examples: Art or School Supplies, Bed sheets/Comforter, Backpack, Lunchbox, etc.)

    3. Something to wear.

    This year, we are looking into purchasing new jeans for my oldest and new shoes for my youngest. Baby boy needs new pants.

    (Wear Examples: Shirts, Jeans, Leggings, Shoes, Socks, Underwear, Pajamas, Jackets, etc.)

    4. Something to read.

    My oldest daughter is very interested in reading chapter books this year. My youngest loves to look at picture books with me as she picks out her sight words while reading. Baby boy will receive a board book.

    (Read examples: Board books, Picture books, Chapter books, Magazine Subscription, etc.)

    This will be our first year of holiday planning where we will try cutting back on giving a lot of holiday gifts to our children. If you are looking to simplify your holiday shopping this year, consider using the “Something they want, Something they need, Something to wear, Something to read” method. If you aren’t quite ready to simplify to only four gifts per child just yet, try to pick two gifts from each category.

    How to Simplify Gift Giving

    Have you simplified your holiday shopping as described above? Tell us about it below!

  • 5 Simple Ways to Decorate Your Home During the Holidays with the Kids

    Simple Ways to Decorate Your Home During the Holidays with the Kids

    The holiday season is a busy time of year! This is the season for giving, entertaining, and spending time with family and friends. We spend a lot of time preparing our homes for guests and decorating so that our homes feel inviting, warm, and welcome. If you are feeling overwhelmed with your to-do list this holiday season, try to focus on keeping things simple. Get the kids involved in decorating and allow them to help in the fun! There’s no reason to go overboard on decorations. These tips below can help!

    5 Simple Ways to Decorate Your Home During the Holidays with the Kids

    1. Allow the kids to help decorate the tree.

    Every year, my kids get to pick out a Hallmark ornament for the Christmas tree. My kids loved opening the box of ornaments and putting them on the tree this year. I keep the ornaments in the original boxes and I write what year they received the ornaments and who or what the ornament was fun. I let them put the ornaments wherever they want on the tree.

    2. Set out a basket full of holiday books.

    For several years, I’ve had a tradition where I create a basket filled with children’s Christmas books for the kids to read. I keep these books in storage all year and every time we put up the tree in December, I bring out the basket and set it near the tree. The kids get very excited about reading the books during the month.

    3. Place some fun plush holiday decorations around the house.

    Instead of placing a bunch of breakable decorations around, place a few plush Christmas decorations around the the kids can interact with! Christmas decorations are fun and I have so many memories of decorations when I was a kid. You can find fun and engaging Christmas decorations at many retailers. My kids love this singing tree!

    4. Create a gingerbread house together.

    We have a tradition where we spend a few hours one day in December creating a Gingerbread House. The kids love creating the house. We set it out to enjoy during the holiday season.

    Simple Ways to Decorate Your Home During the Holidays with the Kids

    5. Don’t forget the milk and cookies for Santa! 

    Leaving cookies and milk for Santa is a favorite for my girls! They get the plate ready and full of cookies and pour the milk for Santa to enjoy. Check out these cute Cookies for Santa plates.

    How do you decorate your home during the holidays with the kids?