-
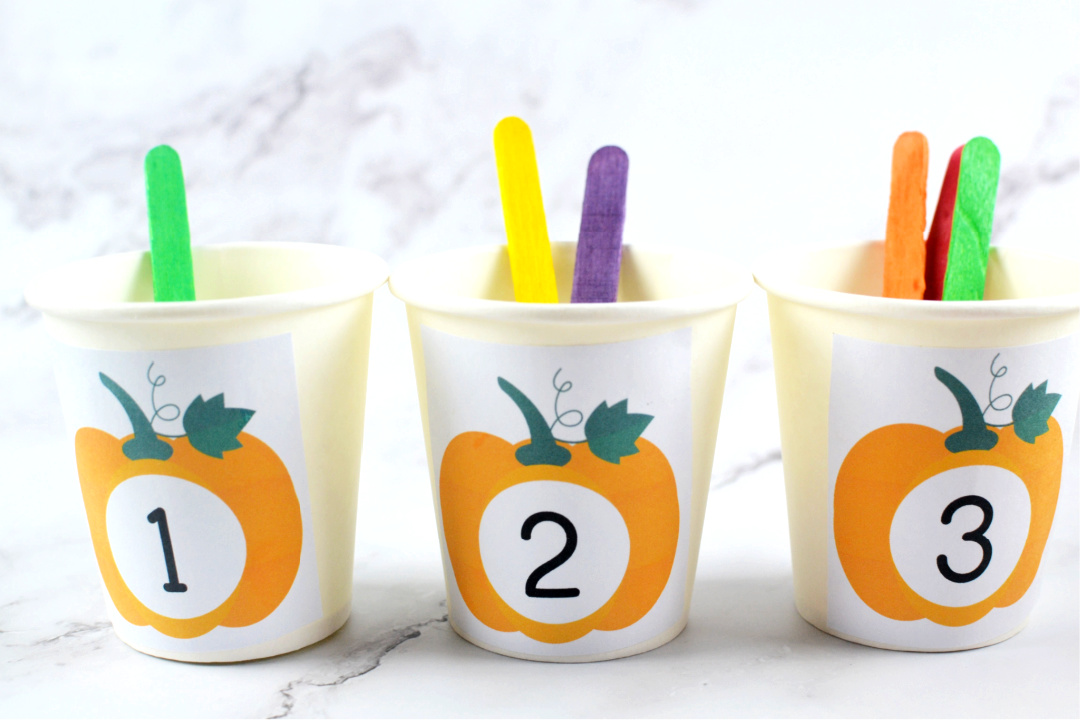
Pumpkin Counting from 1-10 Activity
Enjoy this fun fall Pumpkin Counting from 1-10 Activity for kids! This activity includes a free printable pumpkin template with numbers 1-10. The fall season is the perfect season to take advantage of fun and unique learning games with the kids! This Pumpkin Counting Activity for Kids is simple and easy to create and highly…
-
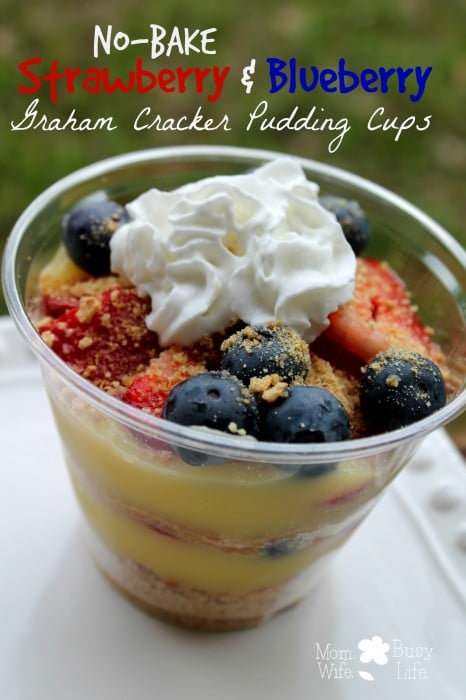
Strawberry and Blueberry Pudding Cups
These graham cracker pudding cups made with strawberries and blueberries are delicious and perfect to enjoy on a hot summer day! With summer around the corner, you’ll find me in the kitchen creating recipes using lots of strawberries and blueberries! This is the season for berries, so I try to add berries into my daily…
-
Memorial Day Crafts for Kids
Enjoy these Memorial Day Crafts for Kids to celebrate Memorial Day this year! Photo by Blessing Ri on Unsplash Do you have plans this weekend to observe the Memorial Day holiday? What is Memorial Day and why do we celebrate it? Memorial Day is an American holiday honoring the men and women who died while serving…
-
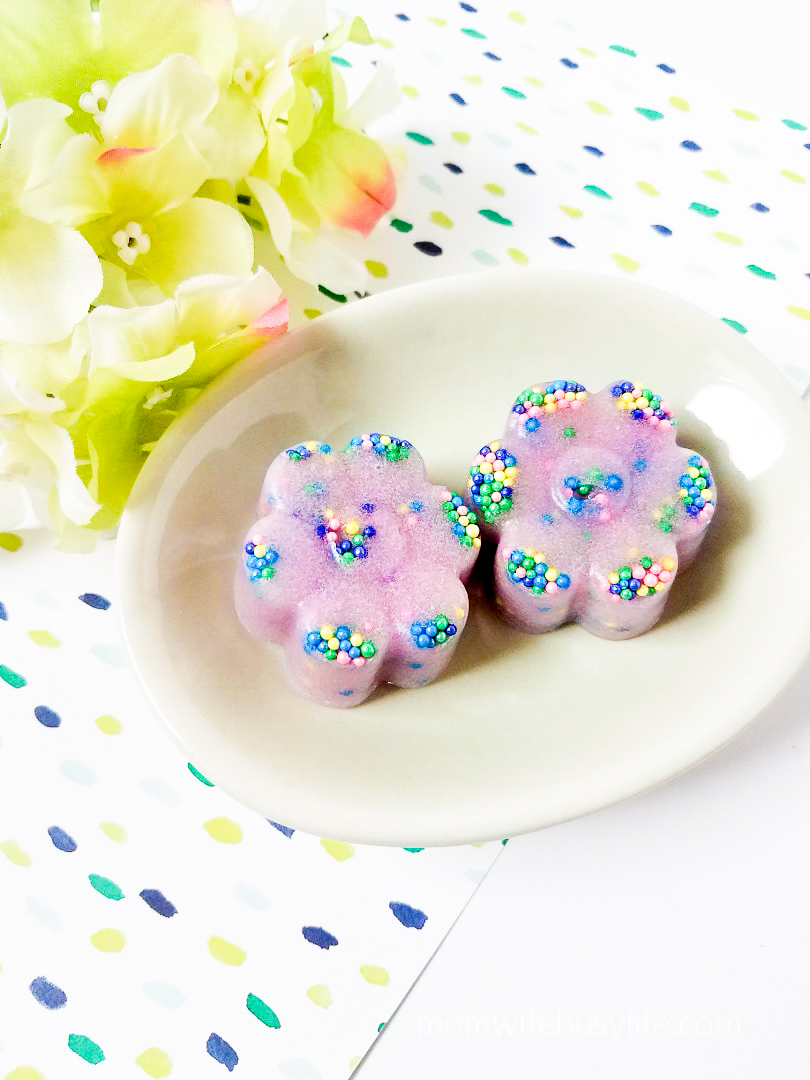
Flower Sugar Scrub Bars with Sprinkles
Bring the spring indoors this year with these colorful Spring Flowers Sugar Scrub Bars! I’m going to show you how to make homemade sugar scrub bars that are moisturizing and exfoliating. The sprinkles in these bars add just the right amount of color to make them fun! Add these to your bathroom this spring season.…
-
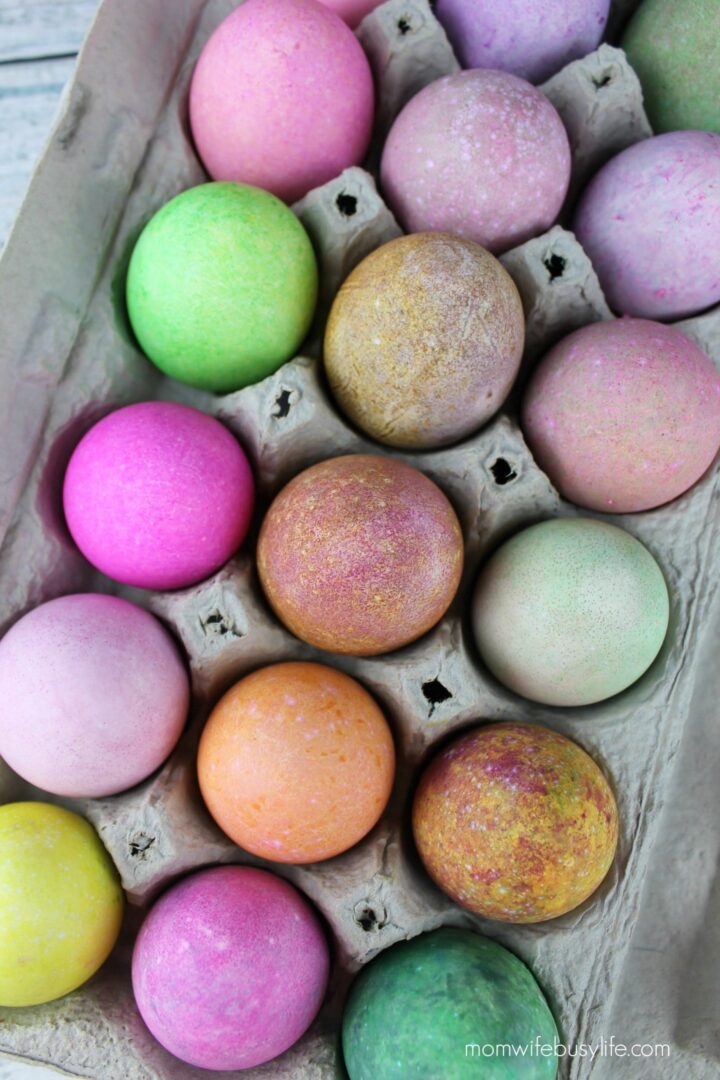
How to Dye Easter Eggs with Rice
Are you looking for a fun and new way to dye eggs this year? Learn how to dye Easter Eggs with Rice! This is one of our favorite ways to dye eggs as a family! We’ve been getting more creative in the kitchen lately! With the Easter holiday approaching, I thought it would be fun…
-
Love Bug Popsicle Stick Craft
Popsicle stick crafts are fun and simple to make! Create this adorable Love Bug Popsicle Stick Craft for Valentine’s Day this year. Get out your craft supplies and create this adorable Love Bug Popsicle Stick Craft with the kids this February to display in your home or classroom. Or, have your child wrap this as…
-
Puppy Dog Popsicle Stick Craft
Create this adorable Puppy Dog Popsicle Stick Craft for Valentine’s Day! Valentine’s Day is coming up! Get ready to create fun crafts this year! Today I’m sharing my tutorial for how to make a puppy dog using popsicle sticks. This craft includes a free printable template for the puppy dog ears and nose. Printable Dog…