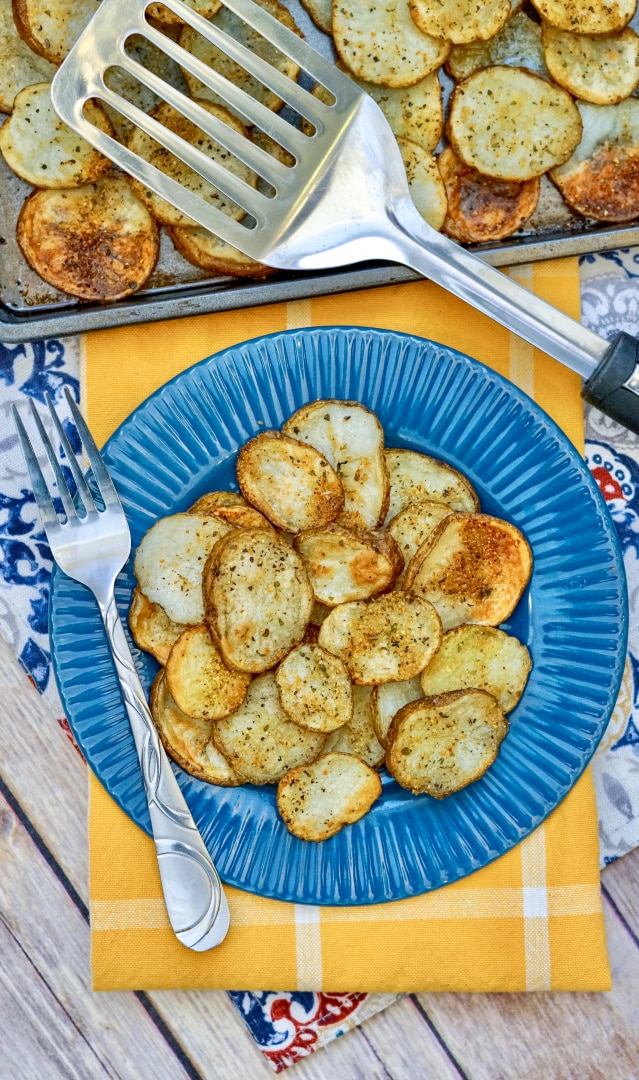
If you are looking for a simple side to make with your favorite meat dish, consider making these Sheet Pan Garlic Herb Potatoes!
Now that the summer season is here, backyard cookouts will be increasing for our family. This means that the grill master (aka my hubby!) will be creating his delicious recipes for us during these hot months. We enjoy hamburgers, hot dogs, brisket, smoked sausage and ribs, plus more.
Every time we grill out we make at least two to three tasty sides to go with the main dish. Sides typically consist of potato salad, creamy macaroni and cheese, pinto beans, or baked beans.
This summer, we are adding a new recipe to our collection — these yummy Sheet Pan Garlic Herb Potatoes below. The flavors in this recipe come together to create the perfect side dish. I love that the recipe requires few ingredients and is easy and simple to make.
Grab your ingredients soon and make these potatoes for your family!
Sheet Pan Garlic Herb Potatoes
Ingredients:
6-8 Potatoes
1/2 Cup Melted Butter
Salt
Pepper
1 Tbs Garlic & Herb Seasoning
Directions:
Slice potatoes on the thin side & place on a baking sheet. The thinner the potatoes, the crispier they will be.
Coat the potatoes in butter.
Sprinkle with salt & pepper to your desired taste.
Sprinkle garlic & herb seasoning into the potatoes.
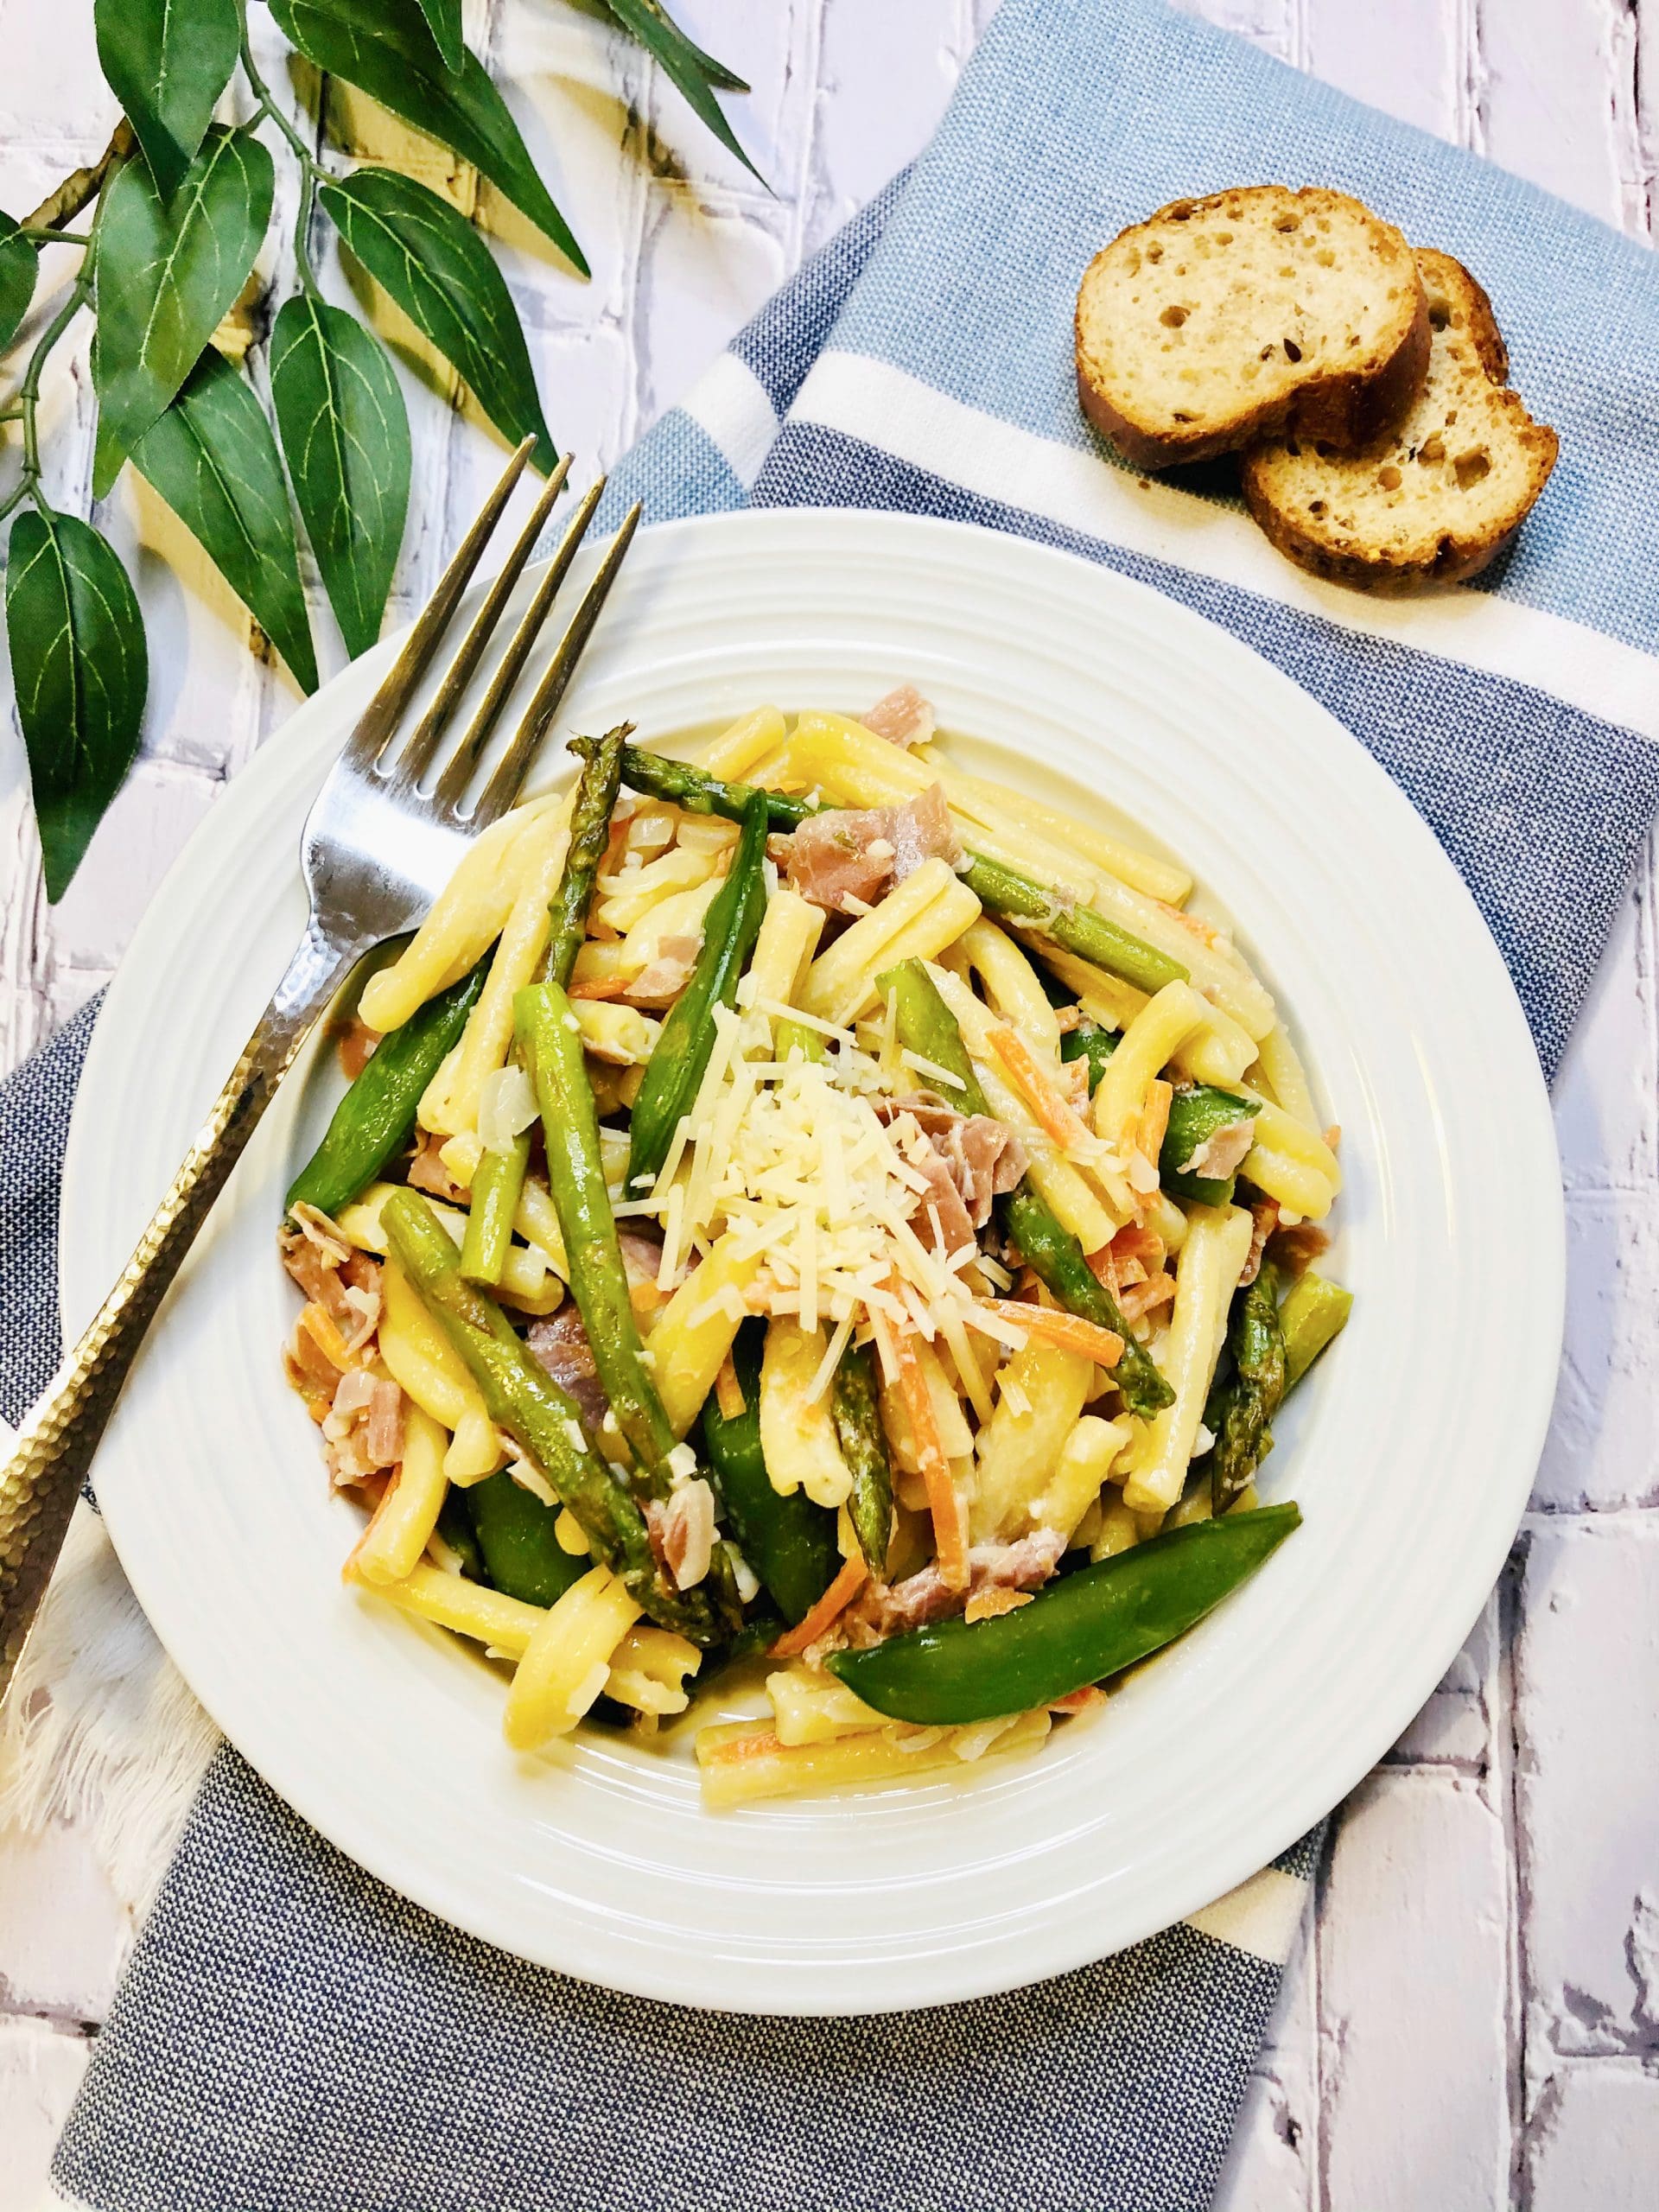
This Casarecce Pasta Primavera with fresh vegetables is perfect to serve for dinner this week!
We all know that weeknights can be quite hectic for busy moms.
Between juggling work schedules, school assignments, and the unpredictability of daily life, finding the time and energy to whip up a gourmet meal can sometimes seem impossible.
But, there’s a recipe you might not have in your weekly meal plan rotation yet: Casarecce Pasta Primavera!
Casarecce Pasta Primavera
Why Casarecce Pasta is a Game Changer
First, let’s dive into what makes Casarecce pasta so special.
Casarecce is a type of pasta that originates from Sicily. Its twisted and scroll-like shape is designed to perfectly hold sauces, ensuring every bite is as flavorful as the next.
When you think of comfort food with a hint of elegance, Casarecce should be at the top of your list.
The Magic of Pasta Primavera
The term ‘Primavera’ translates from Italian as ‘spring’, and this dish truly encapsulates the essence of the season.
With its vibrant vegetables and light, creamy sauce, this Pasta Primavera variation offers a symphony of flavors and textures that both kids and adults will adore.
Plus, incorporating vegetables into a pasta dish is a clever way to get even the pickiest eaters to consume their greens.
Why This Recipe is Ideal for Busy Moms
Quick and Easy Preparation: Time is of the essence on weeknights, and this recipe respects that. In just a few simple steps, you’ll have a steaming, aromatic plate of Casarecce Pasta Primavera ready for the family.
Minimal Ingredients: No need to scour the aisles for hard-to-find ingredients. The list is straightforward and the items are easily accessible. They might already be in your pantry or fridge!
Versatility: While this recipe has a certain set of ingredients, it’s also versatile. You can always add your family’s favorite vegetables or switch the protein. Chicken, shrimp, or even tofu can work wonders in this dish.
Nutrition Packed: Besides being utterly delicious, this dish offers a good balance of carbs, protein, and essential nutrients, thanks to the combination of pasta, veggies, and meat.
A Touch of Luxury with Prosciutto
Let’s pause for a moment and appreciate the inclusion of prosciutto in this recipe.
Prosciutto, a dry-cured ham from Italy, lends a unique taste and texture to the dish. Its savory and slightly salty tones contrast beautifully with the creamy sauce.
If you’ve been reserving prosciutto for special occasions, this dish is a reminder that every day can be a celebration with the right recipe.
Making the Meal a Memory
Dining is not just about the food; it’s also about the experience. Here are a few tips to elevate your Casarecce Pasta Primavera night:
Pair with a Light Wine: For those of you who enjoy a glass of wine with dinner, a light white wine or a rose would pair delightfully with this dish.
Freshly Baked Bread: A loaf of garlic bread or ciabatta can complement the pasta and help mop up any remaining sauce on the plate.
Play Some Italian Tunes: Why not bring a bit of Italy into your home? Some light Italian background music can set the mood and maybe even inspire a little post-dinner dancing.
Get the Kids Involved: Cooking can be a fun family activity. Let the kids sprinkle the Parmesan or set the table. They’ll likely be more excited to eat a dish they’ve had a hand in preparing.
I know the challenge of bringing something new, delicious, and nutritious to the dinner table each night.
The Casarecce Pasta Primavera checks all those boxes. It’s a dish that whispers of Italian landscapes, springtime freshness, and the comforts of home.
So, why not try it this week? Set aside those usual recipes you’ve been cycling through and introduce your family to this delightful dish.
And when they shower you with compliments (because trust me, they will), take a moment to bask in the joy of creating a memorable meal.
Boil pasta as directed on package, drain and set aside.
In a skillet, saute prosciutto or ham and shallot for about 3 minutes.
Add in garlic and red pepper flakes, cook for 1 minute.
Stir in cream, stock, and mustard.
Add in veggies and simmer for about 5 minutes.
Add in drained pasta, toss until combined.
Finish with fresh parmesan cheese if desired.
Serve immediately and enjoy!
Casarecce Pasta Primavera
Ingredients
1 lb. Casarecce pasta – or your favorite pasta
1 large carrot, cut into matchsticks
1 cup snap peas
asparagus
1 tablespoon olive oil
8 oz. prosciutto or ham, chopped small
1 shallot, sliced
1 garlic clove, minced
½ teaspoon red pepper flakes
3 tablespoons Dijon mustard
1 cup heavy cream
1 cup chicken stock
Parmesan cheese
Instructions
Boil pasta as directed on package, drain and set aside.
In a skillet, saute prosciutto or ham and shallot for about 3 minutes.
Add in garlic and red pepper flakes, cook for 1 minute.
Stir in cream, stock, and mustard.
Add in veggies and simmer for about 5 minutes.
Add in drained pasta, toss until combined.
Finish with fresh parmesan cheese if desired.
Serve immediately and enjoy!
Frequently Asked Questions
What is Casarecce pasta?
Casarecce is a type of pasta that originates from Sicily. It has a unique twisted, scroll-like shape, perfect for capturing and holding onto rich sauces and ingredients. The name “Casarecce” is derived from the Italian word for “homemade.”
How is Casarecce different from other pasta types?
Casarecce stands out due to its unique design resembling a narrow, twisted and rolled tube. This structure makes it particularly adept at holding chunky sauces and ingredients, distinguishing it from smoother, straighter pasta varieties.
What dishes pair best with Casarecce?
Casarecce is versatile and goes beautifully with a range of sauces, from light olive oil-based preparations to hearty meat sauces. However, its shape particularly shines with chunky vegetable sauces, pesto, and meaty preparations.
How do you cook Casarecce to perfection?
Like most pasta types, Casarecce should be cooked in boiling salted water. For an al dente texture, which is slightly firm and not too soft, follow the recommended time on the package, usually around 9-11 minutes.
Why choose Casarecce over other pasta varieties?
Casarecce offers a unique blend of tradition and versatility. Its Sicilian roots bring an authentic Italian touch to dishes, while its design ensures a perfect sauce-pasta blend in every bite.
Can Casarecce be used in cold pasta salads?
Casarecce’s shape allows it to retain dressings and mix-ins efficiently, making it a great choice for cold pasta salads and summer dishes.
What sauces don’t pair well with Casarecce?
While Casarecce is quite versatile, extremely thin or watery sauces may not adhere to it as well as they would with more textured pasta types. However, this is a matter of personal preference.
Where can I buy Casarecce?
Most well-stocked grocery stores will carry Casarecce in their pasta aisle. If you’re seeking artisanal or imported varieties, specialty Italian grocery stores or online retailers may be your best bet.
How can I make homemade Casarecce?
To make Casarecce at home, you’d need a basic pasta dough made from flour and eggs. Once rolled out, the dough is cut into narrow strips and then twisted to form the distinctive Casarecce shape. There are numerous online tutorials available for those keen on mastering the art.
What is the nutritional value of Casarecce?
Like most pasta types, Casarecce is primarily a source of carbohydrates. Its nutritional content can vary based on the brand and ingredients used. It’s always advisable to check the packaging for specific nutritional information.
Ranch seasoning is the secret to these delicious Sheet Pan Ranch Seasoned Potatoes. Serve these for your family this week!
What are you having for dinner this week?
If you haven’t created your meal plan for the week, there’s still time to come up with some tasty meal options for your family.
One of my favorite sides to serve with dinner includes some type of potato dish. From mashed potatoes, baked potatoes, fried potatoes = French fries, roasted potatoes — there are so many ways to make potatoes for the family!
Today I’m sharing this delicious sheet pan potato recipes to serve with your favorite main course this week. These potatoes pair well with a meat option like chicken fried steak or baked/fried chicken!
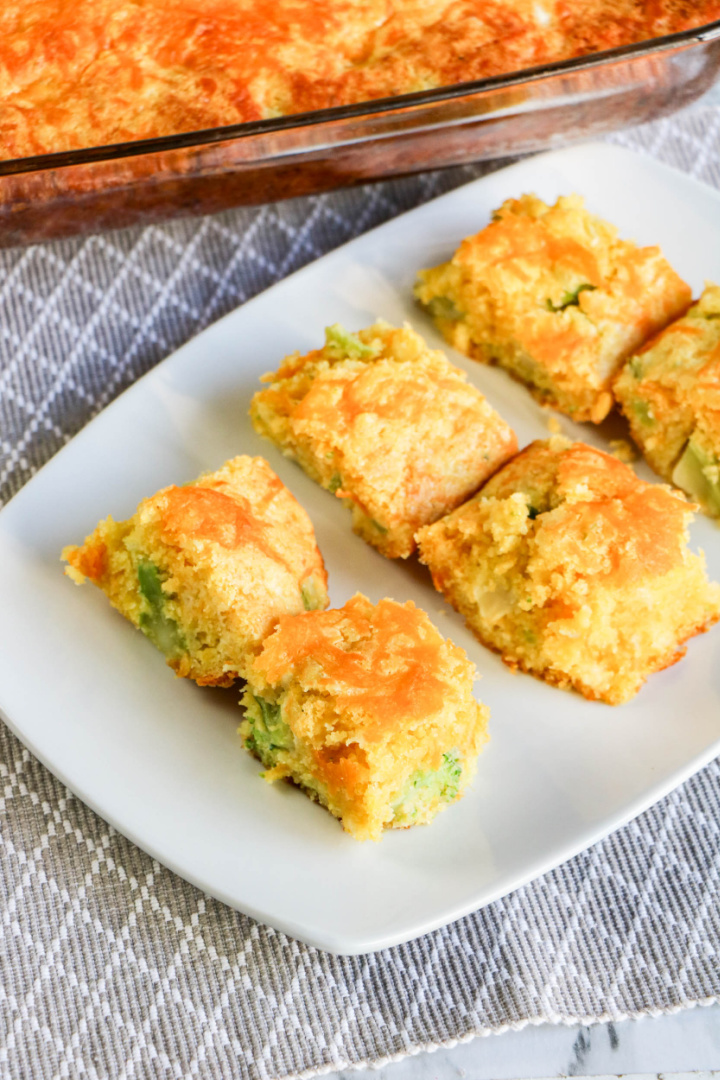
Learn how to make Easy Cheesy Broccoli Cornbread! This recipe is a tasty alternative to just regular cornbread.
Finding a dish that’s quick, easy, and a hit with the family can sometimes feel like a challenge.
But this Broccoli Cheddar Cornbread offers a perfect solution for busy moms who want to whip up something hearty without spending hours in the kitchen.
Whether you’re meal prepping for the week, throwing together a simple dinner, or looking for a dish to bring to a potluck, this cornbread can be a go-to.
This recipe checks all the boxes for a busy family. With the added broccoli, it sneaks in some veggies while delivering a cheesy, savory bite that even picky eaters will love.
It’s also versatile. You can serve it as a side dish with a weeknight meal, or even on its own for a quick lunch.
Plus, it’s a fun twist on classic cornbread that makes it feel a little more special without adding any extra fuss.
Perfect for Any Occasion
One of the great things about this dish is how well it fits into different mealtime situations.
Need something for a weeknight dinner?
Pair it with a simple protein like grilled chicken or a bowl of chili, and you have a complete meal.
Hosting a gathering or heading to a potluck?
Broccoli Cheddar Cornbread travels well, and it’s always a crowd-pleaser. The cheesy topping adds an irresistible golden finish, making it a standout on any dinner table.
Busy Week? Prep Ahead!
This recipe also works well for meal prep. You can easily prepare it in advance and reheat portions throughout the week.
It freezes well too, so consider making an extra batch to have on hand for those days when time is tight.
Simply pop it in the oven to warm it back up, and you have a ready-made side that tastes just as good as the day you baked it.
Family-Friendly Comfort Food
Broccoli Cheddar Cornbread combines the rich flavors of cheddar with the earthy taste of broccoli, all wrapped up in a moist, buttery cornbread base.
It’s comfort food at its best, but with a slightly healthier twist. It’s great for family dinners, holiday gatherings, or even a quick lunch after school.
The cottage cheese and eggs add extra protein, making this dish more filling than your typical cornbread recipe.
Busy moms need recipes that are both convenient and delicious.
This Broccoli Cheddar Cornbread delivers on both, making it an ideal addition to your meal rotation.
Whether it’s a weeknight, a holiday meal, or a dish for a special gathering, this recipe is sure to become a family favorite.
So, next time you’re in need of a quick, savory dish, give this Broccoli Cheddar Cornbread a try—it’s the perfect way to add a little comfort to your table without the hassle.
What goes with broccoli cornbread?
There are many different things that can go well with broccoli cornbread. One option is to serve it with a side of roasted vegetables.
Another option is to pair it with a salad. And, of course, you can always enjoy it on its own as a delicious and hearty snack.
No matter what you choose to do, broccoli cornbread is sure to be a hit!
Why put cottage cheese in cornbread?
There are a few reasons why cottage cheese works well in cornbread.
First, cottage cheese is a good source of protein and fat, which helps to keep the cornbread moist.
Second, the acidity of cottage cheese helps to balance the sweetness of the cornbread.
Finally, the cottage cheese adds a nice creamy texture to the cornbread.
How to store leftover cheesy broccoli cornbread
If you have leftover cornbread, you can store it in an airtight container. Cornbread will last for a few days stored this way.
You can also freeze cornbread for longer storage. To reheat cornbread, wrap it in foil and place it in a 350 degree oven until warm.
Easy Cheesy Broccoli Cornbread
Ingredients:
1 cup cottage cheese
¾ cup butter, melted
4 eggs, lightly beaten
2 (8.5 ounce) packages cornbread mix
1 (10 ounce) package frozen chopped broccoli, thawed and drained
1 onion, chopped fine
2 cups shredded cheddar cheese, divided
Directions:
Preheat the oven to 375 degrees. Prepare a 9×13 casserole dish with nonstick cooking spray.
In a large mixing bowl, mix together the cottage cheese, butter, eggs, cornbread mix until well blended.
Stir in the cornbread mix. Then, add the broccoli, onion, and 1 ½ cup cheese.
Spread the batter in the prepared casserole dish and top with the remaining cheese.
Bake for 35 to 40 minutes or until the cornbread is puffed and golden.
Remove from the oven and cool slightly before slicing and serving.
Easy Cheesy Broccoli Cornbread
Ingredients
1 cup cottage cheese
¾ cup butter, melted
4 eggs, lightly beaten
2 (8.5 ounce) packages cornbread mix
1 (10 ounce) package frozen chopped broccoli, thawed and drained
1 onion, chopped fine
2 cups shredded cheddar cheese, divided
Instructions
Preheat the oven to 375 degrees. Prepare a 9×13 casserole dish with nonstick cooking spray.
In a large mixing bowl, mix together the cottage cheese, butter, eggs, cornbread mix until well blended.
Stir in the cornbread mix. Then, add the broccoli, onion, and 1 ½ cup cheese.
Spread the batter in the prepared casserole dish and top with the remaining cheese.
Bake for 35 to 40 minutes or until the cornbread is puffed and golden.
Remove from the oven and cool slightly before slicing and serving.
Frequently Asked Questions
Can I use fresh broccoli instead of frozen?
Yes, you can use fresh broccoli. Just make sure to cook it first and drain it well before adding it to the batter to avoid excess moisture.
Can I substitute the cottage cheese with another ingredient?
You can substitute cottage cheese with ricotta cheese or even Greek yogurt if you prefer a different texture or taste.
Can I make this recipe gluten-free?
Yes, you can use a gluten-free cornbread mix to make this recipe gluten-free without sacrificing flavor or texture.
How do I store leftovers?
Store any leftovers in an airtight container in the refrigerator for up to 3 days. You can also freeze it for longer storage.
Can I make this recipe ahead of time?
Yes, you can make it a day ahead and store it in the fridge. Just reheat it in the oven or microwave before serving.
What should I serve with Broccoli Cheddar Cornbread?
It pairs well with a variety of dishes like chili, soups, roasted chicken, or even a salad for a lighter meal.
How do I prevent the cornbread from becoming soggy?
Make sure the broccoli is well-drained and not too wet before mixing it into the batter. Also, avoid over-mixing to maintain a fluffy texture.
Can I add more cheese to this recipe?
If you’re a fan of extra cheesy goodness, feel free to add more shredded cheddar or even mix in different cheeses for a unique flavor.
Can I use a different type of onion?
Yes, you can use yellow, white, or even green onions depending on your preference. Just chop them finely for the best texture.
Pizza is often a family favorite no matter what time of the year it is. This list of Easy Pizza Recipes offers great ideas for your next pizza night!
We have a tradition in my house where we will serve pizza at least once a week. It may be a frozen pizza or delivery pizza! We currently live on base and have a Pizza Hut that delivers to us on a regular basis. As I get older, I prefer supreme style pizza, but I do still love pepperoni pizza! My kids prefer cheese pizza.
If you are looking for a spin on pizza, here are a few of our other recipes worth taking a look at for more pizza options:
Pizzas are so versatile; you can add various ingredients or make as many combinations as you’d like. Different sauces, toppings… the possibilities are endless when it comes to making a delicious pizza. Even if you don’t think it should go on a pizza, it’s worth a try because you never know, it might surprise you and turn out to be better than expected!
If you are looking to get some ideas for your next homemade pizza, these tasty pizza recipes should do it!
A delicious meatball mixture is used for the crust with this Meatzza Pizza, which is then topped with cheese and a tomato topping, onion, and a few other ingredients.
If you are looking for a healthy way to enjoy pizza, this sausage pizza uses a kale pesto sauce and is then topped with onions and cheese to create a delicious sausage flavored pizza.
Another great summer pizza, this veggie pizza is gluten-free and delicious! It’s topped with fresh cucumbers, cherry tomatoes, red onions, bits of jalapeno, and feta cheese.
Made with a homemade broccoli rabe pesto, this salad is full of flavor. Inspired from a pasta dish, this pizza combines the homemade pesto with sausage for a delicious combination.
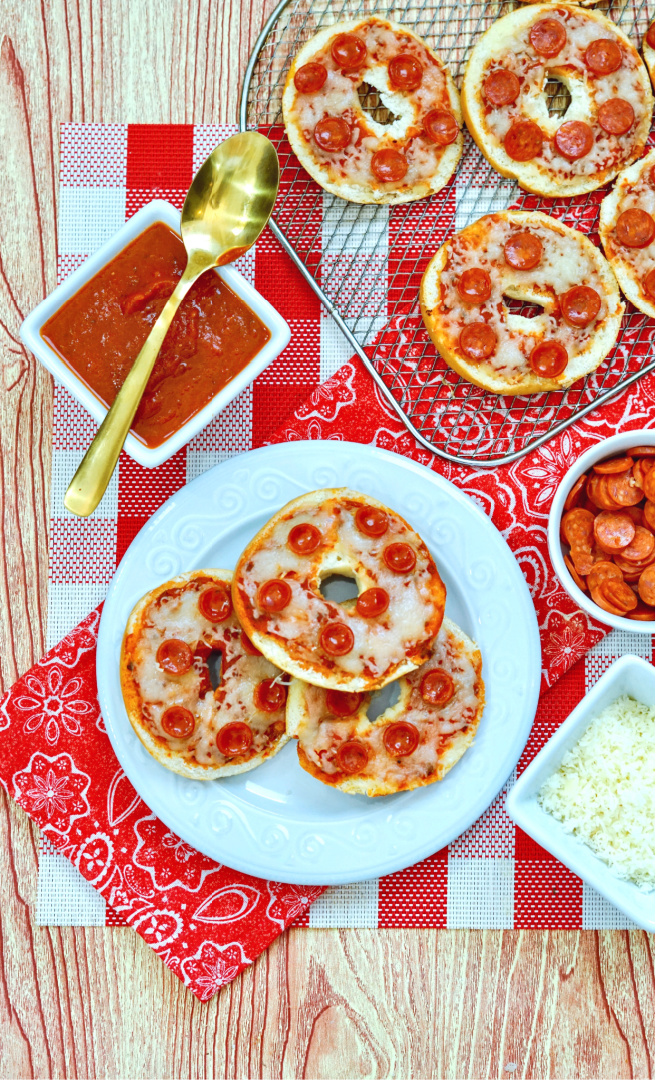
This air fryer pizza bagel recipe is great for families on the go, especially when dinner needs to be on the table in a hurry.
Whether you’re juggling after-school activities, sports practice, or just managing the everyday chaos, these mini bagel pizzas come together with just a handful of ingredients and minimal cleanup.
No oven needed (just use the air fryer!), and no waiting around for delivery.
You can make a batch after school for a filling snack, or use them as a fun alternative to traditional pizza night.
They’re also perfect for weekend lunches when you want something quick but satisfying.
The air fryer gives them a crispy bagel base and melts the cheese just right—no soggy bottoms or uneven cooking like the microwave tends to deliver.
Get the kids involved!
This is also a great recipe to get the kids involved with.
Let them build their own—just set out the ingredients and let them top their own bagels before popping them in the air fryer. It’s a simple way to get picky eaters more excited about mealtime.
Creative ways to serve the Air Fryer Pizza Bagels
These mini pizza bagels can also be served as part of a fun party spread or even tucked into lunchboxes.
Make a big batch, freeze them before cooking, and you’ve got a ready-to-go option for last-minute meals or snacks.
You can also switch up the toppings to include whatever your family likes—black olives, diced bell peppers, crumbled sausage, or even pineapple.
Create a Pizza Bagel Bar
Another fun way to use this recipe is to set up a pizza bagel bar.
It’s a simple, interactive meal idea that works great for birthday parties, sleepovers, or even a family movie night.
Just lay out the ingredients and let everyone build their own pizza bagels before tossing them in the air fryer.
It keeps things easy for you and makes mealtime more fun for kids and guests.
Here are some topping ideas you can set out:
Mini pepperoni
Cooked sausage crumbles
Bacon bits
Sliced black olives
Diced bell peppers
Pineapple chunks
Sliced mushrooms
Spinach
Fresh basil
Crushed red pepper flakes
Shredded mozzarella, cheddar, or Parmesan cheese
Pizza sauce, marinara, or even Alfredo sauce for a twist
Letting everyone build their own gives them some freedom to get creative, and it’s a great way to use up whatever toppings you already have in the fridge.
Make this recipe today!
Whether you’re searching for an air fryer dinner recipe for kids, easy air fryer lunch ideas, or a budget-friendly snack that comes together in under 10 minutes, this one checks all the boxes.
Quick, customizable, and kid-approved—these air fryer pizza bagels are one of those recipes that will quickly become a regular in your rotation.
Air Fryer Pizza Bagels
Ingredients:
Mini Bagels
Pizza Sauce
Mini Pepperoni Slices
Shredded Mozzarella Cheese
Directions:
Slice bagels in half.
Coat with pizza sauce.
Sprinkle with cheese.
Place pepperonis on top.
Place on the air fryer racks and air fry for 5 minutes at 360 degrees.
Serve & enjoy!
Frequently Asked Questions About Air Fryer Pizza Bagels
Can I use regular-sized bagels instead of mini bagels? Yes, you can use full-sized bagels if that’s what you have on hand. Just adjust the cook time slightly. In the air fryer, start with 6–7 minutes at 360°F and check for melted cheese and crispy edges. They make a great air fryer lunch recipe for older kids or teens.
What’s the best way to store leftover pizza bagels? Let the pizza bagels cool completely, then store them in an airtight container in the fridge for up to 3 days. Reheat in the air fryer for 2–3 minutes to bring back the crispy texture.
Can I freeze air fryer pizza bagels for later? Absolutely. Assemble the bagels but don’t cook them. Freeze them flat on a tray, then transfer to a freezer bag. When ready to cook, place them directly in the air fryer and add 1–2 extra minutes to the cooking time.
How do I bake pizza bagels in the oven if I don’t have an air fryer? To make oven-baked pizza bagels, preheat your oven to 375°F. Place the assembled bagels on a baking sheet lined with parchment paper and bake for 10–12 minutes, or until the cheese is melted and bubbly and the bagels are lightly toasted. This is a great option if you’re looking for a baked mini pizza bagel recipe without an air fryer.
What are some topping ideas for mini pizza bagels? You can use just about anything your family likes. Try cooked sausage crumbles, black olives, diced peppers, mushrooms, bacon bits, or pineapple. It’s an easy way to turn this air fryer pizza snack recipe into a fully customizable meal.
Are air fryer pizza bagels good for school lunches? Yes! Let them cool completely, then pack them in a lunchbox with an ice pack. They’re tasty even at room temperature and are a kid-friendly lunch idea that doesn’t require reheating.
Can I use shredded cheddar or other cheeses instead of mozzarella? Mozzarella melts best and gives that classic pizza taste, but you can mix in cheddar, Monterey Jack, or even a little Parmesan for more flavor. This helps make your air fryer pizza bagel recipe more unique and adaptable to what you already have in the fridge.
Do I need to preheat the air fryer? For this recipe, preheating is optional. If your air fryer runs cooler, a quick 2–3 minute preheat can help get a crispier result, but it’s not required for great results. This is part of why it’s such a quick air fryer meal idea for busy families.
How long do I cook mini pizza bagels in the air fryer? Five minutes at 360°F is usually perfect for mini bagels with sauce, cheese, and pepperoni. If you like extra crispy cheese or you’re using thicker bagels, you can add an extra minute of cook time.
Can I make these pizza bagels gluten-free? Yes, just use gluten-free mini bagels and double-check that your pizza sauce and toppings are gluten-free as well. It’s a simple gluten-free air fryer pizza option for kids and adults alike.
Air Fryer Easy Cheesy Pizza Bagels
Ingredients
Mini Bagels
Pizza Sauce
Mini Pepperoni
Mozzarella Cheese
Instructions
Slice bagels in half.
Coat with pizza sauce.
Sprinkle with cheese.
Place pepperonis on top.
Place on the air fryer racks and air fry for 5 minutes at 360 degrees.
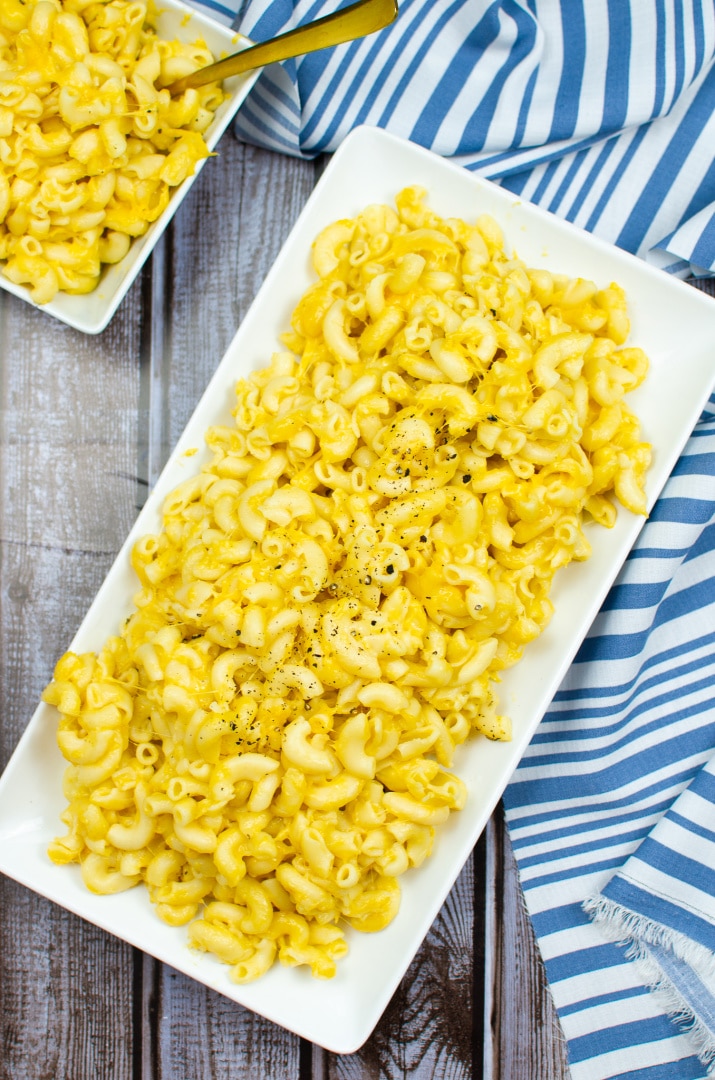
Get out your Instant Pot! Make this easy and delicious Instant Pot Macaroni and Cheese for the family tonight as a part of your favorite meal.
Macaroni and Cheese is a family favorite for many households in America!
I know I enjoyed eating mac and cheese as a kid. It was the kind that came in a box, but it was yummy when my mom made it!
Occasionally she’d throw some vegetables in it, like peas or carrots, and we’d eat that as a part of our dinner with the main protein. I’m pretty sure I remember eating fish sticks with ketchup often with my macaroni and cheese when I was growing up!
Now they make it easy and place macaroni and cheese in cups for the microwave, but there’s still nothing better than homemade macaroni and cheese served fresh!
If you haven’t tried homemade macaroni and cheese, I highly suggest you make it soon. Once you do, you’ll most likely never go back to pre-made mac and cheese.
Macaroni and cheese is super easy to make and takes very little time to whip up a hot batch for your family.
Get out your Instant Pot and try this quick and easy Instant Pot Macaroni and Cheese recipe today!
What can I add to macaroni and cheese to make it taste better?
There are a few things you can add to macaroni and cheese to make it taste better. One thing you can do is add some extra cheese on top. This will make the dish creamier and more flavorful.
Another option is to add some chopped up bacon or ham. This will give the macaroni and cheese a salty, savory flavor that is sure to please.
Finally, you could try adding some green onions or other fresh herbs for a pop of color and flavor.
Whichever way you choose to jazz up your mac and cheese, one thing is for sure – it’ll be delicious!
What to serve with macaroni and cheese
Macaroni and cheese is a classic dish that can be enjoyed on its own or paired with other foods.
Some popular choices for pairing macaroni and cheese include ham, bacon, and broccoli.
If you want a heartier meal, try serving macaroni and cheese with a side of bread or a salad.
For a lighter option, pair macaroni and cheese with fruit or vegetables.
No matter what you choose to serve with your macaroni and cheese, it’s sure to be a hit!
How to store leftover macaroni and cheese
If you have any macaroni and cheese leftover, there are a few ways you can store it.
The best way is to put it in an airtight container and keep it in the fridge.
You can also freeze mac and cheese, which will make it last even longer. Just be sure to thaw it properly before reheating.
Combine the elbow noodles, water, and salt in the Instant Pot.
2. the lid on the Instant Pot. Close by twisting the lid in place and close the valve also.
3. Set the Instant Pot to High Pressure at 4 minutes. The Instant Pot will take about 12 minutes to come to pressure.
4. Once the Instant Pot finishes cooking after the 4 minutes, open the valve. Use something to protect your hands as the steam will be hot.
5. Turn Instant Pot off.
6. After the Instant Pot has released all of its pressure, untwist the lid, and pull the lid off away from you.
7. Stir in the milk and butter.
8. Once the butter has melted and the milk has been mixed completely, add in the cheddar and the mozzarella one handful at a time.
9. Once you have added one handful, mix until the cheese has been completely melted.
10. Add another handful of cheese.
11. Continue until all cheese has been added and all cheese is melted in the macaroni.
12. Serve immediately, or you can set the Instant Pot to the “warm” setting.
Serves 8.
Prep time: 15 minutes
Cook time: 4 minutes (IP pressure builds about 12 minutes adding to a total of about 15-20 minutes)
Total: About 30-35 minutes
Instant Pot Macaroni and Cheese
Ingredients
1 pound dried macaroni
4 cups of water
4 TBSP of butter
1 TBSP of salt
1.5 cups of whole milk
12 oz shredded mild cheddar
4 oz mozzarella shredded
Instructions
1. In the Instant Pot, combine dried macaroni, water, and salt.
2. Place the lid on the Instant Pot, and close by twisting in place. Close the valve.
3. Set the Instant Pot to High Pressure at 4 minutes (The Instant Pot will take about 12 minutes to come pressure.).
4. Once the Instant Pot finishes cooking after the 4 minutes, open the valve using something to protect your hands as the steam will be hot.
5. Turn Instant Pot off.
6. After the Instant Pot has released all its pressure, untwist the lid, and pull the lid off away from you.
7. Stir in the milk, and butter.
8. Once the butter has melted, and the milk has been mixed completely, add in the cheddar, and the mozzarella by one handful at a time. Once you have added one handful, mixed until the cheese has been completely melted. Then add another handful of cheese. Continue until all cheese has been added, and all cheese is melted in the macaroni.
9. Serve immediately, or you can set the Instant Pot to the “warm” setting.
This website uses cookies to improve your experience. We'll assume you're ok with this, but you can opt-out if you wish.AcceptRejectRead More
Privacy & Cookies Policy
Privacy Overview
This website uses cookies to improve your experience while you navigate through the website. Out of these, the cookies that are categorized as necessary are stored on your browser as they are essential for the working of basic functionalities of the website. We also use third-party cookies that help us analyze and understand how you use this website. These cookies will be stored in your browser only with your consent. You also have the option to opt-out of these cookies. But opting out of some of these cookies may affect your browsing experience.
Necessary cookies are absolutely essential for the website to function properly. This category only includes cookies that ensures basic functionalities and security features of the website. These cookies do not store any personal information.
Any cookies that may not be particularly necessary for the website to function and is used specifically to collect user personal data via analytics, ads, other embedded contents are termed as non-necessary cookies. It is mandatory to procure user consent prior to running these cookies on your website.