Category: Dinner Recipes

  • Easy Black Eyed Peas with Bacon Recipe for New Year’s Day (Southern Style)

    Easy Black Eyed Peas with Bacon Recipe for New Year’s Day (Southern Style)

    Looking for a tasty and lucky dish to serve on New Year’s Day?

    This Black Eyed Peas with Bacon recipe is a Southern favorite that’s easy to make, full of flavor, and believed to bring good luck for the year ahead.

    Whether you’re cooking for your family or hosting a New Year’s gathering, this hearty dish will please even picky eaters.

    You may also like:

    Why Black Eyed Peas Are Considered Lucky on New Year’s

    Eating black-eyed peas on New Year’s is a long-standing Southern tradition. Here’s why these little beans are considered lucky:

    • Prosperity: Black-eyed peas swell as they cook, symbolizing growth and abundance.
    • Money: Greens like collard or cabbage often accompany the peas to represent financial wealth.
    • Forward movement: Pork, such as bacon, symbolizes progress since pigs root forward when foraging.
    • Gold: Cornbread, another traditional side, represents wealth.

    Whether or not you believe in the symbolism, this combination makes a hearty, flavorful, and festive meal for ringing in the new year.

    Tips for Adding Flavor to Black Eyed Peas

    • Use bacon or ham for a smoky, savory taste.
    • Add onion soup mix for a quick flavor boost.
    • Fresh herbs like rosemary, sage, thyme, or parsley enhance the flavor.
    • Don’t overcook; black-eyed peas should be tender but not mushy.

    What to Serve with Black Eyed Peas

    Black-eyed peas are versatile and pair well with many dishes:

    • Southern classics: Collard greens, cornbread, sautéed cabbage with bacon
    • Tex-Mex favorites: Tacos, fajitas, black bean and corn salsa
    • Creative options: Use as a base for soups, stews, or curries

    This Black Eyed Peas with Bacon recipe is the perfect addition to your New Year’s celebration or any Southern-style meal.

    Full of flavor, easy to prepare, and steeped in tradition, it’s a dish your family will enjoy year after year.

    Try this recipe for your next New Year’s Day dinner and start the year with flavor, tradition, and a little bit of luck!

    Black Eyed Peas with Bacon

    Ingredients:

    • 1 lb. bag of black eyed peas
    • 1 package of onion soup mix
    • 1 small onion
    • 2-4 strips of bacon
    • 1 tbsp. olive oil
    • salt and pepper

    (Read below for a recipe using canned black eyed peas.)

    Directions: 

    Pour the entire bag of black eyed peas in a colander and rinse beans. This helps to remove any sand or dirt that remained on the black eyed peas.

    Transfer beans into a large pot of water and soak overnight or for 8 hours.

    Do not drain the water.

    Put the black eyed peas on high heat and bring to a rapid boil.

    Once up to a rolling boil, keeping boiling for 10 minutes.

    Add 1 package of onion soup mix and stir until combined.

    Turn down the heat to low.

    Dice up the small onion. Saute the onion and olive oil in a skillet until golden brown. Add salt and pepper.

    Add the onions to the black eyed peas.

    Leave the black eyed peas on low for 2-3 hours or until all peas are tender. Check the beans every 20-30 minutes and stir well each time.

    If water gets low, add 1 cup of water. When the black eyed peas are tender, remove from heat.

    Cook the bacon strips until crispy. Allow the bacon to cool, then break apart the bacon into bacon bits.

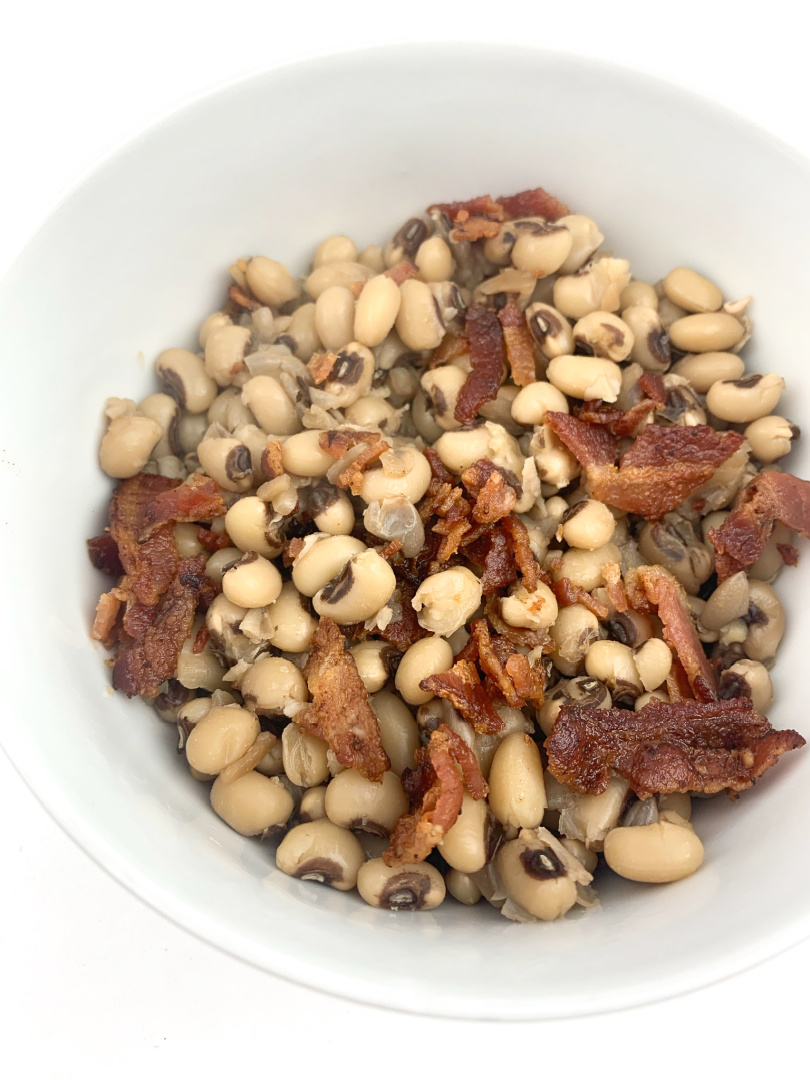
    Serve the black eyed peas in a bowl. Top with the crispy bacon bits!

    Note: You can cook the bacon by adding it to the pot of beans and allow the bacon to cook with the beans. It’s all about texture preference!

    This photo below shows my black eyed pea recipe with the bacon cooked with the beans. Notice it’s not as crispy as the photo above.

    black eyed peas with bacon recipe

    FAQs About Black Eyed Peas

    Do I need to soak black-eyed peas before cooking?
    No, soaking is optional. It reduces cooking time but is not required.

    Can I use canned black-eyed peas?
    Yes! Drain and rinse them before adding to your recipe.

    Can I cook black-eyed peas without bacon?
    Absolutely. You can use smoked sausage, ham hock, or keep it vegetarian.

    How long does it take to cook black-eyed peas?
    Stovetop: 30–60 minutes depending on whether they are soaked.
    Pressure cooker: 10–15 minutes.

    Can I make this recipe ahead of time?
    Yes! Black-eyed peas taste even better when made a day ahead, allowing flavors to meld.

    Black Eyed Peas With Bacon

    Black Eyed Peas With Bacon

    Ingredients

    • 1 lb. bag of Black Eyed Peas
    • 1 Package of Onion Soup Mix
    • 1 Small Onion
    • 2-4 Strips of Bacon
    • 1 tbsp. olive oil
    • Salt and Pepper

    Instructions

    Pour the entire bag of black eyed peas in a colander and rinse beans. This helps to
    remove any sand or dirt that remained on the black eyed peas.

    Transfer beans into a large pot of water and soak overnight or for 8 hours.

    Do not drain the water.

    Put the black eyed peas on high heat and bring to a rapid boil.

    Once up to a rolling boil, keeping boiling for 10 minutes.

    Add 1 package of onion soup mix and stir until combined.

    Turn down the heat to low.

    Dice up the small onion. Saute the onion and olive oil in a skillet until golden brown.
    Add salt and pepper.

    Add the onions to the black eyed peas.

    Leave the black eyed peas on low for 2-3 hours or until all peas are tender. Check
    the beans every 20-30 minutes and stir well each time.

    If water gets low, add 1 cup of water. When the black eyed peas are tender, remove from heat.

    Cook the bacon strips until crispy. Allow the bacon to cool, then break apart the bacon into bacon bits.

    Serve the black eyed peas in a bowl. Top with the crispy bacon bits!


    Note: You can cook the bacon by adding it to the pot of beans and
    allow the bacon to cook with the beans. It’s all about texture preference!

  • Easy Irish Shepherd’s Pie Recipe (Classic Comfort Food for Busy Families)

    Easy Irish Shepherd’s Pie Recipe (Classic Comfort Food for Busy Families)

    When you need a warm, filling dinner that the whole family will eat, Irish Shepherd’s Pie is always a solid choice.

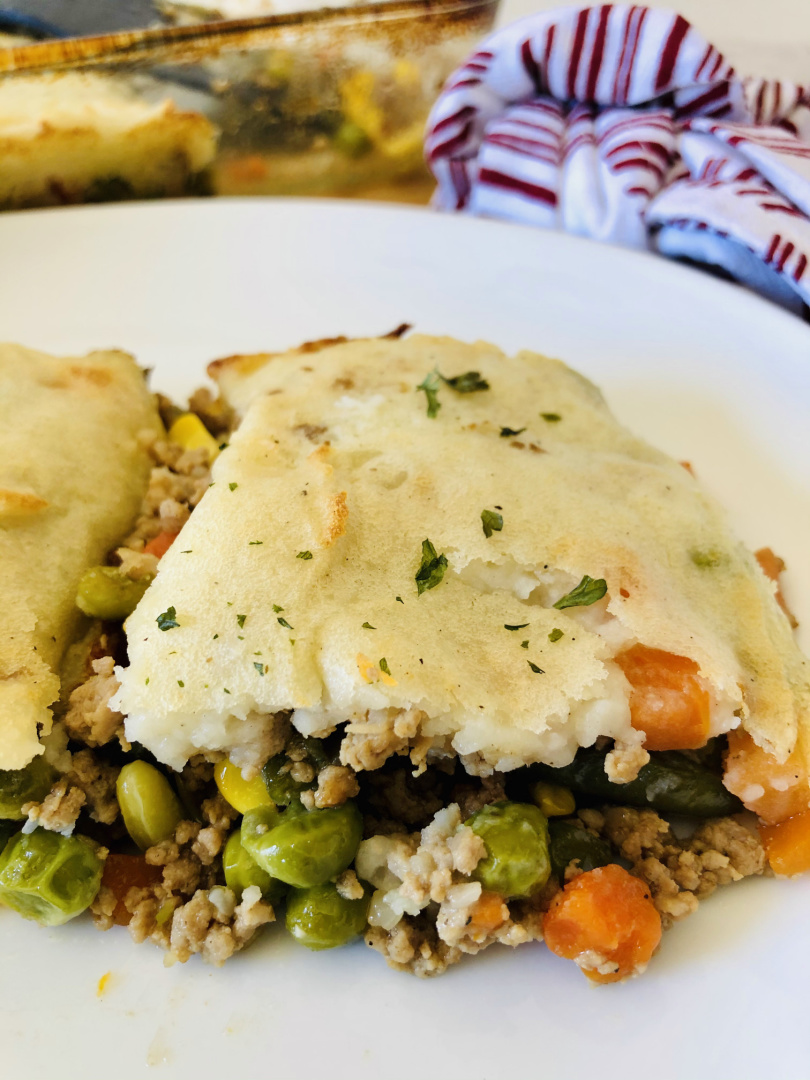
    This classic comfort food is made with savory ground meat, vegetables, and a rich gravy, all topped with creamy mashed potatoes and baked until golden.

    Perfect for busy weeknights, cold evenings, or even St. Patrick’s Day dinner, Shepherd’s Pie is a one-dish meal that’s simple, satisfying, and great for feeding a hungry family without a lot of fuss.

    You may also like:

    Irish Bread


    What Is Irish Shepherd’s Pie?

    Irish Shepherd’s Pie is a traditional casserole-style dish that dates back to the late 18th century.

    It was originally created as a way to use leftover roasted meat and potatoes, making it a practical and budget-friendly meal — something busy moms still appreciate today.

    Traditional Shepherd’s Pie is made with ground lamb, while versions made with beef are often called Cottage Pie.

    That said, many families use ground beef because it’s easier to find and more affordable, making it a popular option for modern home cooks.


    Ingredients Commonly Used in Shepherd’s Pie

    One of the reasons Shepherd’s Pie works so well for busy families is its flexibility. Most versions include:

    • Ground lamb or ground beef
    • Onion and garlic
    • Carrots and peas
    • Beef or lamb gravy
    • Worcestershire sauce and herbs
    • Creamy mashed potatoes

    Everything cooks together in one dish, making cleanup easier — a big win on hectic evenings.


    Why Busy Moms Love Shepherd’s Pie

    This dish checks all the boxes for family dinners:

    • Hearty and filling — no need for extra sides
    • Make-ahead friendly — assemble earlier and bake later
    • Great for leftovers — reheats well for lunch the next day
    • Budget-conscious — uses simple, affordable ingredients

    Serve it hot with a side of buttery green beans, a simple salad, or crusty bread if you want to stretch the meal even further.


    When to Make Irish Shepherd’s Pie

    Irish Shepherd’s Pie is perfect for:

    • Easy weeknight dinners
    • Cozy winter meals
    • St. Patrick’s Day celebrations
    • Freezer meals for busy weeks

    If you’re looking for a comforting dinner that doesn’t require complicated steps or fancy ingredients, this classic recipe deserves a spot on your meal plan.

    Irish Shepherd’s Pie 

    Ingredients:

    • 4 cups of prepared mashed potatoes – homemade or instant, both work well 
    • 2 tablespoons butter 
    • 1 onion, chopped 
    • 2 cups mixed vegetables – fresh, frozen, or canned work just fine 
    • 1 ½ pounds ground beef or ground turkey
    • ½ cup beef broth
    • 1 tsp. Worcestershire sauce
    • salt & pepper to taste 
    • dry parsley

    Directions:

    Preheat oven to 400 degrees.

    Saute onion in butter until tender. 

    Add ground beef or turkey and cook until browned. 

    Stir in vegetables and cook until tender or warmed through.

    Add in Worcestershire sauce, broth, and salt & pepper to taste. 

    Simmer, uncovered, on low for about 10 minutes.

    Spray a baking dish with nonstick spray and starting with the meat, layer the meat mixture and mashed potatoes until all used, the top layer should be mashed potatoes.

    Bake for about 40 minutes, until the potatoes are golden brown on top. 

    Let stand for about 10 minutes before serving.   

    Frequently Asked Questions About Irish Shepherd’s Pie

    Can I make Shepherd’s Pie ahead of time?

    Yes! Shepherd’s Pie is a great make-ahead meal. You can fully assemble it, cover it tightly, and refrigerate for up to 24 hours before baking. When ready to cook, bake as directed, adding a few extra minutes if it’s cold from the fridge.


    Can I freeze Shepherd’s Pie?

    Absolutely. Shepherd’s Pie freezes very well. Assemble the dish, let it cool completely, then wrap it tightly with plastic wrap and foil. Freeze for up to 3 months. Thaw overnight in the refrigerator before baking.


    Is Shepherd’s Pie better with ground beef or ground turkey?

    Both work well. Ground beef gives a richer, more traditional flavor, while ground turkey is a leaner option. Choose what fits your family’s preferences or what you have on hand.


    Can I use instant mashed potatoes?

    Yes. Instant mashed potatoes work just fine and save time, which makes this recipe perfect for busy weeknights. Homemade mashed potatoes also work great if you prefer them.


    What vegetables can I use in Shepherd’s Pie?

    This recipe is very flexible. Mixed vegetables work best, but you can also use carrots, peas, corn, or green beans. Fresh, frozen, or canned vegetables all work.


    How do I keep Shepherd’s Pie from being watery?

    Let the meat mixture simmer uncovered so excess liquid can cook off. This helps thicken the filling and keeps the final dish from becoming runny.


    What size baking dish should I use?

    A standard 9×13-inch baking dish works well for this recipe. You can also use a slightly smaller dish for a thicker Shepherd’s Pie.


    How do I know when Shepherd’s Pie is done baking?

    The Shepherd’s Pie is ready when the mashed potatoes on top are lightly golden and the filling is hot and bubbling around the edges.


    Can I add cheese to the mashed potato topping?

    Yes, if your family likes cheese. Adding shredded cheddar or Colby Jack to the mashed potatoes or sprinkling some on top before baking adds extra flavor.


    How long does Shepherd’s Pie last in the fridge?

    Leftover Shepherd’s Pie can be stored in an airtight container in the refrigerator for up to 3–4 days. It reheats well in the oven or microwave.


    What should I serve with Shepherd’s Pie?

    Shepherd’s Pie is a complete meal on its own, but it pairs well with simple sides like green beans, a side salad, or crusty bread.


    Is this Shepherd’s Pie recipe kid-friendly?

    Yes. The flavors are mild, the texture is soft, and it’s easy for kids to eat, making it a great family-friendly dinner option.

    Irish Shepherd's Pie

    Irish Shepherd's Pie

    Ingredients

    • 4 cups of prepared mashed potatoes – homemade or instant, both work well
    • 2 tablespoons butter
    • 1 onion, chopped
    • 2 cups mixed vegetables – fresh, frozen, or canned work just fine
    • 1 ½ pounds ground beef or ground turkey
    • ½ cup beef broth
    • 1 teaspoon worcestershire sauce
    • Salt & Pepper to taste
    • Dry parsley

    Instructions

    Preheat oven to 400 degrees.

    Saute onion in butter until tender.

    Add ground beef or turkey and cook until browned. 

    Stir in  vegetables and cook until tender or warmed through.

    Add in Worcestershire sauce, broth, and salt & pepper to taste. 

    Simmer, uncovered, on low for about 10 minutes.

    Spray a baking dish with nonstick spray and starting with the meat, layer the meat mixture and mashed potatoes until all used, the top layer should be mashed potatoes.

    Bake for about 40 minutes, until the potatoes are golden brown on top. 

    Let stand for about 10 minutes before serving.   

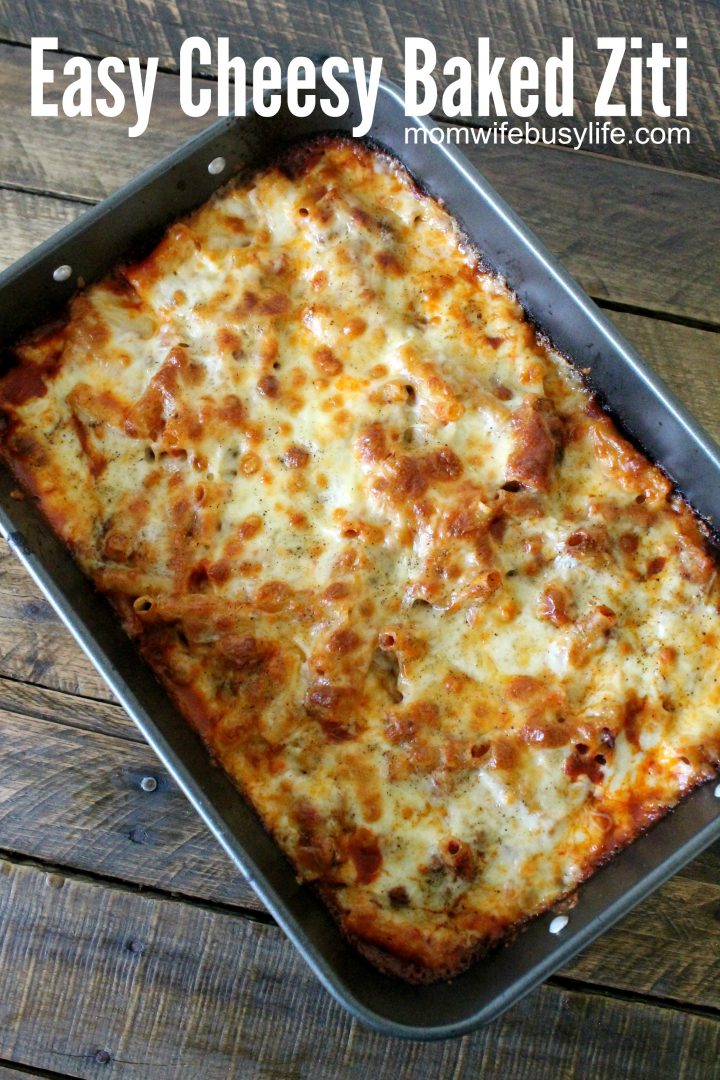
  • Easy Cheesy Baked Ziti with Ground Beef – Family-Friendly Pasta Dinner

    Easy Cheesy Baked Ziti with Ground Beef – Family-Friendly Pasta Dinner

    Easy Cheesy Baked Ziti Recipe

    Looking for a quick, easy baked ziti recipe with ground beef that everyone in the family will love?

    This Easy Cheesy Baked Ziti is comforting and packed with flavor—perfect for busy weeknights, meal trains, or feeding a crowd.

    Pair it with garlic bread, a fresh salad, or roasted vegetables for a complete Italian-inspired meal.


    Why This Recipe Is a Family Favorite

    • Quick & Easy: Ready in under an hour, making it perfect for busy moms and dads.
    • Feeds a Crowd: Great for families of 4–6, with plenty of leftovers for the next day.
    • Versatile: Swap ground beef for Italian sausage, ground turkey, or chicken.
    • Make-Ahead & Freezer Friendly: Bake now or freeze for later to save time.

    This baked ziti has been a go-to recipe for my family for years. As a mom of three and a military spouse, I need meals that are simple to make, satisfying, and able to feed everyone—including my husband, who comes home hungry after a long day.

    It’s also the perfect dish to bring to meal trains. Whether helping a friend with a new baby or supporting a family during a deployment, this baked ziti is a comforting, hearty option that’s sure to please everyone.

    You may also like:


    Tips for Making the Best Baked Ziti

    • Freeze Ahead: Wrap tightly and store in the freezer before baking. Thaw in the fridge overnight and bake as usual.
    • Cover or Uncover: Baking uncovered gives a bubbly, golden cheese topping, but you can cover it with foil if you prefer softer cheese.
    • Meat Variations: Try Italian sausage, ground turkey, or even lamb to switch up the flavor.
    • Serving Suggestions: Serve with garlic bread, a fresh salad, roasted vegetables, or sautéed mushrooms.

    Frequently Asked Questions

    What is ziti pasta?
    Ziti is a long, tubular Italian pasta made from durum wheat. It works perfectly in baked pasta dishes, soups, and stews.

    Can baked ziti be frozen?
    Yes! Freeze in an airtight container or wrapped in foil. Thaw overnight in the fridge and reheat in a 350°F oven until warmed through.

    Can I use other meats instead of ground beef?
    Absolutely! Italian sausage, ground turkey, or chicken are all great options. Experiment to find your favorite combination.

    Should I cover baked ziti while baking?
    It’s up to you. Covering with foil keeps the cheese soft, while baking uncovered creates a bubbly, golden top.


    Why This Recipe Works for Families

    This cheesy baked ziti is easy, filling, and guaranteed to be a hit.

    Perfect for busy nights, meal prep, feeding a crowd, or sharing with friends and neighbors during meal trains.

    It’s the kind of dish that brings comfort, convenience, and smiles to every table.

    Easy Cheesy Baked Ziti Recipe

    Ingredients: 

    • 1 box of Ziti noodles
    • 2 (24 oz.) jars of spaghetti sauce
    • 2 lbs. ground beef
    • 1 onion
    • 1 lb. bag of shredded mozzarella cheese
    • 1 tbsp. olive oil
    • 1 tsp. black pepper
    • Optional: 1 tsp. salt

    Product recommendation: This jumbo cooker is my favorite! I use this skillet to cook the meat sauce for this recipe.

    Directions:

    Preheat oven to 400 degrees.

    Brown ground beef in a large deep skillet.

    Add two jars of spaghetti sauce to the beef.

    Stir the sauce and the beef mixture around until combined well.

    Simmer on low heat.

    Using a cutting board and knife, cut the onion into thin slices.

    In a small skillet, saute the onions with olive oil until onions are caramelized.

    Pour onions into the beef mixture and stir until mixed.

    In a large pot, boil two quarts of water.

    Add Ziti pasta noodles and boil for 10-11 minutes, stirring well so the noodles don’t stick together.

    Drain the noodles using a colander.

    Add desired amount of Ziti noodles to beef mixture.

    Note: I usually use about 2/3 to 1/2 box of the Ziti noodles. I prefer more meat sauce over noodles – add more noodles if you like to have more noodles in your recipe!

    Mix the noodles into the meat sauce.

    Scoop mixture into a 13 X 9 baking pan.

    Sprinkle mozzarella cheese on top until covered.

    Sprinkle with pepper and salt if desired for added flavor. Note: The cheese does contain salt, keep that in mind when creating your recipe!

    Bake for 20-30 minutes, or until cheese is slightly browned.

    Let us know how your Baked Ziti turned out! I hope your family enjoys this recipe as much as we do!

    Easy Cheesy Baked Ziti

    Easy Cheesy Baked Ziti

    Ingredients

    • 1 box of Ziti noodles
    • 2 (24 oz.) jars of spaghetti sauce
    • 2.25 lbs. ground beef
    • 1 onion
    • 1 lb. mozzarella cheese
    • 1 tbsp. olive oil
    • 1 tsp. black pepper
    • Optional: 1 tsp. salt

    Instructions

    Preheat oven to 400 degrees.

    Brown ground beef in a large deep skillet.

    Add two jars of spaghetti sauce to the beef.

    Stir the sauce and the beef mixture around until combined well.

    Simmer on low heat.

    Using a cutting board and knife, cut the onion into thin slices.

    In a small skillet, saute the onions with olive oil until onions are caramelized.

    Pour onions into the beef mixture and stir until mixed.

    In a large pot, boil two quarts of water.

    Add Ziti pasta noodles and boil for 10-11 minutes, stirring well so the noodles don’t stick together.

    Drain the noodles using a colander.

    Add desired amount of Ziti noodles to beef mixture.

    Mix the noodles into the meat sauce.

    Scoop mixture into a 13 X 9 baking pan.

    Sprinkle mozzarella cheese on top until covered.

    Sprinkle with pepper and salt if desired for added flavor.

    Bake for 20-30 minutes, or until cheese is slightly browned.

  • Air Fryer Mummy Hot Dogs

    Air Fryer Mummy Hot Dogs

    Air Fryer Mummy Hot Dogs

    Halloween is just around the corner, and as a busy mom, you’re likely juggling a million things at once.

    Between decorating, planning costumes, and managing the day-to-day, finding time to whip up festive treats can feel like a daunting task.

    That’s where the Air Fryer Mummy Hot Dogs come to the rescue—a simple, quick, and kid-approved recipe that adds a fun Halloween twist to your meal planning without taking up too much of your precious time.

    You may also like:

    Why Make Air Fryer Mummy Hot Dogs?

    When it comes to Halloween, it’s all about embracing the spooky spirit, but that doesn’t mean you need to spend hours in the kitchen.

    This recipe is perfect for busy moms who want to bring a touch of Halloween fun to the table without the hassle.

    The Air Fryer Mummy Hot Dogs are ready in under 20 minutes, making them a lifesaver for those busy weeknights or when you need a last-minute party snack.

    When and Where to Serve Them

    These Mummy Hot Dogs are incredibly versatile, making them a great choice for various occasions throughout the Halloween season.

    Here are a few ideas on when and where you can serve them:

    • Weeknight Dinner: Turn an ordinary weeknight dinner into a Halloween-themed meal that your kids will actually look forward to. Pair the mummy dogs with some roasted veggies or a simple salad, and you’ve got a balanced meal in no time.
    • Halloween Party: If you’re hosting or attending a Halloween party, these mummy dogs make for a crowd-pleasing appetizer. They’re easy to transport and serve, and they fit right in with any spooky spread.
    • School Lunch: Surprise your little ones with a special Halloween treat in their lunchbox. These mummy dogs are just as delicious when cooled, and they’re sure to be a hit with their friends.
    • After-School Snack: For those afternoons when the kids come home hungry, these mummy dogs are a fun and filling option that you can whip up in minutes.

    Extra Tips for Busy Moms

    To make this recipe even easier, here are a few tips:

    • Prep Ahead: If you’re really strapped for time, you can wrap the hot dogs in crescent dough earlier in the day or even the night before. Keep them in the fridge until you’re ready to air fry, and then pop them in when you need them.
    • Customize: If your kids have dietary restrictions, this recipe is easy to customize. Use gluten-free dough or veggie dogs to make it work for your family’s needs.
    • Get the Kids Involved: This recipe is simple enough that your kids can help with the wrapping process. Let them have fun creating their own mummy designs, and it turns into a fun family activity.

    In a nutshell, Air Fryer Mummy Hot Dogs are the perfect solution for moms who want to bring a bit of Halloween fun to their meals without sacrificing time or effort.

    Whether you’re prepping for a party or just need a quick dinner idea, this recipe is sure to become a Halloween staple in your home.

    Air Fryer Mummy Hot Dogs

    • Servings: 8
    • Prep Time: 10 minutes
    • Cook Time: 7 minutes
    • Cool Time: 2 minutes
    • Total Time: 19 minutes

    Ingredients:

    • Crescent rolls
    • Hot dogs
    • Edible eyeballs

    Directions:

    Preheat your air fryer to 350°F (175°C) for about 5 minutes.

    Unroll the crescent roll dough and separate it into triangles.

    Using a knife or pizza cutter, slice each triangle into thin strips (about 1/4 inch wide).

    air fryer mummy hot dogs

    Take one hot dog and start wrapping it with a crescent roll strip, leaving a small gap for the face. Continue wrapping until the hot dog is covered, resembling a mummy.

    Repeat with the remaining hot dogs and crescent roll strips.

    Place the wrapped hot dogs in the air fryer basket, making sure they are not touching each other.

    air fryer mummy hot dogs

    Air fry at 350°F (175°C) for 5-7 minutes or until the crescent rolls are golden brown and cooked through.

    Remove the mummy dogs from the air fryer and let them cool slightly.

    Place the edible eyeballs in the gap you left for the face. If needed, you can use a tiny bit of mustard or ketchup to help the eyeballs stick.

    air fryer mummy hot dogs

    Serve the mummy dogs warm with your favorite dipping sauces like ketchup or mustard.

    air fryer mummy hot dogs

    Air Fryer Mummy Hot Dogs

    Air Fryer Mummy Hot Dogs

    Ingredients

    • Crescent rolls
    • Hot dogs
    • Edible eyeballs

    Instructions

    Preheat the Air Fryer: Preheat your air fryer to 350°F (175°C) for about 5 minutes.

    Prepare the Crescent Rolls: Unroll the crescent roll dough and separate it into triangles.

    Using a knife or pizza cutter, slice each triangle into thin strips (about 1/4 inch wide).

    Wrap the Hot Dogs: Take one hot dog and start wrapping it with a crescent roll strip, leaving a small gap for the face. Continue wrapping until the hot dog is covered, resembling a mummy.

    Repeat with the remaining hot dogs and crescent roll strips.

    Place the wrapped hot dogs in the air fryer basket, making sure they are not touching each other.

    Air fry at 350°F (175°C) for 5-7 minutes or until the crescent rolls are golden brown and cooked through.

    Remove the mummy dogs from the
    air fryer and let them cool slightly.

    Place the edible eyeballs in the gap you left for the face. If needed, you can use a tiny bit of mustard or ketchup to help the eyeballs stick.

    Serve the mummy dogs warm with your favorite dipping sauces like ketchup or mustard.

    Frequently Asked Questions

    Can I make Air Fryer Mummy Hot Dogs ahead of time?

    Yes, you can prepare the hot dogs by wrapping them in the crescent roll dough ahead of time and storing them in the refrigerator. When you’re ready to serve, simply pop them in the air fryer for a few minutes.

    What if I don’t have an air fryer? Can I still make these?

    If you don’t have an air fryer, you can bake the mummy hot dogs in a conventional oven at 375°F (190°C) for about 12-15 minutes or until the crescent rolls are golden brown.

    Can I use different types of hot dogs or sausages?

    Yes, you can customize this recipe to fit your dietary needs or preferences. Feel free to use turkey dogs, veggie dogs, or any type of sausage you prefer.

    How do I keep the mummy hot dogs warm for a party?

    If you’re serving these at a party and want to keep them warm, you can place the cooked mummy dogs on a baking sheet and keep them in a low oven (about 200°F or 93°C) until you’re ready to serve.

    Can I freeze the mummy hot dogs?

    While it’s possible to freeze them, they are best enjoyed fresh. If you do freeze them, wrap them individually and store in an airtight container. Reheat in the air fryer or oven before serving.

    What can I use instead of edible eyeballs?

    If you don’t have edible eyeballs, you can use small dots of mustard or ketchup for the eyes, or even tiny pieces of black olives or raisins.

    Are Air Fryer Mummy Hot Dogs safe for school lunches?

    Yes, these mummy dogs are a great option for school lunches. Just make sure they’re cooled completely before packing them in a lunchbox.

    How can I make these gluten-free?

    To make this recipe gluten-free, use a gluten-free crescent roll dough and ensure that your hot dogs are also gluten-free.

    Can kids help make these?

    This recipe is simple and fun, making it a great activity to involve your kids in the kitchen. They can help with wrapping the dough around the hot dogs and adding the eyes.

    What dipping sauces go well with Air Fryer Mummy Hot Dogs?

    You can serve these with a variety of dipping sauces like ketchup, mustard, BBQ sauce, or even a spicy aioli. Let your kids choose their favorites!

  • Air Fryer Corn On The Cob

    Air Fryer Corn On The Cob

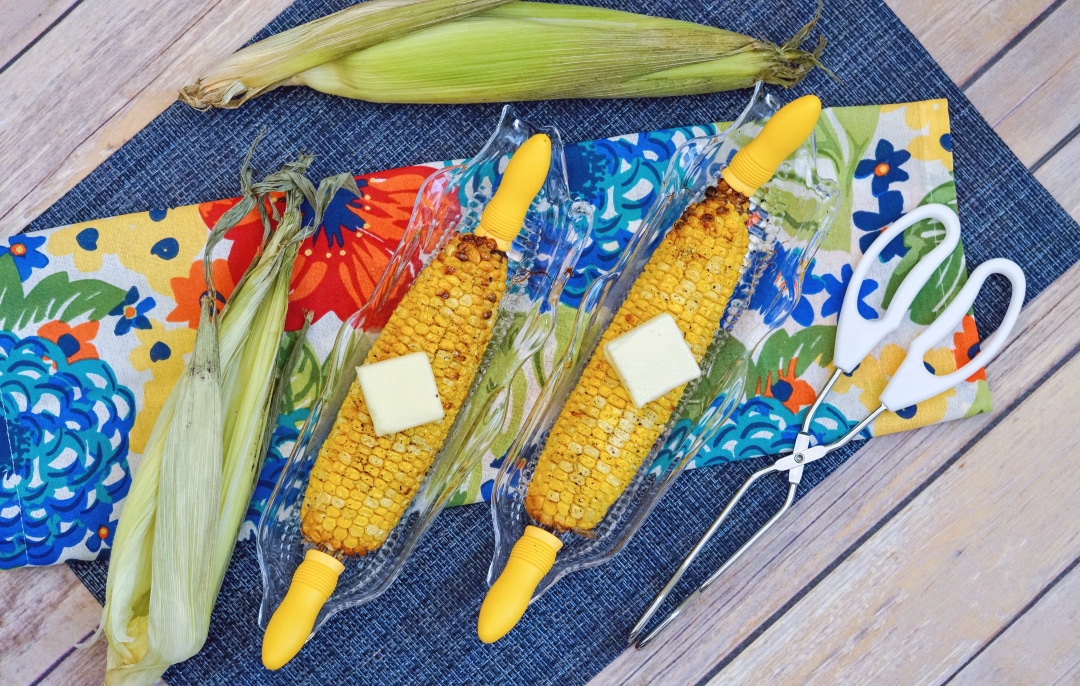
    This Air Fryer Corn on the Cob recipe is a great addition to your summer meal planning! Add this tasty side to your family dinner tonight!

    I know how hectic life can get, especially during summer when you want to spend more time enjoying the sunshine with your family.

    That’s why I’m here to share with you a fantastic recipe that will save you time in the kitchen while delighting your taste buds and your family’s.

    Coca-Cola Baked Beans

    Sheet Pan Garlic Herb Potatoes

    Imagine juicy and flavorful corn on the cob, perfectly cooked using an air fryer.

    Intrigued? Let me convince you why making an air fryer corn on the cob should be your go-to summer side dish!

    Time-Saver Extraordinaire

    As a busy mom, you’re always on the lookout for ways to save time without compromising taste.

    Air fryers are renowned for their efficiency, and corn on the cob is no exception. By utilizing this kitchen gadget, you’ll significantly cut down on cooking time compared to traditional boiling or grilling methods.

    Air frying takes only about 10-15 minutes, allowing you to prepare a wholesome side dish in a flash.

    >>> Shop Air Fryers

    No-Fuss and Mess-Free

    Let’s face it: kitchen clean-up can be a real hassle. With air fryer corn on the cob, you can kiss messy pots, boiling water, and grill scrubbing goodbye.

    Simply shuck the corn, season it to your liking, pop it into the air fryer basket, and let the magic happen.

    The air fryer’s self-contained cooking process means no splattering, no greasy stove, and no dirty grates to clean.

    After the cooking is done, just wipe down the air fryer basket, and you’re good to go!

    Healthy and Flavorful Delight

    As a mom, you’re always striving to provide your family with nutritious meals. Air fryer corn on the cob delivers a healthy option without sacrificing flavor.

    Unlike deep-frying, the air frying method requires little to no oil, resulting in a lighter and guilt-free dish.

    The hot circulating air in the fryer ensures the corn cooks evenly while sealing in all the natural flavors and juiciness.

    You’ll end up with beautifully caramelized kernels that burst with sweetness and a satisfying crunch!

    Versatility and Creativity

    The air fryer opens up a world of culinary possibilities beyond traditional corn on the cob.

    Experiment with different seasonings and spices to elevate the taste. Sprinkle some chili powder and lime for a zesty kick, or try garlic butter and parmesan for a savory twist.

    You can even wrap the corn in bacon for an indulgent treat.

    With an air fryer, you’ll have the freedom to explore and customize your corn on the cob recipes to suit your family’s preferences.

    Family-Friendly Fun

    Involving your children in meal preparation can be a delightful bonding experience. Making air fryer corn on the cob can become a fun family activity.

    Let your kids shuck the corn or help you season it. They’ll enjoy watching the transformation of raw corn into a delicious dish through the magic of air frying.

    Plus, you’ll be instilling in them the importance of healthy eating and cooking skills that they can carry with them throughout their lives.

    What do kids learn while cooking?

    Busy mom, an air fryer corn on the cob recipe is a game-changer for your summer side dish repertoire.

    With its time-saving nature, easy cleanup, health benefits, versatility, and family-friendly appeal, it’s a win-win for everyone.

    So why not treat your family to a delectable, no-fuss corn on the cob experience?

    Embrace the convenience and flavor that an air fryer brings to the table, and create lasting memories while spending less time in the kitchen.

    Enjoy the best of summer with this irresistible

    Air Fryer Corn On the Cob

    Ingredients:

    • corn on the cob
    • salt
    • pepper
    • garlic
    • 1/2 cup melted butter
    • room temperature butter
    air fryer corn on the cob

    Directions:

    Remove the husk and silk threads from the corn.

    Coat corn in melted butter.

    Place in air fryer for 15 minutes at 400 degrees.

    Remove from air fryer. 

    Smother in butter, salt, pepper, garlic.

    Air Fryer Corn on the Cob

    Air Fryer Corn on the Cob

    Ingredients

    • Corn
    • Salt
    • Pepper
    • Garlic
    • 1/2 Cup Melted Butter
    • Room Temperature Butter

    Instructions

    Remove the husk and silk threads from the corn.

    Coat corn in melted butter.

    Place in air fryer for 15 minutes at 400 degrees.

    Remove from air fryer. 

    Smother in butter, salt, pepper, garlic to your liking and enjoy!!! 

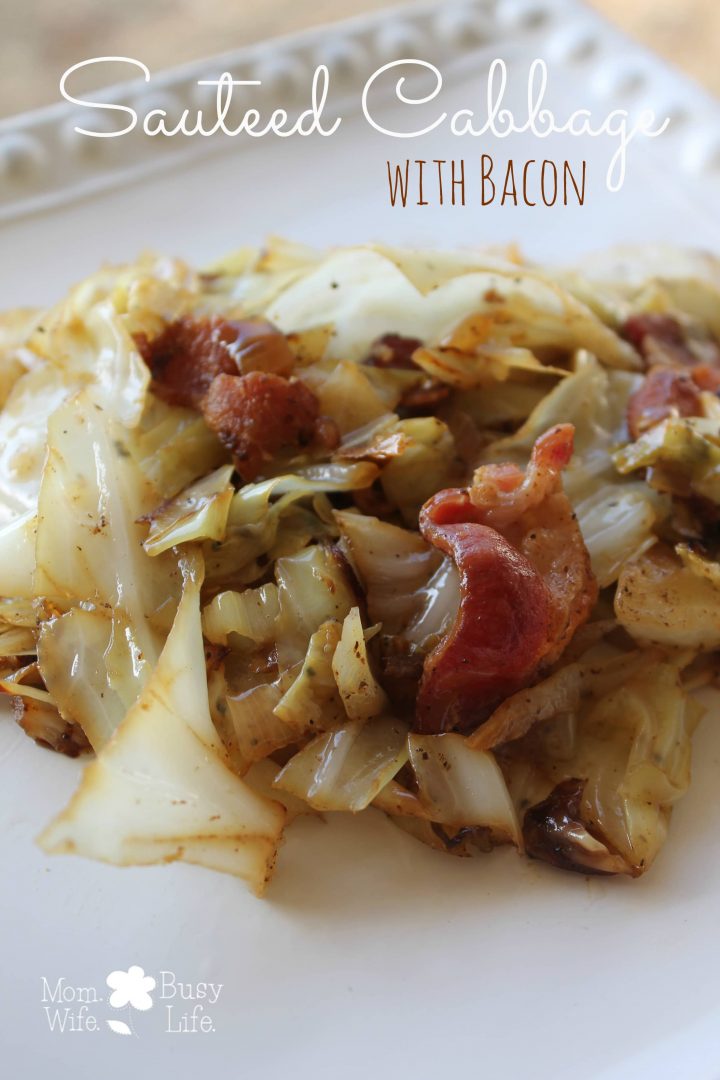
  • Sauteed Cabbage with Bacon

    Sauteed Cabbage with Bacon

    Are you looking for a delicious dinnertime solution for your family? Try this amazing Sauteed Cabbage with Bacon recipe!

    Sauteed Cabbage with Bacon

    The Sauteed Cabbage with Bacon recipe is a tradition of ours each year. We make this recipe every New Year’s Day.

    This tradition started with our own families making the dish and it’s been carried on for years and will be a favorite of ours at the start of every new year!

    It’s easy to make and tastes great!

    Sauteed foods are a favorite of mine. When you saute something, this means that you cook it quickly in a pan over high heat. This is a common cooking method for meats and vegetables alike.

    Sauteing allows the food to retain its natural juices and flavors, while also giving it a nice crispy texture.

    Black Eyed Peas with Bacon

    Corn Bread Recipes

    Sauteed cabbage with bacon is a delicious and easy way to get your family to eat their greens. Cabbage is packed with nutrients, including vitamins C and K, and fiber.

    There are many different ways to enjoy sauteed cabbage, but one of the best is with bacon. The salty, savory flavors of bacon complement the sweetness of the cabbage perfectly. Bacon adds a delicious smoky flavor and crispy texture.

    Other great pairings for Sauteed Cabbage include sausage, ham, and chicken. No matter what your taste, there’s a delicious way to enjoy this healthy vegetable dish.

    This dish is sure to be a hit with everyone at the dinner table.

    Sauteed Cabbage with Bacon

    Ingredients:

    • 1 head of cabbage
    • 1 onion
    • 4 strips of bacon
    • salt and pepper

    Directions: 

    Chop up the cabbage. Not sure how? Here’s how:

    How to Cut a Head of Cabbage

    If you’re wondering how to cut a head of cabbage, wonder no more! Here’s a quick and easy guide to get the perfect cabbage slices every time.

    First, start by cutting off the bottom of the cabbage head. This will help it sit flat on your cutting board and make it easier to work with.

    Next, cut the cabbage in half through the core. You can then cut each half into quarters or eighths, depending on how thick or thin you want your slices to be.

    Once your cabbage is in quarters or eighths, start slicing it into thin strips. Be sure to hold onto the end of the cabbage as you slice so that it doesn’t fall apart.

    And that’s it!

    Let’s move on to the rest of the recipe!

    Next, chop up or dice the onion.

    Fry 4 strips of bacon in a large frying pan and then chop up. Set aside. (I recommend using this jumbo cooker! We cook just about everything in it!)

    Sautee the chopped onion in remaining bacon fat.

    Slowly add cabbage, stir and add more cabbage as cabbage cooks down.

    Add salt and pepper and serve!

    Check out more recipes here.

  • Southern Cornbread Dressing

    This Southern Cornbread Dressing is perfect served along side your holiday turkey or ham this season!

    The holidays are approaching! Families will soon gather together to celebrate the holiday season over plenty of good food, fun, and festivities.

    One of my favorite memories as a little girl was celebrating the holiday season with my family, especially when my cousins would come over.

    I remember watching the parades in the morning on t.v. and then eating a late holiday lunch. 

    Afterwards, we would head outside to play. We would throw the football around to each other or play games of hide and seek.

    The adults – my aunts and uncles, were usually assigned with the harder tasks.

    They were to each bring a special dish to the gathering as a contribution so that the responsibilities of cooking, which is a big responsibility, didn’t fall on just one person. 

    This tradition made it easier on everyone and the family had plenty of time to visit with each other and enjoy each other’s company.

    Thankfully after I married my husband, I noticed that his family carried on the same traditions.

    It’s a beautiful thing to see everyone pitch in to provide the holiday meals each season.

    Everyone contributes their favorite dish and we all gather together to enjoy conversations and plenty of laughs.

    I’m also thankful that my side of the family and my husband’s side of the family are great cooks! As I get older, I cherish the recipes that are created with love in the kitchen that have been passed on by mothers and grandmothers in the family.

    As a kid, it’s easy to overlook how much hard work goes into each dish that’s prepared over the holidays, but now that I have kids of my own, I can only hope to pass these family recipes down to my own kids.

    They will be able to prepare these special dishes for their own families as the recipes and traditions get passed down.

    This holiday season, I’ll be making a Southern Cornbread Dressing Recipe with Homestyle Herbed Gravy to serve with a glazed baked ham. 

    This particular dressing recipe is my husband’s favorite.

    He says that out of all of the side dishes that are served during the holidays, the dressing side dish is the dish he looks forward to the most!

    I can understand why. It is moist and flavorful and a perfect addition to any holiday meal this season. 

    Serve this dressing alongside of turkey, baked ham, roast and all of the traditional sides that are served during holiday meals.

    I am thankful for my mother-in-law who passed down her grandmother’s dressing recipe to my family.

    She wrote it down for me a few years back to keep in my recipe box! I will be forever grateful and this will be my go-to dressing recipe for years to come.

    For this dressing recipe, I give you step by step instructions and photos so that you can follow along and learn how to create your own Southern Cornbread Dressing Recipe this holiday season!

    Southern Cornbread Dressing

    Ingredients:

    • 1 9X9 pan of cornbread (here’s my homemade cornbread recipe)
    • 8 slices of toasted bread
    • 1 12 count (12 oz.) can of small biscuits (baked)
    • 1 cup green onions chopped (3 stalks)
    • 1 cup chopped onion
    • 1 1/4 cup melted butter
    • 3 tbsp. rubbed sage 
    • 2 eggs
    • 3 cups chicken broth
    • 1/2 tsp salt
    • 1/4 tsp ground pepper 

    Directions:

    Preheat oven to 375 degrees.

    Gather the baked biscuits, toasted bread, and cornbread.

    McCormick1

    Crumble the biscuits into a large mixing bowl.

    Southern Cornbread Dressing Recipe

    Crumble the toasted bread into a large mixing bowl on top of the biscuits.

    Southern Cornbread Dressing Recipe

    Crumble the cornbread into the large mixing bowl on top of the bread.

    Southern Cornbread Dressing Recipe

    Add salt, ground pepper and rubbed sage.

    Southern Cornbread Dressing Recipe

    Add both onions.

    Southern Cornbread Dressing

    Southern Cornbread Dressing

    Add eggs, butter, and chicken stock to the mixture.

    Southern Cornbread Dressing

    Southern Cornbread Dressing

    Stir mixture together until mixture is combined well and moist.

    Southern Cornbread Dressing

    Southern Cornbread Dressing

    Place mixture in a casserole pan and press mixture down with large spoon until even.

    Southern Cornbread Dressing

    Bake for 45 minutes to 1 hour or until golden brown.

    Southern Cornbread Dressing

    Southern Cornbread Dressing

    Southern Cornbread Dressing

    Southern Cornbread Dressing

    Ingredients

    • 1 9X9 pan of cornbread (here’s my homemade cornbread recipe)
    • 8 slices of toasted bread
    • 1 12 count (12 oz.) can of small biscuits baked
    • 1 cup green onions chopped (3 stalks)
    • 1 cup chopped onion
    • 1 1/4 cup melted butter
    • 3 tbsp. rubbed sage
    • 2 eggs
    • 3 cups chicken broth
    • 1/2 tsp salt
    • 1/4 tsp ground pepper

    Instructions

    1. Preheat oven to 375 degrees.

    2. Gather the baked biscuits, toasted bread, and cornbread.

    3. Crumble the biscuits into a large mixing bowl.

    4. Crumble the toasted bread into a large mixing bowl on top of the biscuits.

    5. Crumble the cornbread into the large mixing bowl on top of the bread.

    6. Add salt, ground pepper, and rubbed sage.

    7. Add both onions.

    8. Add eggs, butter, and chicken stock to the mixture.

    9. Stir mixture together until mixture is combined well and moist.

    10. Place mixture in a casserole pan and press mixture down with large spoon until even.

    11. Bake for 45 minutes to 1 hour or until golden brown.

    Southern Cornbread Dressing
    Southern Cornbread Dressing

    Did you know that dressing is also a popular recipe to serve at Christmas? This dressing recipe is PERFECT for serving at your holiday lunch or dinner this year!

    Southern Cornbread Dressing