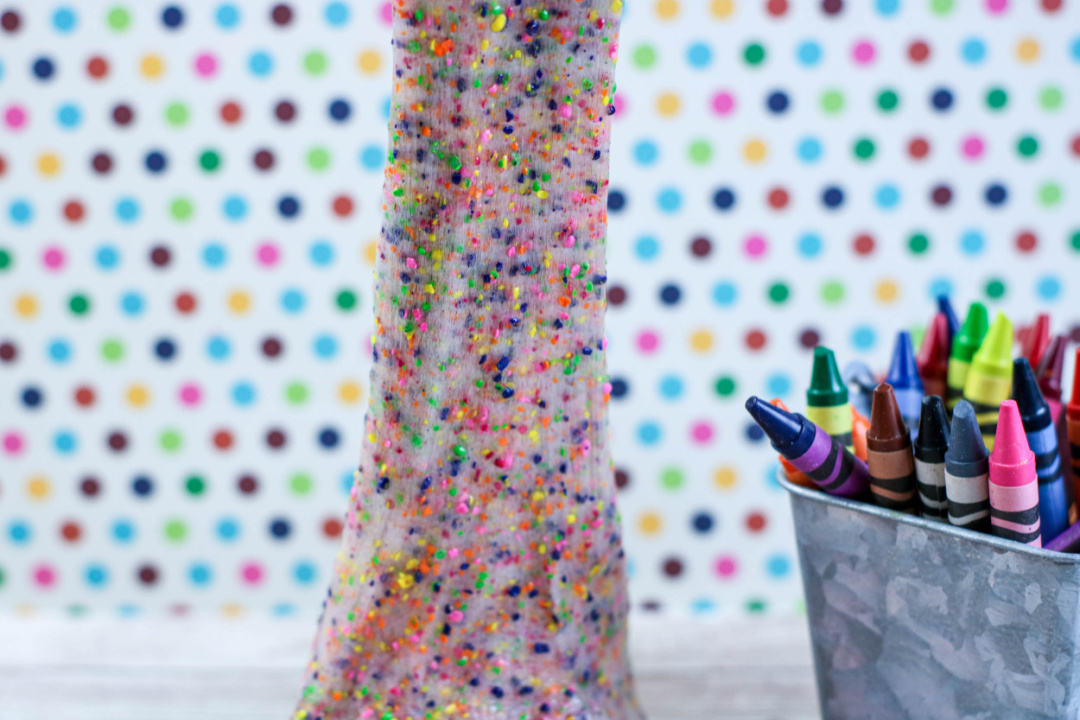
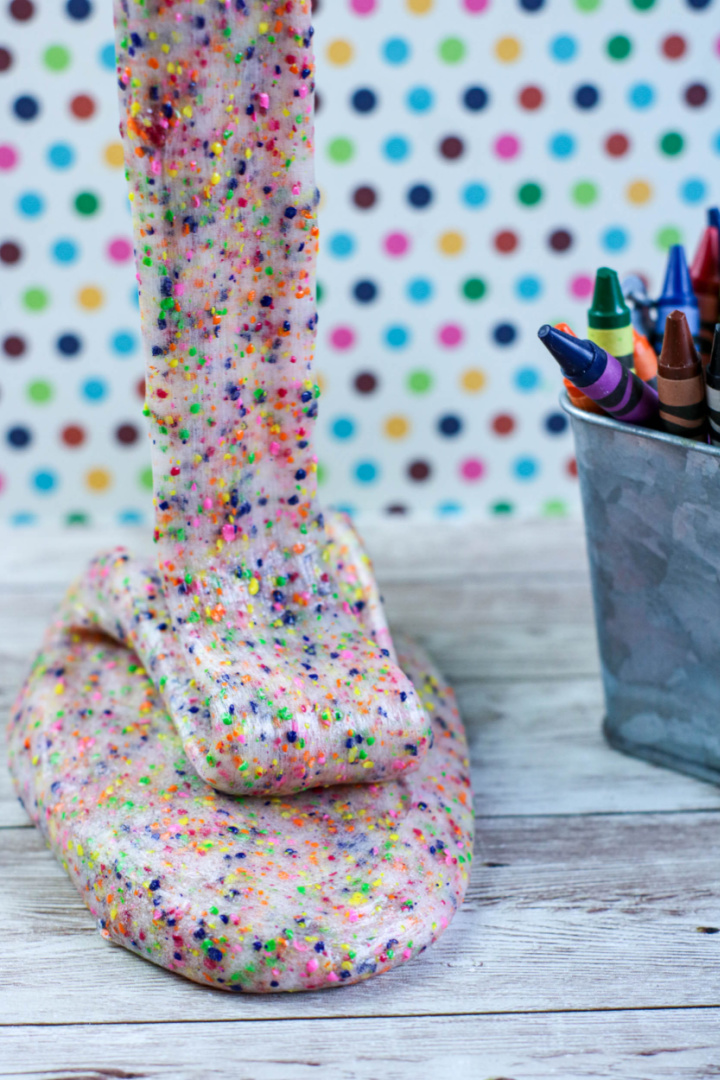
Make this bright, colorful, and stretchy Crayon Slime with pieces of broken crayons! This is a great back to school activity, too.
Crayon Slime Recipe: A Fun Back to School Activity for Kids
Looking for a hands-on activity that keeps little hands busy and gets creative juices flowing?
This crayon slime recipe is a colorful and budget-friendly way to entertain kids at home—and it’s especially perfect as a back to school activity to spark excitement for the new school year.
Whether you’re homeschooling, looking for an after-school project, or planning a weekend craft, this vibrant DIY slime checks all the boxes.
Who Is This Slime For?
This activity is ideal for kids ages 5 and up (with adult supervision), but older kids and tweens will have just as much fun customizing their own batch.
It’s also a great sensory play project for children who benefit from tactile activities. Moms, teachers, grandparents—anyone looking for a simple, low-mess craft can easily add this to their list of go-to ideas.
What Makes Crayon Slime Different?
Unlike most DIY slime recipes, this one brings in a twist—grated crayons.
Not only does that give the slime a unique speckled look, but it also lets kids choose their favorite colors and even mix and match to make multicolored batches.
It’s a smart way to use up broken crayons hiding at the bottom of the art bin, giving them a second life in a totally new form.
When Can You Use It?
This crayon slime recipe is especially fun to make:
- At the start of the school year as a back to school activity to ease first-week jitters
- On a rainy day when you need an indoor boredom buster
- As a weekend project to break up screen time
- During playdates where each child can make their own custom batch
- As a quiet activity for after school wind-down time
You can even tie it into learning activities by using slime in color mixing lessons, letter tracing, or fine motor skill development.
Where Can You Use or Share It?
Anywhere you can throw down a placemat or a baking sheet works—your kitchen table, a playroom, or even outside on a porch.
Hosting a kids’ craft party? Crayon slime makes a great interactive station.
Need a non-candy classroom favor or birthday bag filler? Portion it into small containers and you’ve got a handmade party favor that won’t go to waste.
Why Moms Love It
Let’s be honest—slime has gotten a bad rap for being messy, but when made with the right balance of ingredients, it’s actually easy to clean up and keeps kids entertained much longer than most crafts.
This recipe only uses a few basic supplies and avoids complicated steps or specialty products.
Plus, it’s a creative way to recycle crayons and sneak in a bit of science as kids observe chemical reactions and texture changes.
How to Use It Creatively
Once the slime is made, the possibilities are endless:
- Make a rainbow batch by grating crayons of different colors and swirling them into the mixture.
- Turn it into a mini art lesson—have kids compare what happens when you use primary vs. secondary colors.
- Use cookie cutters or plastic tools to flatten and shape it.
- Pair it with a themed book or lesson—making blue slime while reading an ocean story or red and yellow slime for a fall leaf unit.
And if you’re prepping for the school year, consider using this crayon slime recipe as a fun icebreaker for your kids’ new classmates or friends. It’s a hands-on way to spark conversation, creativity, and even a little confidence.
Perfect if you’re looking for:
- how to make slime with crayons
- back to school slime activity for kids
- DIY crayon slime recipe for kids
- easy homemade slime using Elmer’s glue
- fun slime project for preschool and elementary kids
Need more fun, affordable craft ideas like this? Be sure to check out my other easy recipes and printables for busy moms!
Crayon Slime
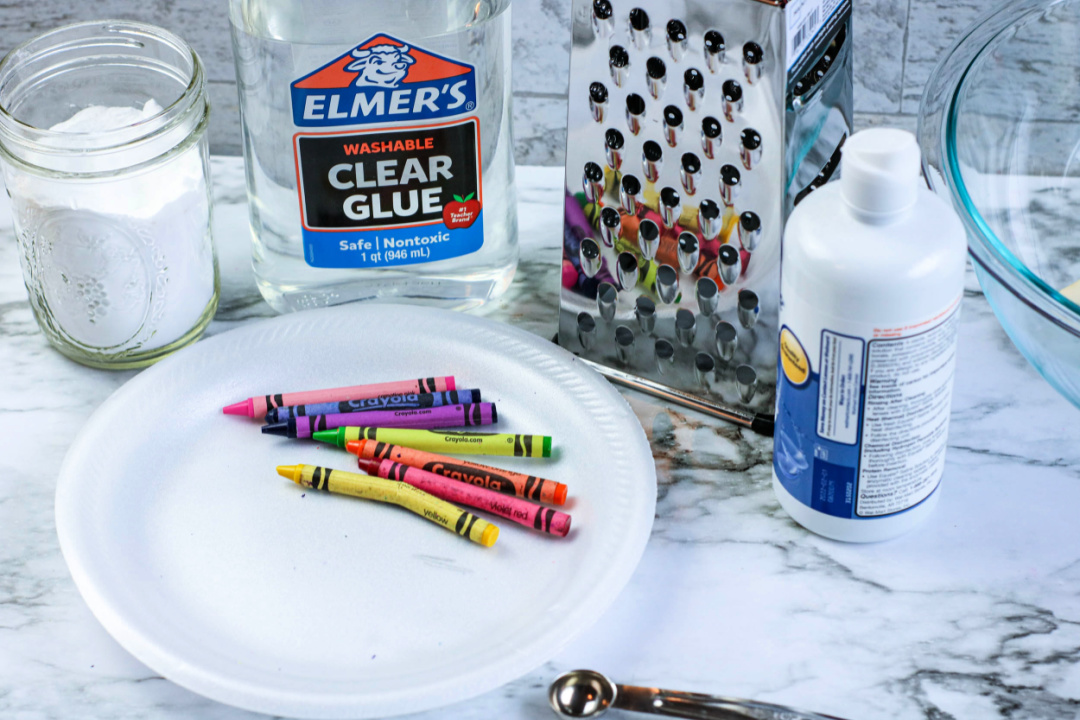
Supplies:
- 1 (6 ounce) bottle clear Elmer’s Glue
- About ¼ cup warm water
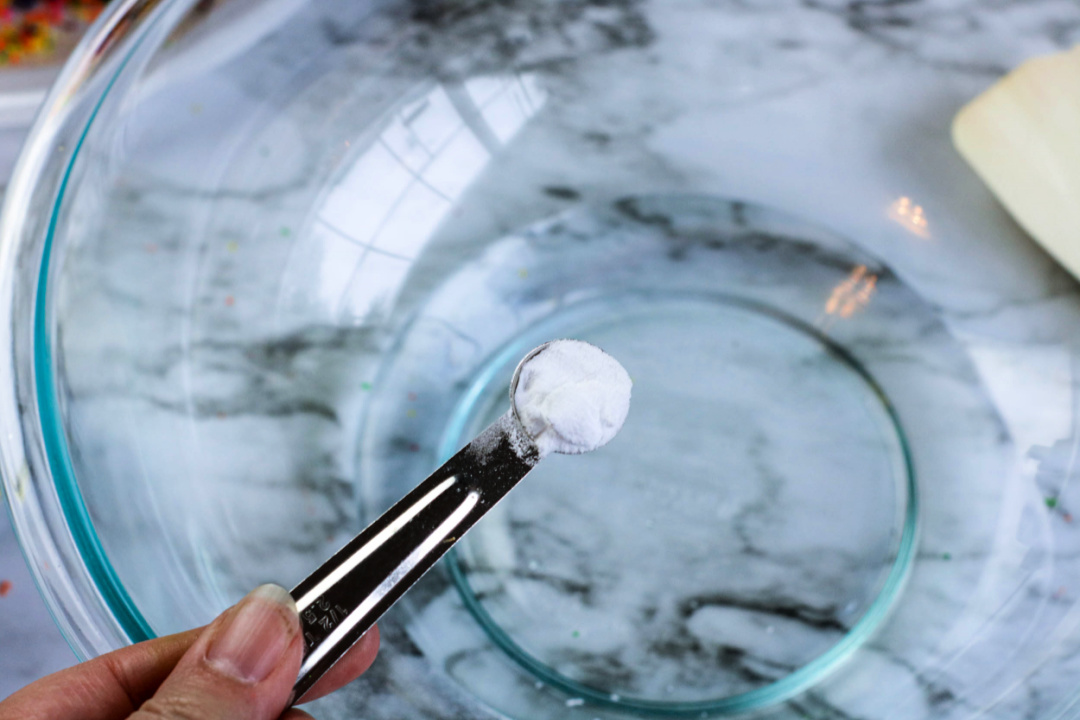
- ½ teaspoon baking soda
- 1 tablespoon contact lens solution (containing boric acid)
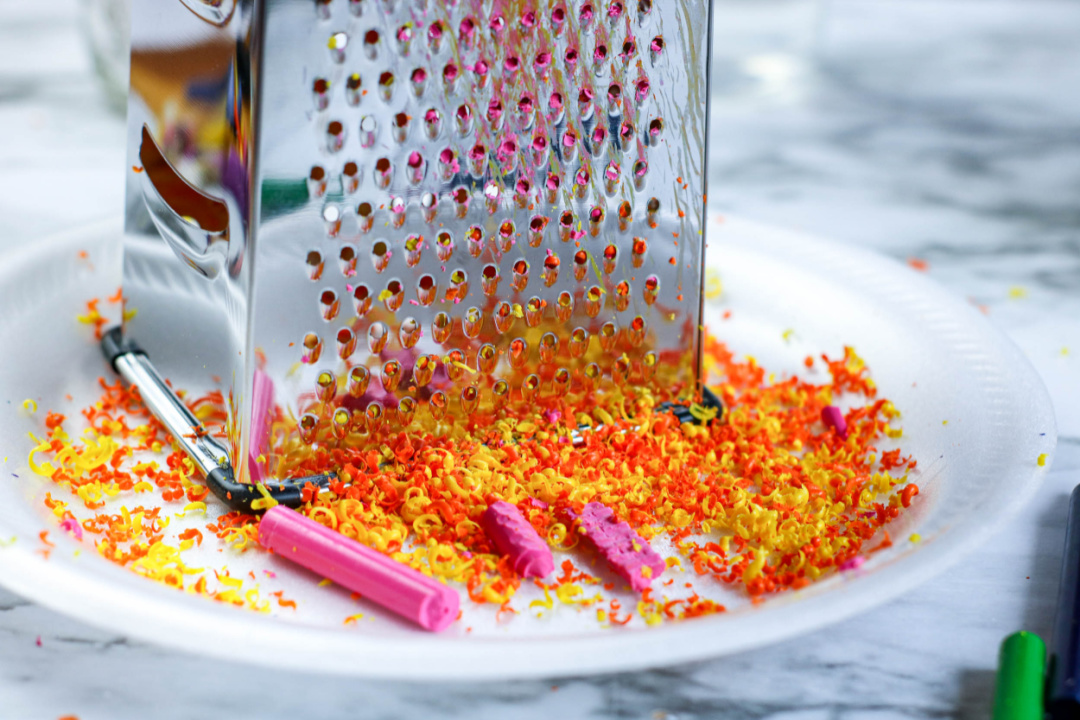
- 6 to 8 Crayons, grated
Directions:
Empty the glue into a large bowl.
Fill the empty glue bottle about ⅓ full with warm water (about ¼ cup) and seal with the lid. Shake well to combine the remaining glue with the water. Pour into bowl with glue and stir to combine.
Add the baking soda to the glue and stir to mix thoroughly.
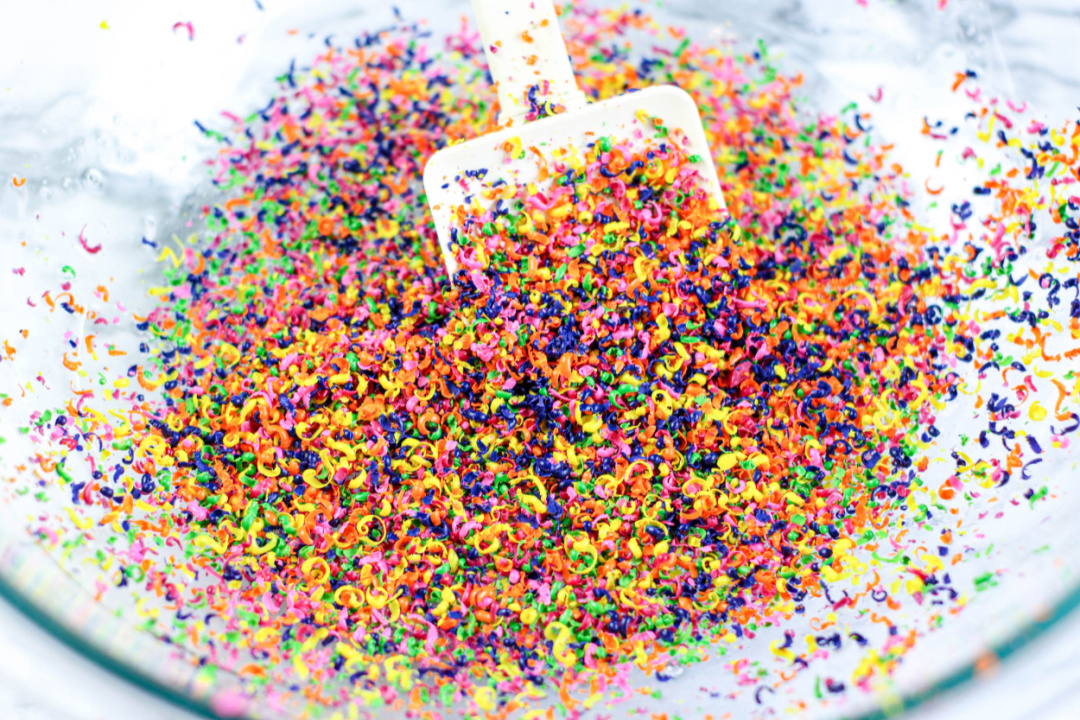
Stir the grated crayons into the glue mixture.
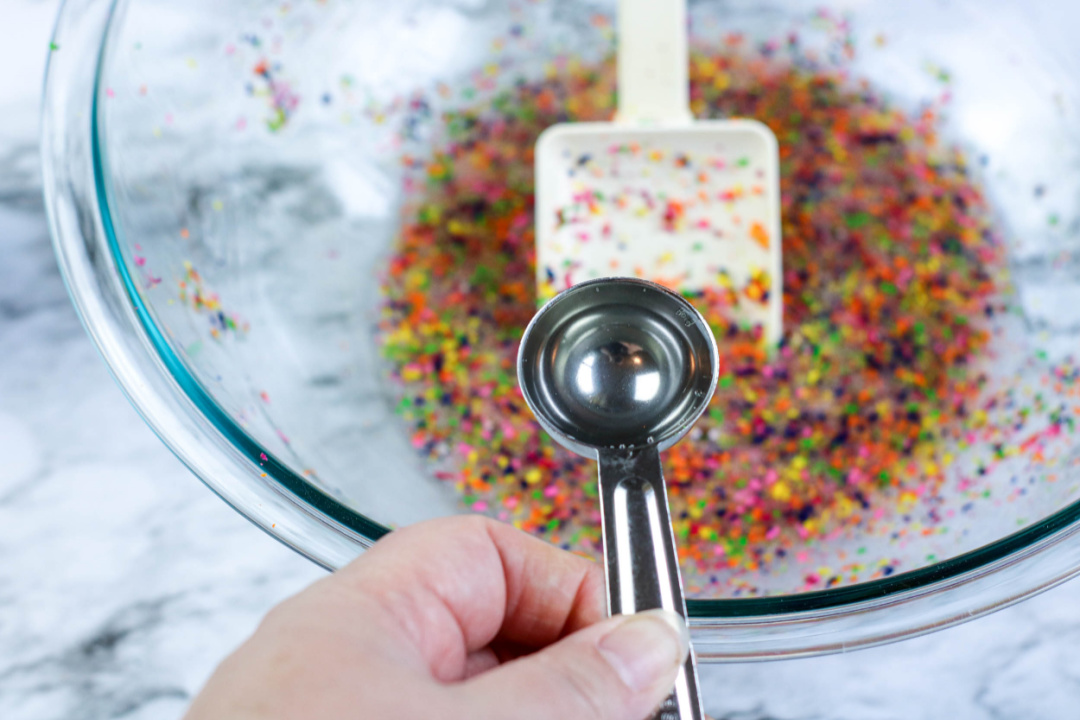
Add contact lens solution to the glue mixture and stir well.
(Note: regular glue will require less contact lens solution than glitter glue. Add the contact lens solution slowly, mixing between additions, and add only enough to bring the glue together into a soft ball.)
Remove the slime from the bowl. The slime will be sticky. Begin to play with the slime, kneading it as you would bread dough, to bring the slime together. The slime is ready when it is no longer sticky.
Best if stored in an airtight container in the refrigerator when not in use.
Helpful Tips for Making and Using Crayon Slime
Grate crayons ahead of time – Use a fine grater or pencil sharpener and prepare a few different colors before you begin. This makes the process smoother, especially if you have younger kids involved.
Use older or broken crayons – This recipe is a great way to use up old crayons that are too small to color with.
Stick with classic crayons – Avoid washable crayons, as they can affect the consistency and may not blend as well into the slime.
Add glitter (optional) – For extra sparkle, add fine glitter along with the grated crayons for a fun sensory twist.
Knead the slime thoroughly – It may start off sticky, but the more you knead it, the smoother and stretchier it becomes.
Start with less contact solution – Add slowly and mix well between additions to avoid over-activating the slime, which can make it rubbery.
Protect your work surface – Use a plastic tablecloth, cutting board, or silicone baking mat to contain the mess and make cleanup easier.
Store slime properly – Keep it in an airtight container or resealable plastic bag and store in the fridge when not in use to extend its life.
Label containers if making multiple colors – Helps kids keep track of their favorite batch (and avoids sibling mix-ups!).
Don’t expect a perfectly smooth texture – The grated crayons give the slime a unique speckled look and a slightly grainy feel—that’s part of the fun!
Use as a color mixing activity – Try combining two crayon colors and talk about what happens when they blend together.
Tie into school themes – Make red, yellow, and blue slime to go with primary color lessons or seasonal colors like orange and brown for fall.
Make it a gift or party favor – Portion slime into small containers, add a sticker or label, and use for birthdays, class parties, or even Halloween treats.
Teach cleanup responsibility – Have kids help clean up and store their slime when done—it’s part of the fun and helps build good habits.
Crayon Slime Recipe – FAQ
Can I use washable crayons instead of regular crayons?
It’s best to stick with regular wax crayons. Washable crayons tend to smear or break down when mixed into slime and may affect the texture or color.
What kind of glue works best for this slime recipe?
Clear Elmer’s glue gives the best results and lets the crayon colors show through nicely. White glue can be used, but it will mute the colors and give a cloudy look.
Can I melt the crayons instead of grating them?
Melting crayons isn’t recommended for slime—it can make the texture oily and messy. Grating them gives a much better texture and a cool speckled appearance.
Is this slime safe for kids?
Yes, with adult supervision. All ingredients are generally safe, but slime should never be eaten. Be sure kids wash their hands after playing.
How do I keep the slime from being too sticky?
If the slime is too sticky, add a small amount of contact solution (a few drops at a time) and knead well. Too much solution will make the slime rubbery, so go slow.
How long does crayon slime last?
Stored in an airtight container in the refrigerator, crayon slime can last up to 1–2 weeks. Discard if it dries out, smells odd, or changes color.
Can I store the slime at room temperature?
You can for short periods (like during play), but for longer storage, the refrigerator is better to prevent mold and keep the texture soft.
What kind of contact solution should I use?
Make sure it contains boric acid and/or sodium borate—these are the activating ingredients that help the slime come together.
Can I make this slime without contact solution?
Not with this recipe. Contact solution works with the baking soda to activate the slime. Saline solution with boric acid may also work in a pinch.
Can this be used in the classroom or for group activities?
Absolutely! This makes a great back to school craft, rainy day project, or hands-on STEM activity. Just prep materials ahead of time and supervise closely.
Crayon Slime

Materials
- 1 (6 ounce) bottle Elmer’s Glue in clear
- About ¼ cup warm water
- ½ teaspoon baking soda
- 1 tablespoon contact lens solution (containing boric acid)
- 6 to 8 crayons, grated
Instructions
Empty the glue into a large bowl.
Fill the empty glue bottle about ⅓ full with warm water (about ¼ cup) and seal with the lid. Shake well to combine the remaining glue with the water. Pour into bowl with glue and stir to combine.
Add the baking soda to the glue and stir to mix thoroughly.
Stir the grated crayons into the glue mixture.
Add contact lens solution to the glue mixture and stir well. (Note: regular glue will require less contact lens solution than glitter glue. Add the contact lens solution slowly, mixing between additions, and add only enough to bring the glue together into a soft ball.)
Remove the slime from the bowl. The slime will be sticky. Begin to play with the slime, kneading it as you would bread dough, to bring the slime together. The slime is ready when it is no longer sticky.
Best if stored in an airtight container in the refrigerator when not in use.