I created a fun beach themed area for my girls to enjoy on their Saturday movie day. Our “Beach Themed Movie Day” turned out to be a huge hit.
We play a day each summer to do this now with the kids!
Indoor Beach Themed Movie Day for Kids
For our indoor beach themed movie day, I picked up a few beach themed party supplies and decorations, snacks, and drinks to make this a day to remember.
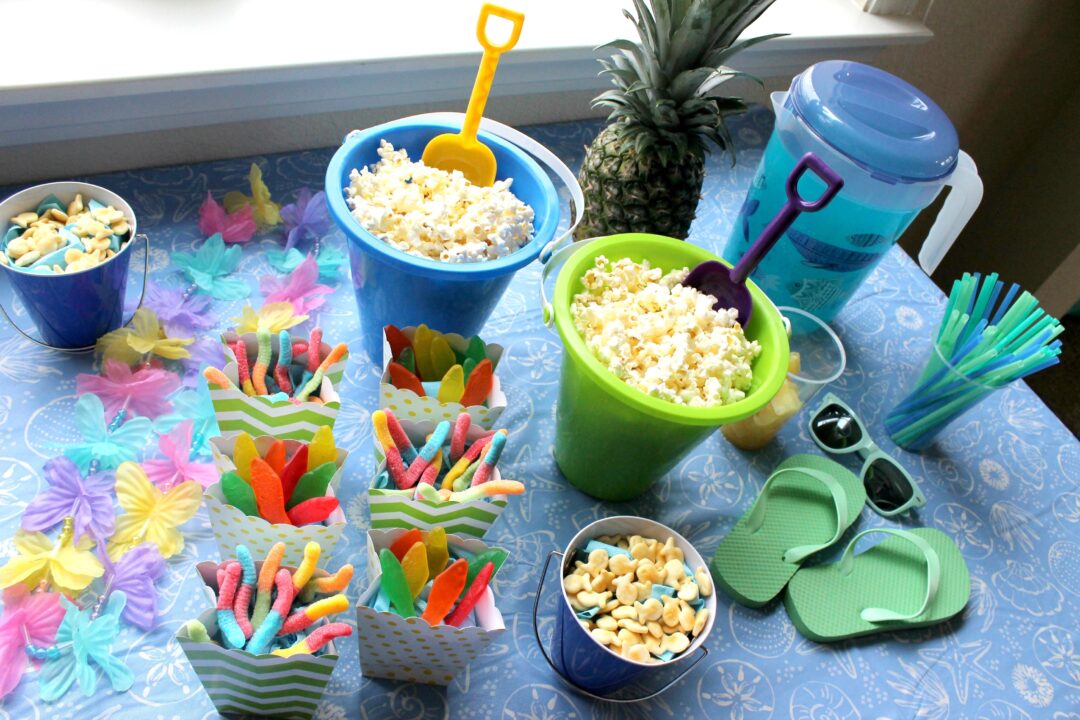
We served treat boxes full of gummy worms, gummy fish, fish crackers, and popcorn inside sand buckets with shovels.
We had a real pineapple displayed with a few pineapple chunks to enjoy.
We served “ocean water” with “seaweed” straws. You can use Hawaiian Punch Berry Blue or any blue drink for this idea. Blue and green straws are best for this idea!
The display of snacks, drinks, and extra decorations such as flip flops for kids and sunglasses for kids were perfect for our Beach Themed Movie Day!
Our party was extra special because of the decor we used to make it seem like we were really at the beach!
The blue beach towels were perfect paired with beach chairs for kids to sit in. The carpet was the “sand.”
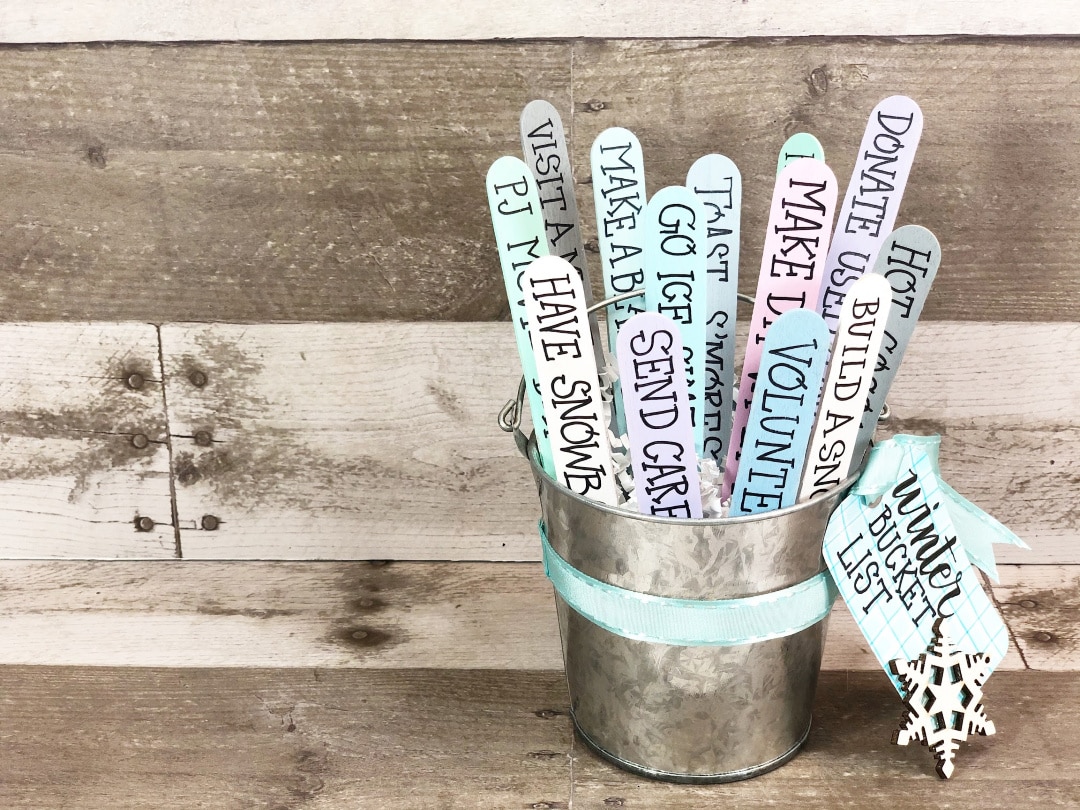
Looking for a simple way to keep kids busy during the long winter months? This popsicle stick winter bucket list craft for kids is an easy, hands-on activity that helps families make the most of winter—without screens or expensive supplies.
This winter bucket list craft combines a fun DIY project with family-friendly winter activities you can enjoy together at home or out and about.
Kids love pulling a stick from the bucket, and parents love having ready-made ideas for snow days, winter break, and cold afternoons.
Why You’ll Love This Winter Bucket List Craft
Encourages quality family time during winter
Uses affordable, easy-to-find craft supplies
Great for indoor winter activities on cold days
Helps kids look forward to seasonal traditions
Can be reused year after year
This craft works well for families with preschool and elementary-aged kids and can also be adapted for classrooms or homeschool settings.
Supplies Needed for a Popsicle Stick Winter Bucket List Craft
Before getting started, gather these simple supplies:
Wooden craft sticks
Small metal bucket
Ribbon
Paper shred
Snowflake cutout
Washable markers
Craft paint
Glue gun and glue sticks
Scissors
Paintbrush
White shipping tag
Black permanent marker
Pencil
These are budget-friendly items you may already have on hand, making this a great low-cost winter activity.
How to Make a Popsicle Stick Winter Bucket List Craft
Step 1: Paint the Craft Sticks
Paint twelve wooden craft sticks on both sides using winter-inspired colors. Set aside to dry completely. Apply a second coat if needed.
Step 2: Write the Winter Bucket List Activities
Use a pencil first, then trace with a permanent black marker to write one winter activity on each craft stick. Kids can help come up with ideas to personalize the bucket list.
You can also write additional activities on the back of each stick for even more options.
Step 3: Decorate the Bucket
Measure and cut ribbon to wrap around the metal bucket. Secure it using a glue gun.
Step 4: Create the Winter Bucket List Tag
Using washable markers, draw a plaid pattern on the white shipping tag. Write “WINTER BUCKET LIST” with a permanent marker.
Cut an 8-inch piece of ribbon, loop it through the tag, and tie it to the bucket handle. Add a snowflake cutout for a festive touch.
Step 5: Assemble the Winter Bucket List
Add paper shred to the bucket, then place the completed craft sticks inside. Your winter bucket list is ready to use.
Winter Bucket List Activity Ideas for Families
Here are some simple and fun ideas to include on your craft sticks:
Build a snowman
Volunteer together
Host a family game night
Send a care package
Toast s’mores
Make DIY Valentine’s
Enjoy hot cocoa by the fire
Visit a local museum
Donate used toys
Build a blanket fort
Have a pajama movie day
Go ice skating
Choose activities that fit your family’s schedule, budget, and weather.
How to Use Your Winter Bucket List
Place the bucket somewhere visible and let kids take turns drawing a stick. Once an activity is completed, remove the stick from the bucket.
For extra memory-making, write the date on each stick and save them in a scrapbook or journal to look back on each winter.
When to Use This Winter Activity
This popsicle stick winter bucket list craft is perfect for:
Snow days
Winter break
Cold weekends
After-school activities
Family night planning
It’s a great way to stay intentional about family time during the colder months.
Make Winter Fun Without Screens
Winter doesn’t have to mean boredom or extra screen time. This popsicle stick winter bucket list craft for kids gives families an easy way to stay connected, creative, and engaged all season long.
Whether you use it once a week or every day during winter break, this simple craft turns ordinary days into meaningful memories.
Winter Bucket List Activity
Materials
Wooden Craft Sticks
Metal Bucket
Ribbon, Blue
Paper Shred, White
Snowflake Cut Out
Washable Markers
Craft Paint – Variety of Winter Colors
Glue Gun and Glue Sticks
Scissors
Paintbrush
Shipping Tag – White
Permanent Marker – Black
Pencil
Instructions
Base coat twelve wooden craft sticks with a variety of Winter inspired colors. Let dry and the apply a second coat, if necessary. Because these sticks will be seen from both sides, flip over and paint the backs of the craft sticks.
Using a pencil and then a permanent black marker, write a Winter Bucket List activity on each of the twelve craft sticks. Get the kiddos involved to create your list! You can also use the back of each craft stick to add more activities.
Measure and cut a length of blue ribbon to wrap around the circumference of the metal bucket, and then attach with the glue gun. Using the light and medium blue washable markers, create a plaid pattern on the white shipping tag by drawing grids. Write WINTER BUCKET LIST on the tag with a permanent black marker. Cut an 8-inch length of blue ribbon, loop through shipping tag and tie to the handle of the metal bucket. Accent with a snowflake cut out.
Add the white paper shred to the bucket and then insert the Winter Bucket List craft sticks. Remove each stick as the family completes the activity. Add dates to the craft sticks and incorporate them into journal entries or scrapbook pages for added fun!
Create this Winter Bucket List in just about 30 minutes with coloring, painting and printing help from the kids!
Looking for a simple winter paper craft that works for kids of all ages? These curled paper snowflakes are a fun and creative way to bring winter indoors — no real snow required.
Whether you’re planning a snow day activity, a classroom winter craft, or a quiet afternoon project at home, curled paper snowflakes are an easy, low-prep option that lets kids get creative while working on fine motor skills.
This is one of those winter crafts that’s just as enjoyable for adults as it is for kids, making it perfect for family crafting time, classrooms, or even winter-themed home decor.
Why Curled Paper Snowflakes Are a Great Winter Craft
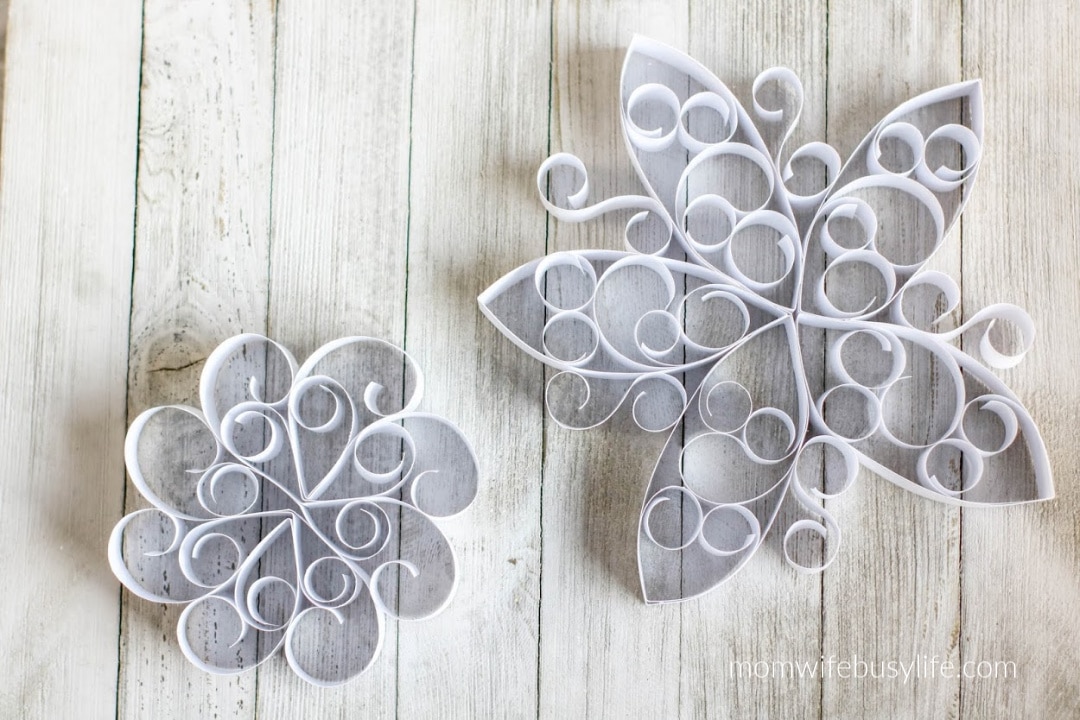
Curled paper snowflakes are a fun twist on traditional paper snowflakes. Instead of folding and cutting, kids use strips of paper to create curls and glue them together into a snowflake design.
This craft is especially great because:
It works for preschoolers, elementary kids, teens, and adults
There’s no right or wrong design
Each snowflake turns out unique, just like real snowflakes
It encourages creativity and patience
It’s also a nice alternative for kids who struggle with detailed cutting or traditional snowflake folding.
Perfect for Snow Days, Classrooms, and Winter Activities
If you’ve ever experienced a snow day with kids at home, you know how important it is to have simple activities ready to go.
These curled paper snowflakes are ideal for:
Snow day crafts
Winter classroom activities
Homeschool winter units
Indoor recess
Winter parties or bulletin boards
Seasonal home decorations
Even if you live somewhere that doesn’t get snow, this craft is an easy way to still enjoy a winter theme indoors.
A Craft That Grows With Your Kids
One of the best parts of this activity is how easily it can be adjusted by age.
Younger kids can focus on wrapping paper strips and gluing basic shapes
Older kids can work on symmetry and more detailed snowflake designs
Teens and adults can create elaborate, decorative snowflakes for display
This makes it a great multi-age craft for families, classrooms, or group settings.
Encouraging Creativity & Learning Through Crafting
While this is a fun winter craft, it also offers learning opportunities:
Builds fine motor skills
Encourages spatial awareness
Introduces the concept of symmetry
Allows kids to plan and design their own creations
You can keep it simple or turn it into a challenge by encouraging kids to make their snowflakes symmetrical or more detailed.
Decorating With Curled Paper Snowflakes
Once finished, these snowflakes make great winter decorations.
They can be:
Hung from the ceiling or windows
Used on classroom bulletin boards
Added to winter-themed party decor
Displayed on walls or doors
Because they’re lightweight, they’re easy to hang and store for future winters.
Curled paper snowflakes are a classic winter craft that’s easy to set up, fun to make, and adaptable for all ages.
Whether you’re facing a snowy week indoors or just want a cozy winter activity, this craft is a simple way to celebrate the season creatively.
Winter Curled Paper Snowflakes
Supplies:
white cardstock paper
Guillotine cutting board or ruler
scissors
unsharpened pencil
glue stick
Directions:
Cut paper into ½ to 1 inch strips, depending on how thick you want each snowflake.
Wrap the paper strips around a pencil to create the curls.
Create a snowflake shape by gluing the pieces of paper together.
Tips:
Remember that snowflakes are symmetrical. (Makes a great challenge for older kids.)
To create pointed tips on the snowflakes, Fold strips of paper in half and use the fold as the point.
Make the snowflakes as simple or as elaborate as desired.
Hang the snowflakes as decorations using thin thread or fishing line.
Frequently Asked Questions About Curled Paper Snowflakes
What is the best paper to use for curled paper snowflakes?
Cardstock works best for curled paper snowflakes because it’s sturdy enough to hold the curls and keep the snowflake’s shape. That said, regular printer paper can also be used, especially for younger kids who may find it easier to bend and wrap.
Do I need a guillotine paper cutter to make curled paper snowflakes?
No, a guillotine paper cutter is not required. While it helps create straight, even strips, scissors work just fine. The strips don’t need to be perfectly uniform for the snowflake to turn out well.
How do I help kids wrap paper strips more easily?
Using an unsharpened pencil makes wrapping paper strips much easier and helps create consistent curls. For smaller hands, thinner tools like a chopstick, straw, or paintbrush handle can work even better.
What kind of glue works best for this snowflake craft?
A standard glue stick works well for curled paper snowflakes. Apply glue where the ends of the paper strips connect, press firmly, and hold for a few seconds to allow the glue to set securely.
How can I make this craft more challenging for older kids?
Older kids can be challenged to create symmetrical snowflakes, experiment with different strip widths, or use folded paper strips to create pointed tips. Adding more layers and details is another way to increase the difficulty.
Is this an easy winter craft for beginners?
Yes, this is a very beginner-friendly winter craft. Even simple designs made with just a few curled strips look great. The craft can be as simple or detailed as you want, making it perfect for all skill levels.
How can I display curled paper snowflakes?
Curled paper snowflakes look great when hung from the ceiling, displayed in windows, or used as winter decorations around the home or classroom. They can also be attached to walls or windows using tape or removable adhesive.
Is this snowflake craft good for classrooms or group activities?
Yes, curled paper snowflakes are ideal for classrooms, homeschool groups, and playgroups. The craft is inexpensive, easy to prep, and adaptable for different ages and skill levels, allowing everyone to work at their own pace.
How do I store paper snowflakes for future use?
To store curled paper snowflakes, lay them flat in a box and place tissue paper between layers to prevent sticking. Keep them in a cool, dry place away from moisture and direct sunlight.
What are other creative ways to use curled paper snowflakes?
In addition to decorations, curled paper snowflakes can be used as gift toppers, greeting card embellishments, bulletin board accents, or part of a winter-themed mobile for a child’s room.
Winter Curled Paper Snowflakes
Materials
Paper (I used cardstock.)
Guillotine cutting board or ruler
Scissors
Unsharpened pencil
Gluestick
Instructions
Cut paper into ½ to 1 inch strips, depending on how thick you want each snowflake.
Wrap the paper strips around a pencil to create the curls.
Create a snowflake shape by gluing the pieces of paper together.
Tips:
Remember that snowflakes are symmetrical. (Makes a great challenge for older kids.)
To create pointed tips on the snowflakes, Fold strips of paper in half and use the fold as the point.
Make the snowflakes as simple or as elaborate as desired.
Hang the snowflakes as decorations using thin thread or fishing line.
December is a magical month, but it’s also incredibly busy. Between holiday shopping, decorating, meal planning, and trying to keep everyone entertained, the to-do list can feel endless.
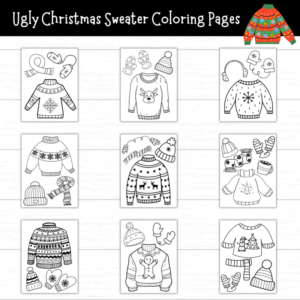
That’s where printable ugly sweater coloring pages can be a lifesaver for busy moms. These versatile and fun activities offer a simple way to keep kids engaged, unleash their creativity, and even sneak in a bit of stress relief for yourself.
When and Where to Use Ugly Sweater Coloring Pages
During Holiday Prep As you’re wrapping gifts, baking cookies, or addressing holiday cards, kids can get restless. Set them up at the kitchen table with a few coloring pages and a variety of crayons, markers, or colored pencils. It keeps them entertained while you focus on your tasks.
At Holiday Gatherings Whether you’re hosting family or attending a festive party, printable coloring pages are an easy way to keep little ones busy. Bring along a small stash to share, and you’ll quickly become the hero of the evening for providing a quiet, creative activity.
While Traveling Long car rides or flights during the holiday season can be challenging with kids in tow. Printable coloring pages are lightweight, portable, and easy to pack. Pair them with a small pouch of coloring supplies for an instant travel activity.
After-School Downtime December schedules are often packed with school plays, holiday concerts, and extracurricular activities. Coloring pages provide a calming way for kids to unwind after a busy day.
Why Printable Coloring Pages Are a Mom’s Best Friend
Quick and Easy to Access No need to make a last-minute store run. With printable pages, you can have an engaging activity ready in minutes.
Encourages Creativity Kids can design their dream ugly sweater! Whether they love glittery ornaments or silly holiday puns, these pages allow them to express their unique style.
Screen-Free Fun In a month filled with digital distractions, coloring offers a refreshing break from screens.
Affordable Entertainment For just the cost of some paper and a few coloring supplies, you’ve got hours of fun. Plus, you can print them as many times as you need!
Creative Ways to Use Ugly Sweater Coloring Pages
Host a Family Coloring Contest Gather around the table and see who can come up with the wackiest or most festive design. It’s a great way to spend quality time together and create holiday memories.
Turn Artwork into Holiday Cards Let your kids color their sweaters, then cut out the designs and glue them onto folded cardstock. Add a sweet note inside, and you’ve got unique holiday cards to send to loved ones.
Create DIY Decorations Hang finished pages on the fridge, tape them to the windows, or string them together as a colorful garland.
Use as Gift Wrap Once kids finish their masterpieces, use the pages to wrap small gifts. It’s a personalized touch that grandparents and teachers will adore.
Pair with a Hot Cocoa Night On a chilly evening, print out a few pages and make some hot cocoa. Add marshmallows, turn on some holiday tunes, and enjoy a cozy family night in.
Save Time While Adding Holiday Cheer
Life gets hectic in December, but printable ugly sweater coloring pages can help you reclaim a bit of calm.
They’re a simple, cost-effective way to entertain kids, encourage creativity, and even make holiday prep a little easier.
So, the next time you’re feeling overwhelmed by holiday chaos, remember that a few sheets of paper and some crayons can go a long way toward saving your sanity—and making December a little brighter for everyone in your home.
Looking for a fun, easy, and budget-friendly way to keep your kids entertained this holiday season?
A Design an Ugly Christmas Sweater printable activity is just what you need! This printable set combines creativity, learning, and festive fun in two simple pages. Perfect for busy moms, it’s an ideal activity for a variety of occasions and settings.
Why This Printable Is a Must-Have
Christmas is a busy time for families, but keeping the kids engaged doesn’t have to be complicated or expensive.
This activity is versatile enough to work for everything from classroom parties to family nights at home.
Plus, it helps kids practice art skills, creative thinking, and even writing—all while having fun.
What’s Included in the Printable Set?
Page 1: Blank Sweater Template
The first page features a blank sweater outline ready to be transformed into the “ugliest” (and most fun) Christmas sweater.
Kids can use crayons, markers, colored pencils, or get extra crafty with glue and embellishments.
Think glitter, pom-poms, cotton balls for snow, or tiny felt cutouts to make their designs pop. This page encourages kids to express their creativity in a way that’s uniquely theirs.
Page 2: Writing Activity
The second page takes the fun a step further with a writing activity where kids can describe their sweater design.
They can use adjectives like “sparkly,” “bright,” “silly,” or “snowy” to practice descriptive language.
This is a fantastic way to sneak in a bit of learning during the holiday break while keeping things festive.
How to Use the Ugly Christmas Sweater Activity
At Home: Set up a crafting station with the printable, art supplies, and decorations for a holiday-themed afternoon. Add Christmas music or a classic holiday movie in the background to set the mood.
At a Party: Whether it’s a school celebration or a family get-together, this activity works great at holiday parties. Kids can create their sweaters as part of a competition or just for fun.
On a Snow Day: When the kids are stuck indoors, this printable can turn a dull day into a creative one. Pair it with hot cocoa and let their imaginations run wild.
As a Gift Tag or Decoration: After decorating their sweaters, kids can cut them out and use them as unique gift tags or tree ornaments.
Why It’s Perfect for Busy Moms
This printable is not just fun for kids—it’s a lifesaver for moms juggling holiday prep.
It requires minimal setup and keeps kids entertained for hours, giving you time to wrap gifts, bake cookies, or simply enjoy a quiet moment.
Plus, since it’s printable, you can use it again and again throughout the season.
Make the Holidays Merry and Bright
This Ugly Christmas Sweater Activityis more than just a craft—it’s a way to create lasting holiday memories while keeping kids engaged.
Download the set, print a few copies, and let the creativity (and laughter) flow.
Whether it’s for fun at home or a big holiday event, this printable is sure to become a family favorite.
Printable Design an Ugly Christmas Sweater Activity
My girls are gearing up for back to school. According to my Facebook feed, most kids started school this week. We don’t start until September! This year, we are carefully planning for back to school success and organization. I’m way more organized this school year than I was last, and I’ve learned some lessons from last year that I am improving on this year. Here are my tips for creating a peaceful morning routine so that you can get out of the door faster (and less frazzled) as well as tips for a successful evening routine.
Morning:
1. Wake up before the kids wake up.
I set my alarm for 7:00 a.m. every morning. My kids don’t wake up until 7:30 a.m. During this time from 7:00 a.m to 7:30 a.m., I make my coffee, put on my make up, and get dressed. By 7:30 a.m., I can focus on waking up the girls, making sure they are motivated to get up and dressed for the day. When I get myself dressed before I wake up the kids, I don’t feel as stressed out trying to get everyone (including myself) dressed all at once! Plus, there’s something about a little quiet time in the morning that helps set the mood for the day!
No need to spend a lot of time cooking up fancy breakfast foods every morning. Instead, serve easy options like frozen waffles and pancakes.
3. Give yourself plenty of time in the morning.
Last year, I didn’t give our family enough time to get dressed and fed in the mornings. This caused us to have feelings of being rushed and stressed in the morning. I added time to our morning routine this year (30 minutes) so that when my kids are dressed and fed, we have 30 minutes to hang out in the living room and watch cartoons, talk, read, etc. instead of feeling rushed. This has worked very well this year already and I will continue to give my kids at least an hour block of time to get everything done before we leave the house.
4. Establish a morning routine with your children.
Give your children a schedule to follow each morning. My girls get dressed first and then come down stairs to eat breakfast. Then, they fix their hair (I help many times!) and brush their teeth. When they are finished with their routine, they get to use the remaining time to watch cartoons on t.v. before we head out the door! The down time they get in the morning helps to create a peaceful morning for them instead of making them feel rushed.
How do you create a peaceful routine in the morning?
Evening:
1. Complete homework and sign papers as soon as kids get home.
Kids have homework? No problem! Have them complete their homework as soon as they get home. Set up a nice space somewhere in your home where they can concentrate and focus on getting it done before dinner.
2. Serve easy and simple after school snack or dinner ideas.
The kids will be hungry after school and you’ll need to get dinner on the table fast. If your kids get home earlier, you’ll need to prepare a snack. As soon as you get home, pop something easy into the oven.
3. Schedule and establish a bath and bedtime routine.
Kids thrive on routines. Set a specific bath and bed time and stick to it. Maybe the kids take a bath right after dinner, or maybe they get a little t.v. time and then they take their bath. Either way, have a set schedule and stick to it so that they know what is expected of them. My girls take baths at 7:00 p.m. and are in bed by 8:00 p.m.
How do you create a peaceful routine in the evening?
The 4th of July weekend is approaching and that usually means a long weekend off from work and time spent with the family.
Many families will be planning vacations and some families will be staying home.
Either way, there’s always a great variety of activities to take advantage of during this holiday weekend.
Below you will find several 4th of July activities for families to enjoy!
4th of July Activities for Families
Play patriotic themed games.
Spend time together as a family by playing patriotic games.
We like to set out our patriotic corn hole boards out in the backyard to see who can toss the most bean bags inside the hole!
Other fun games include watermelon seed spitting, drawing pictures with chalk, baseball, they have so many fun parks for your family to enjoy, and more.
You can also download and print this FREE 4th of July Bingo game to complete as a family!
Simply complete an activity and mark it off on the bingo sheet.
Try to get as many Bingo lines as you can this summer!
Go on a 4th of July Scavenger Hunt with the family! Print one of these FREE scavenger hunts below and enjoy checking off the list as your family finds the items listed.
Print this FREE crossword puzzle with answer key!
Enjoy this free tic-tac-toe game!
Create American themed crafts.
Let the kids get creative with American-themed crafts!
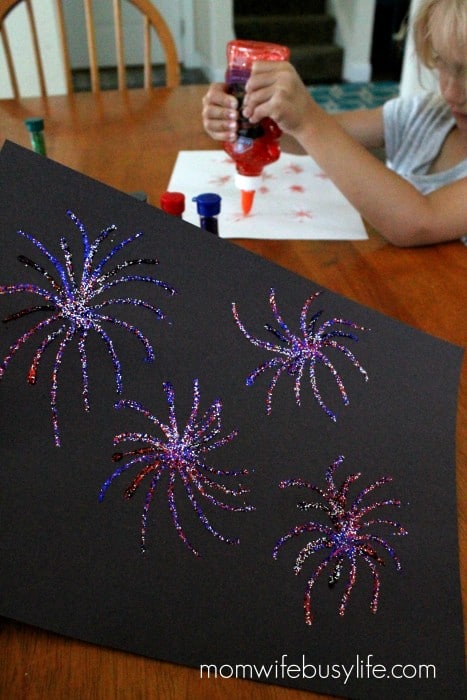
One of our favorite crafts to make are Fireworks on a sheet of paper using glue and glitter. Simply pour glue onto paper in the shape of fireworks (black or white construction paper works best) and then sprinkle glitter onto the glue.
Shake excess glitter off and you have a great fireworks craft to display.
This a great activity you can do indoor while on that last minute getaway!
While you are here, read our list of 15+ Patriotic Crafts for Kids!
The 4th of July is a great time to plan a quick family getaway. Many families pack up and head to their favorite beach destination during the long 4th of July weekend.
Families can take part in activities such as horseback riding, golfing, fishing, boating, hiking, swimming at the springs, biking, zip lining and so much more.
When we head for some time outdoors with the family, we try to take in as much as we can.
It’s definitely nice to have more varieties to choose from vs. just heading to the beach and splashing around in the water.
This keeps the kids from getting burned out and that’s a win for us!
Pack a picnic lunch.
Pack up your favorite picnic foods and enjoy a picnic lunch together.
Don’t forget this summertime favorite — watermelon! Watermelon is a refreshing treat to enjoy with your family on hot summer days!
Watch fireworks displays.
Look for fireworks displays in your local area. We’ve enjoyed watching fireworks at the mall, parks, and other local areas. We also look for fireworks in our neighborhood as well!
Grill out.
My husband loves to grill out during the holidays. When he’s grilling out, my kids spend that time enjoying the backyard with games, bubbles, water balloons, and more.
It’s nice to get outdoors during a long weekend as well as enjoying yummy foods fresh from the grill! Check out his recipes at roscoesrecipes.com!
Play in the water!
Summer is HOT! The temperatures outdoors here on the East Coast have been approaching the 100’s!
We take advantage of our neighborhood pool, sprinklers, water balloons, and other water activities during hot days to stay cool.
Enjoy these fun and engaging 4th of July activities with your family this year! What do you plan to do this summer for 4th of July?
This website uses cookies to improve your experience. We'll assume you're ok with this, but you can opt-out if you wish.AcceptRejectRead More
Privacy & Cookies Policy
Privacy Overview
This website uses cookies to improve your experience while you navigate through the website. Out of these, the cookies that are categorized as necessary are stored on your browser as they are essential for the working of basic functionalities of the website. We also use third-party cookies that help us analyze and understand how you use this website. These cookies will be stored in your browser only with your consent. You also have the option to opt-out of these cookies. But opting out of some of these cookies may affect your browsing experience.
Necessary cookies are absolutely essential for the website to function properly. This category only includes cookies that ensures basic functionalities and security features of the website. These cookies do not store any personal information.
Any cookies that may not be particularly necessary for the website to function and is used specifically to collect user personal data via analytics, ads, other embedded contents are termed as non-necessary cookies. It is mandatory to procure user consent prior to running these cookies on your website.