
If you’re looking for a simple, no-bake dessert for New Year’s Eve, these New Year’s Oreo Pops are an easy win—especially for busy moms juggling party prep, kids, and end-of-year chaos.
Made with classic Oreo cookies and festive decorations, this treat is quick to assemble, kid-friendly, and perfect for ringing in the new year without turning on the oven.
Whether you need a last-minute party dessert, a fun kitchen activity for kids, or a festive treat to serve alongside finger foods, Oreo pops check all the boxes.
You may also like:
Why New Year’s Oreo Pops Are Perfect for Busy Families
No-Bake and Time-Saving
New Year’s Eve desserts don’t have to be complicated. Oreo pops are a no-bake dessert, which means less cleanup, no oven time, and faster prep—ideal for busy schedules and crowded kitchens.
Kid-Friendly Holiday Treat
These Oreo cookie pops are easy for kids to help with, making them a great New Year’s Eve activity for families. Little hands can help decorate, sprinkle, and customize each pop, turning dessert prep into quality time.
Perfect for Parties and Celebrations
New Year’s Oreo Pops work well as:
- New Year’s Eve party desserts
- Classroom or school treats
- Dessert table additions
- Edible party favors
They’re easy to serve, mess-free, and visually festive—everything you want in a holiday dessert.
Decorating Ideas for New Year’s Oreo Pops
One of the best things about New Year’s Oreo Pops is how customizable they are. You can easily match your decorations to your New Year’s Eve theme.
Popular ideas include:
- Black, gold, and silver sprinkles
- White chocolate coatings with festive drizzle
- Holiday-themed candy decorations
- Countdown or celebration-inspired colors
Because each pop is individually decorated, they’re perfect for letting kids get creative while still keeping things simple.
Make-Ahead and Storage Tips
When planning New Year’s Eve desserts, convenience matters. Oreo pops can be made ahead of time and stored in an airtight container, making them ideal for party prep.
This make-ahead option allows you to focus on other celebrations without worrying about dessert at the last minute.
A Fun New Year’s Eve Dessert Without the Stress
New Year’s Oreo Pops are proof that holiday desserts don’t have to be complicated to be fun and festive. With minimal ingredients and no baking required, they’re a practical choice for busy moms who still want something special on the table.
Whether you’re hosting a party, celebrating quietly at home, or making memories in the kitchen with your kids, these Oreo pops are an easy way to add a sweet touch to your New Year’s Eve celebration.
Looking for more easy holiday desserts and kid-friendly treats? Be sure to explore more no-bake dessert ideas perfect for busy families.
New Year’s Oreo Pops
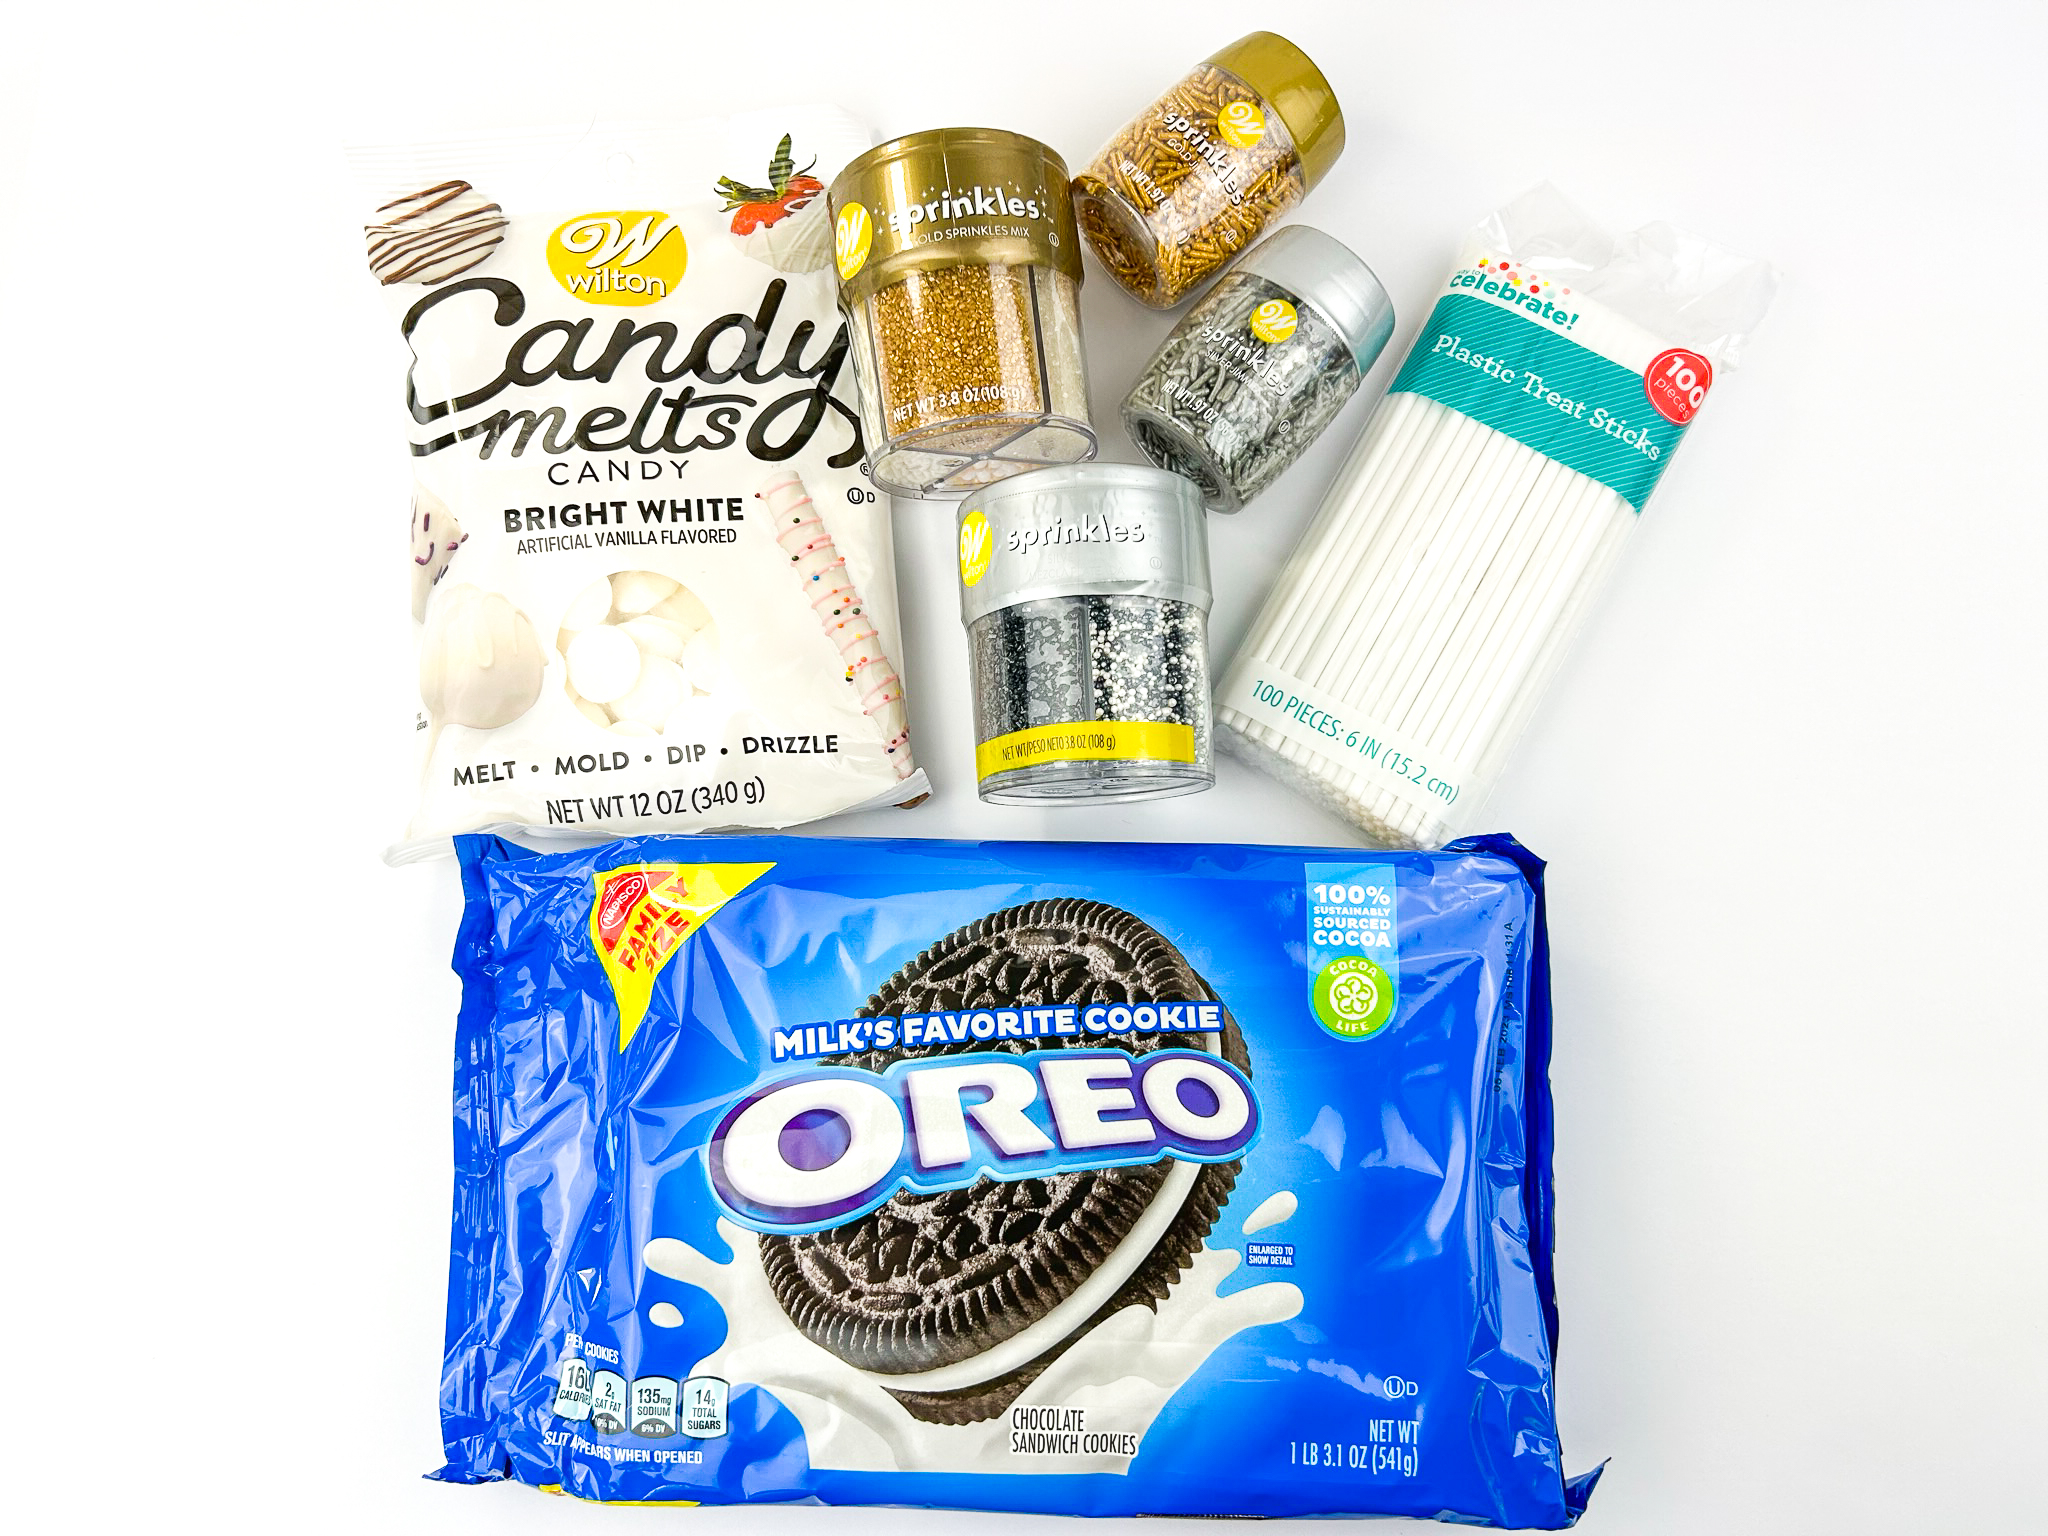
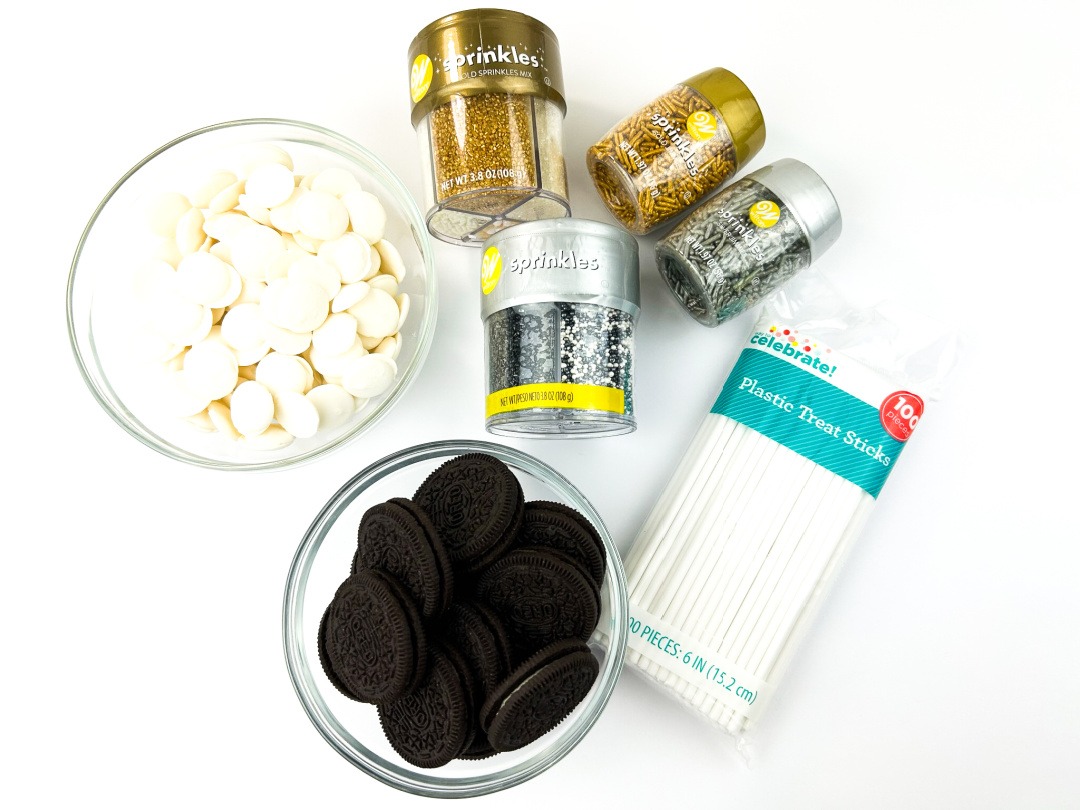
Supplies:
- Oreos
- Treat sticks (plastic or paper)
- White vanilla candy melts
- Variety of New Year’s sprinkles
(***Note: I loved working with the Wilton’s candy melts because the candy didn’t harden up too quickly and allowed plenty of time for me to take my time covering each Oreo properly vs. rushing through it.)
Directions:
Gently twist the Oreo so that it pulls apart as evenly as possible.
Push the top of a treat stick down into the cream part of the Oreo.
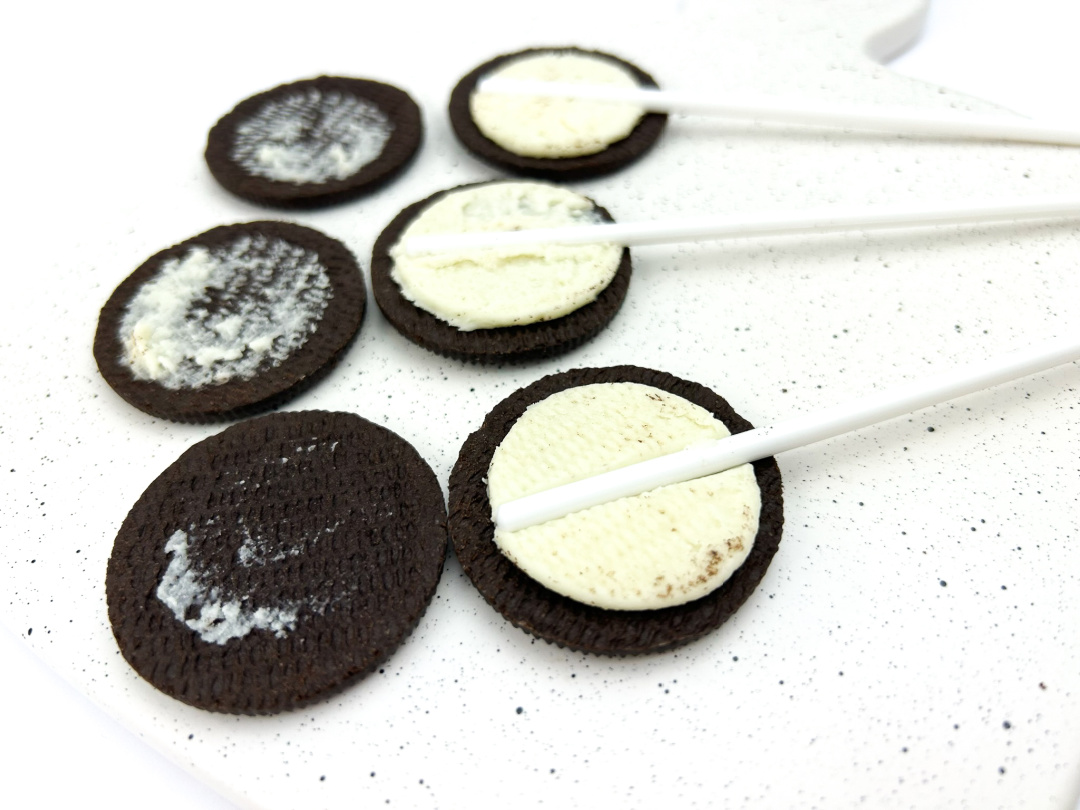
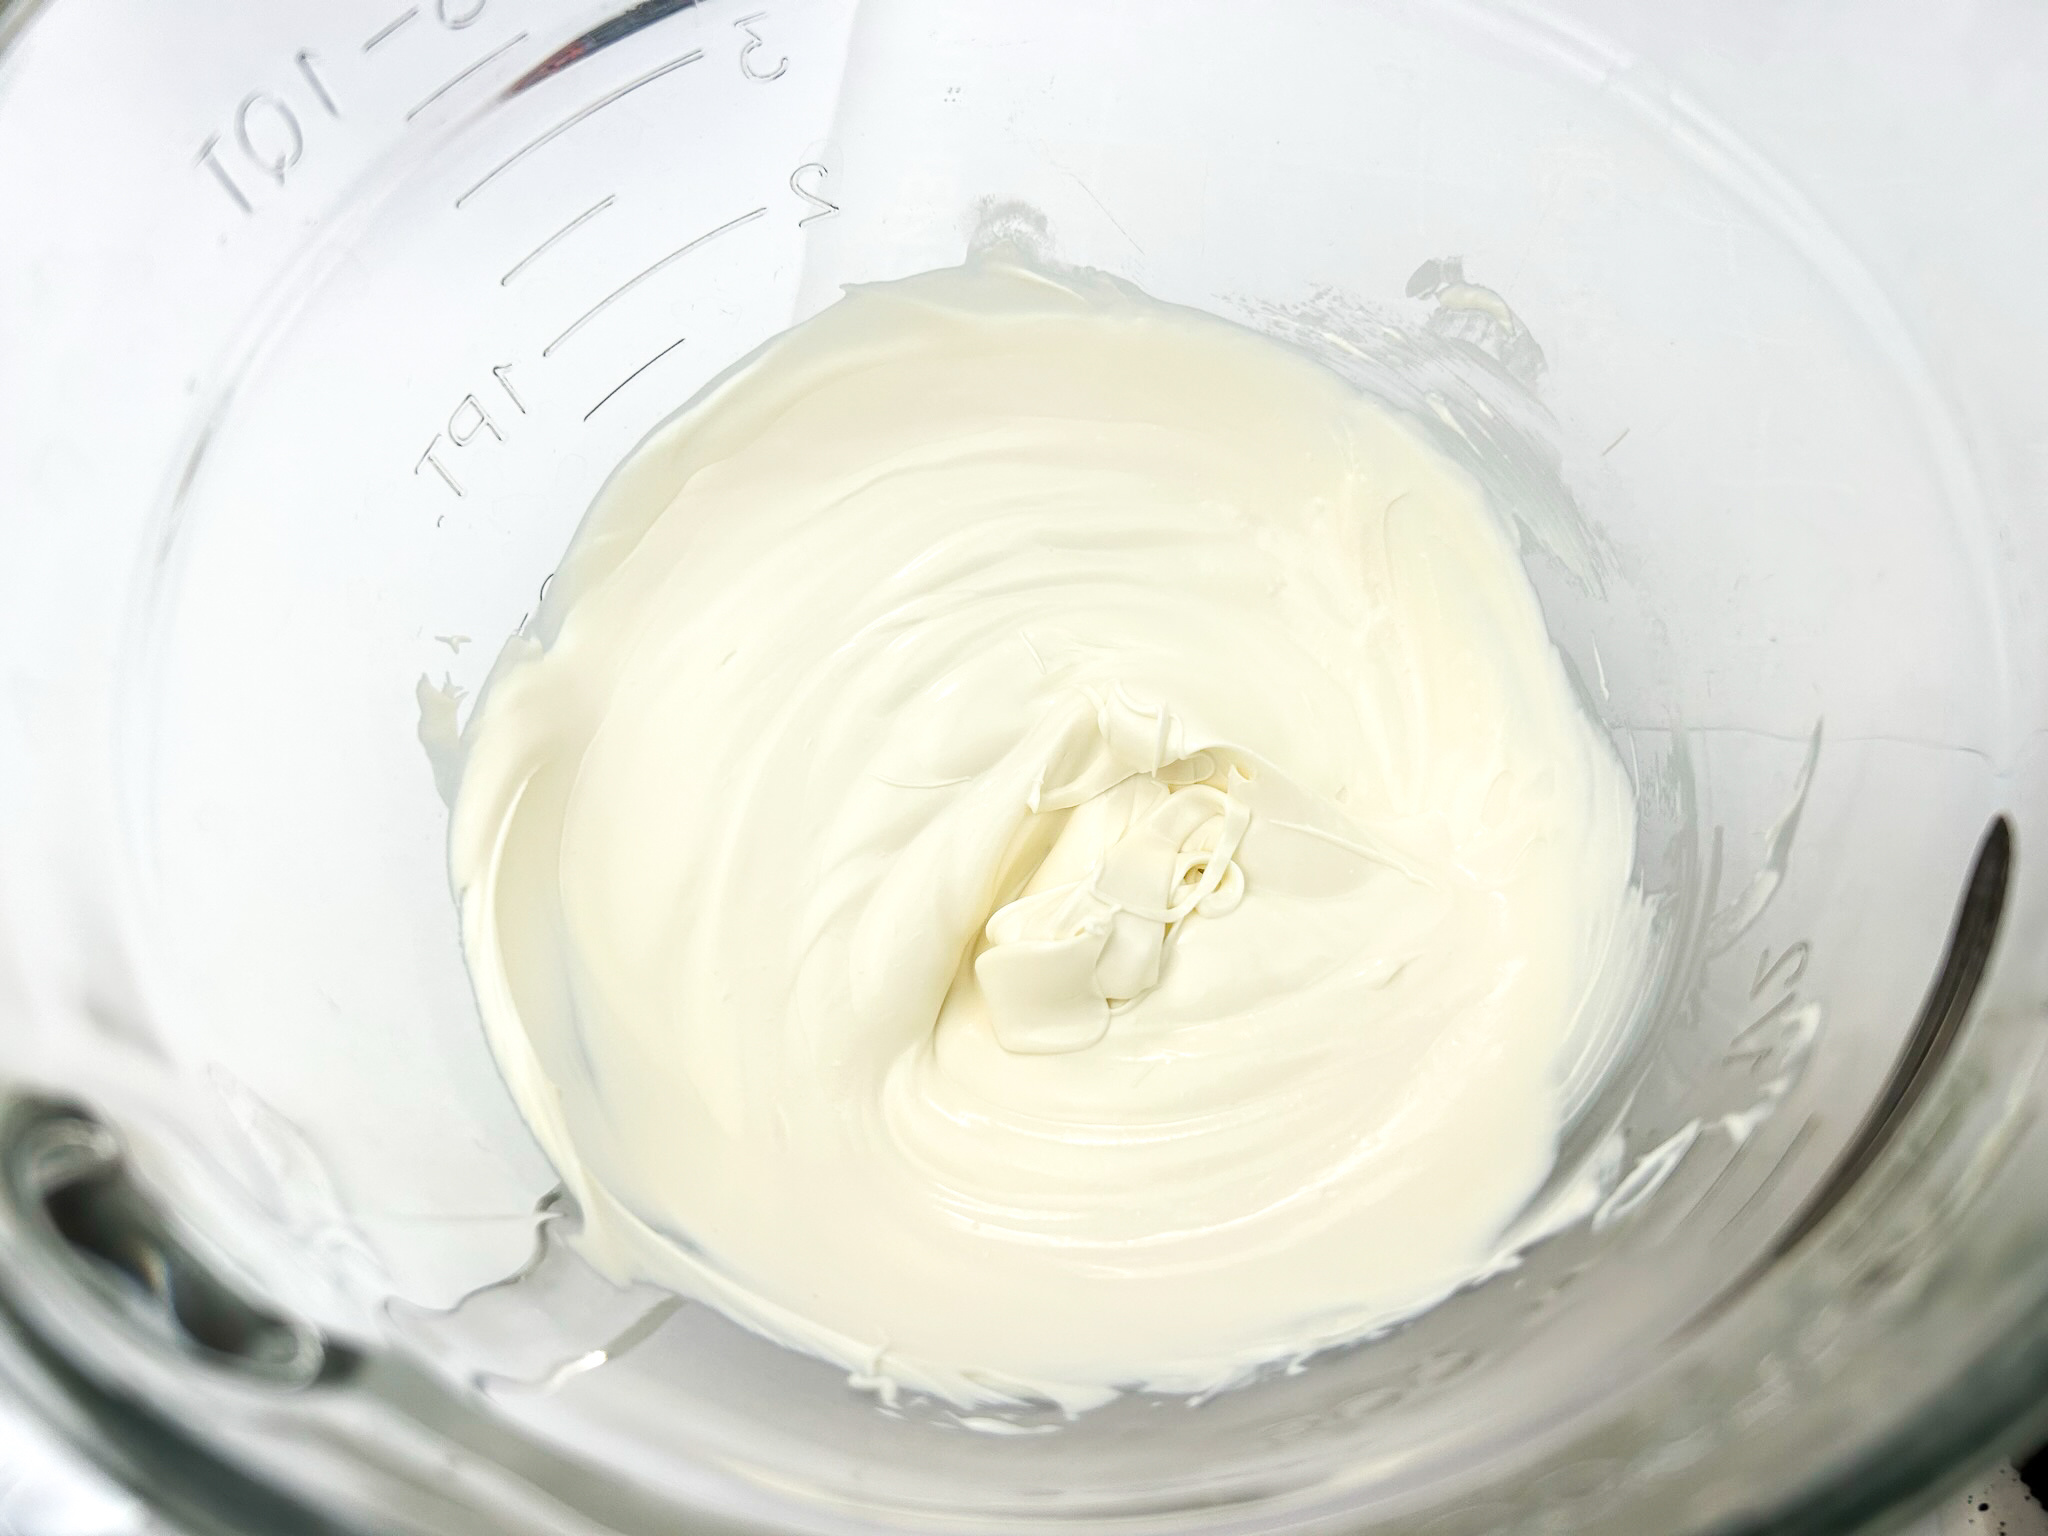
Melt a few candy melts according to the instructions on the packaging.
Add a small dab of the melted chocolate on top of the stick and cream.
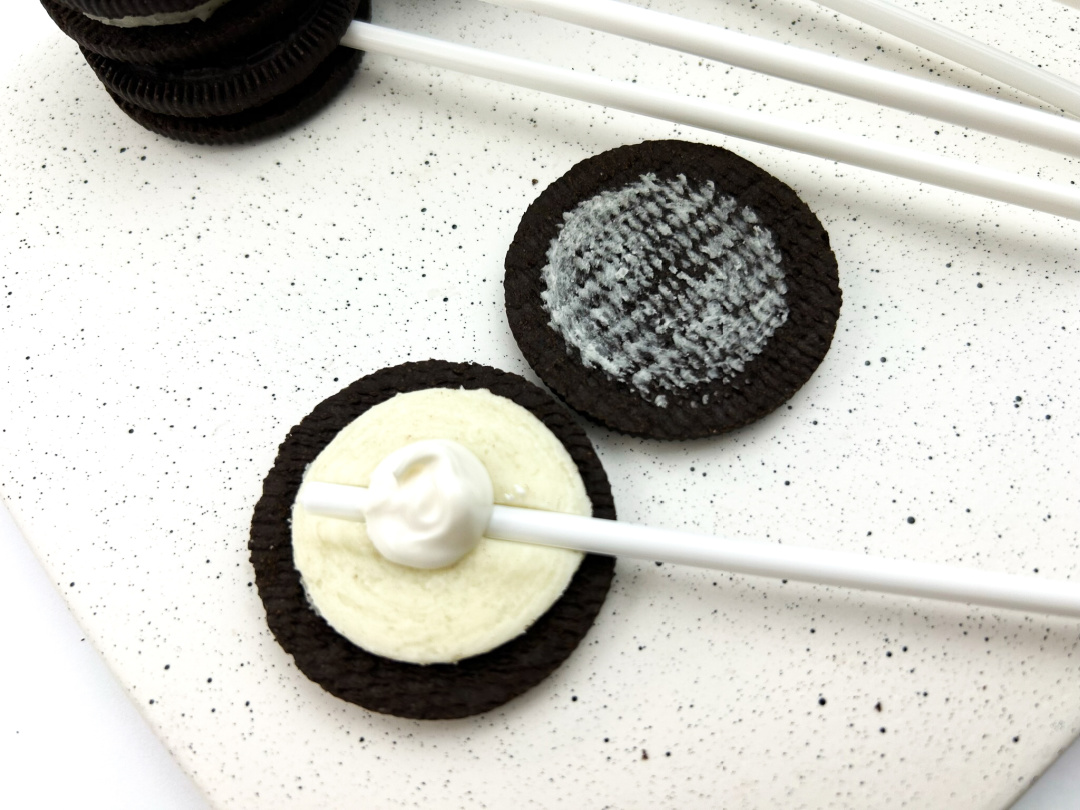
Put the Oreo back together, pressing down gently so that the candy will help the Oreo to stick back together well. (Otherwise, it can easily fall apart without enough of the melted candy.)
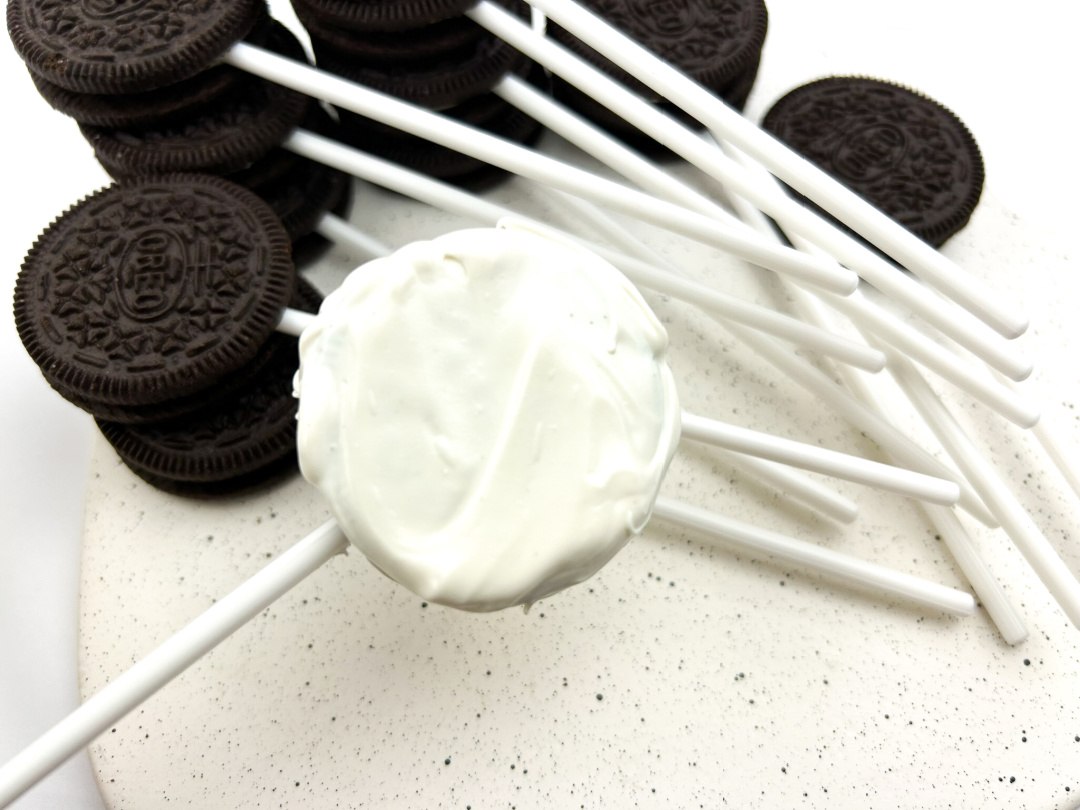
Repeat to create the desired amount of Oreos pops.
Melt the remaining candy melts (enough to cover the amount of Oreo pops you’ll be working with.)
While you can dip the Oreos into the melted candy, I found it was easier to spoon the melted candy onto the Oreo and then smooth the chocolate around the Oreo with the spoon vs. dipping the Oreo.
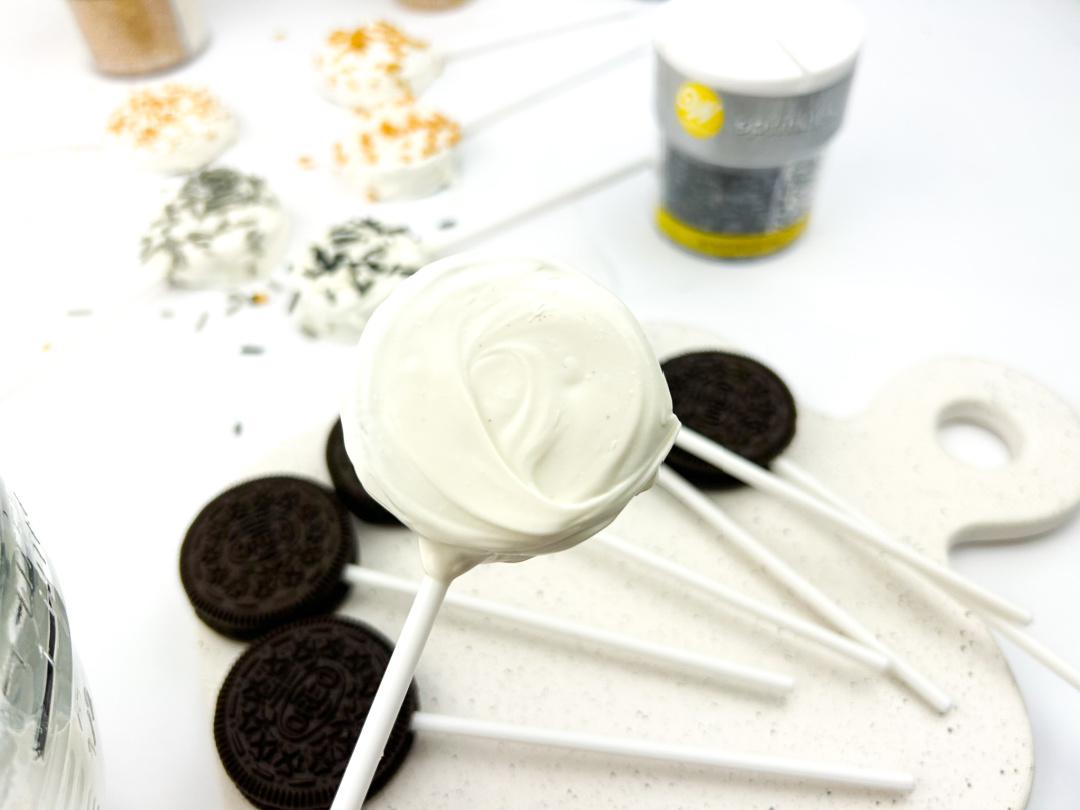
Set the Oreo pop on a pan lined with parchment paper. Add sprinkles to the pop.
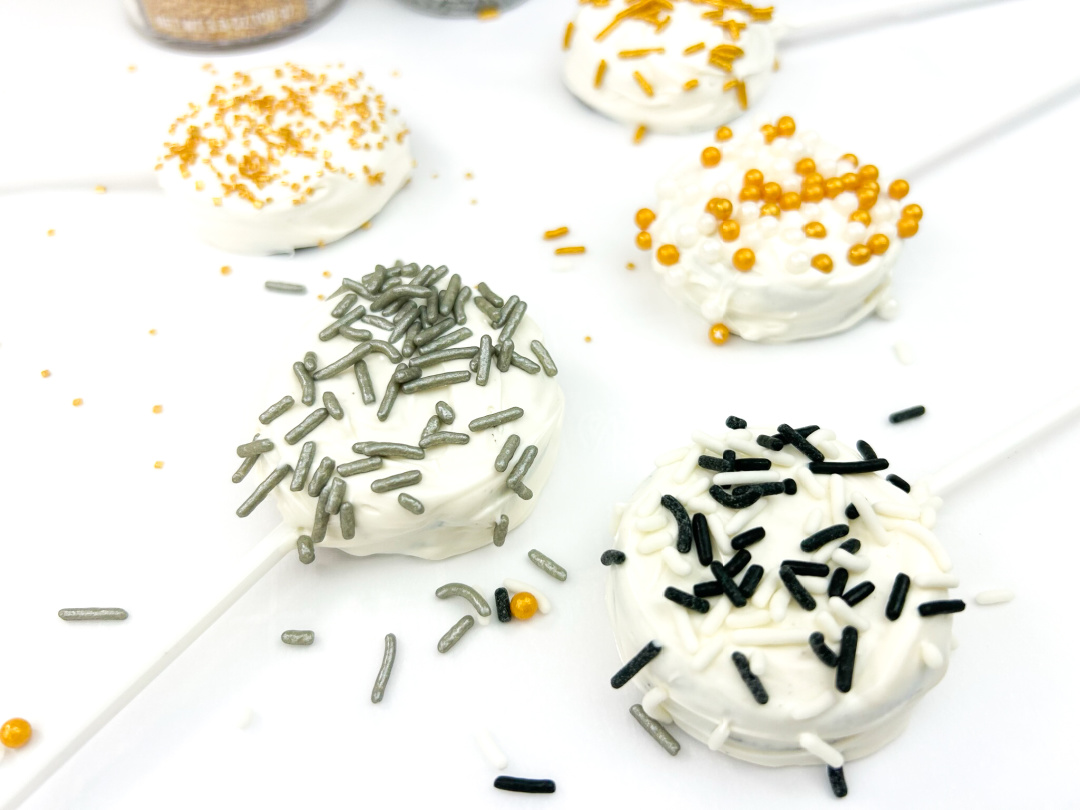
Repeat this process and use a variety of sprinkles on each pop.
If you’d like for the candy to harden quickly, place the pops in the freezer for a few minutes.
Then, serve!


Frequently Asked Questions
Can I use different types of Oreos for this recipe?
Feel free to experiment with different flavors of Oreo, such as Double Stuff Oreos, Golden Oreos, or even the various limited edition flavors. Each type brings a unique twist to your Oreo pops.
What if I don’t have candy melts? Can I use white chocolate chips instead?
You can use white chocolate chips as an alternative. For smoother melting, consider adding a small amount of coconut oil or vegetable oil. Keep in mind that chocolate chips may harden faster than candy melts.
How do I store Oreo pops, and how long will they last?
Oreo pops should be stored in an airtight container at room temperature. They typically last for about 1 week, making them a great make-ahead treat for special occasions.
My Oreo keeps falling off the stick. What am I doing wrong?
Ensure you’re adding enough melted candy to the cream center before reassembling the Oreo. This acts like glue. Also, let the candy set for a bit before dipping the whole Oreo into the melted candy.
Can I freeze Oreo pops?
Oreo pops can be frozen. Wrap them individually in cling film and store them in a Ziplock bag. They can be frozen for up to a month. Just allow them to come to room temperature before serving.
Is it possible to make these Oreo pops without a microwave?
You can melt the candy melts or white chocolate using a double boiler on the stovetop. Just ensure that the water does not touch the bowl containing the chocolate and stir continuously for even melting.
Can kids help make these Oreo pops?
This is a perfect recipe for kids to help with, especially in decorating with sprinkles or drizzling with melted chocolate. Just supervise them during the melting process.
How can I make these Oreo pops for a specific holiday like Halloween or St. Patrick’s Day?
Easily customize your Oreo pops with themed sprinkles, colored candy melts, or specific decorations like candy canes for Christmas or black icing for Halloween. The possibilities are endless!
Do I need any special equipment to make these?
No special equipment is needed. Basic kitchen tools like a microwave-safe bowl, parchment paper, and a baking sheet are sufficient. If you have a cookie scoop or a small spoon, these can be helpful but are not necessary.
New Year's Oreo Pops

Ingredients
- Oreos
- Treat sticks (plastic or paper)
- White vanilla candy melts (***Note: I loved working with the candy melts because it didn’t harden up too quickly and allowed plenty of time for me to take my time covering each Oreo properly vs. rushing through it.)
- Variety of sprinkles
Instructions
Gently twist the Oreo so that it pulls apart as evenly as possible.
Push the top of a treat stick down into the cream part of the Oreo.
Melt a few candy melts according to the instructions on the packaging.
Add a small dab of the melted chocolate on top of the stick and cream.
Put the Oreo back together, pressing down gently so that the candy will help the Oreo to stick back together well. (Otherwise, it can easily fall apart without enough of the melted candy.)
Repeat to create the desired amount of Oreos pops.
Melt the remaining candy melts (enough to cover the amount of Oreo pops you’ll be working with.)
While you can dip the Oreos into the melted candy, I found it was easier to spoon the melted candy onto the Oreo and then smooth the chocolate around the Oreo with the spoon vs. dipping the Oreo.
Set the Oreo pop on a pan lined with parchment paper. Add sprinkles to the pop.
Repeat this process and use a variety of sprinkles on each pop.
If you’d like for the candy to harden quickly, place the pops in the freezer for a few minutes.
Then, serve!