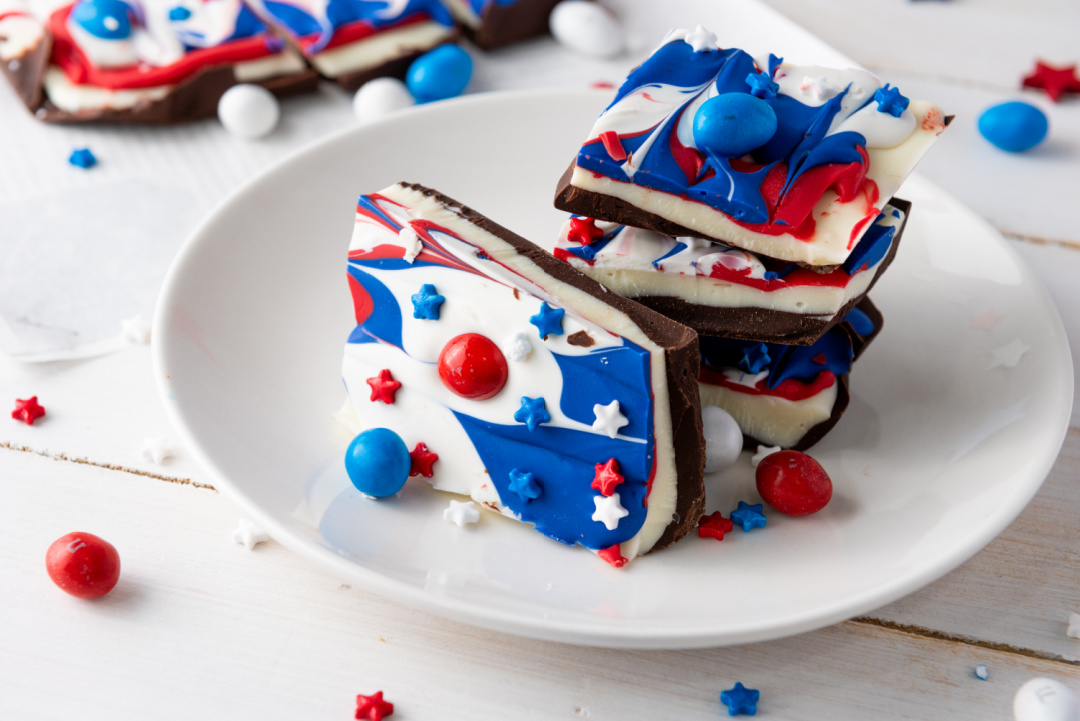
Easy Red, White, and Blue Chocolate Bark for Patriotic Holidays
When you’re a busy mom, having a quick, festive treat up your sleeve is a game changer—especially around the holidays.
This red, white, and blue chocolate bark recipe is one of those simple ideas that checks all the boxes: fast, no baking, kid-friendly, and perfect for patriotic celebrations like the Fourth of July, Memorial Day, or Labor Day.
You may also like:
- Patriotic Popcorn
- Patriotic Pretzel Rods
- Patriotic Popsicles
- Patriotic Oreo Truffles
- Patriotic Fruit Salad
- Patriotic Rice Krispie Treats
Whether you’re hosting a neighborhood cookout, heading to a family potluck, or looking for something fun to make with your kids while you prep for the fireworks, this chocolate bark is a great option.
Why this recipe is kid and mom approved
Kids love the color, the candy, and the fact that they can help drizzle and decorate. Grown-ups love that it looks like you put in way more effort than you actually did.
What makes this recipe stand out is how easily it comes together with just a few ingredients. It’s not fussy, there’s no oven involved, and you can prep it in advance.
That’s key during busy holiday weekends when your kitchen is already working overtime. Plus, it travels well and doesn’t need to be kept hot or cold for serving—perfect for outdoor events.
Best time to make this patriotic chocolate bark
When is the best time to make red, white, and blue chocolate bark? Any patriotic holiday, of course. Think Memorial Day, Veterans Day, Labor Day, and 4th of July holidays.
But don’t overlook it for school parties, team celebrations, or end-of-year events. You can even turn it into a tradition—your go-to Independence Day dessert that shows up every year.
Pin it:
Where to serve the chocolate bark
You can serve this dessert just about anywhere.
Add it to a dessert table at a BBQ, wrap it up in treat bags for party favors, or pop it into a mason jar and tie it with a ribbon for a thoughtful, last-minute hostess gift.
You could even use it as a fun lunchbox surprise if you’re celebrating a holiday week with your kids.
Why you should make this patriotic recipe
This recipe is easy to customize, uses affordable pantry ingredients, and brings a festive pop of color without much effort.
It’s also a smart way to get the kids involved in the kitchen—let them help swirl the candy melts or scatter the sprinkles and M&Ms on top. It’s an activity and a dessert in one.
How to use this treat creatively
Think beyond the dessert table. Try:
- Breaking the bark into smaller chunks and mixing it into popcorn for a sweet-and-salty party snack.
- Serving it on a platter alongside fresh strawberries and blueberries for a red, white, and blue spread.
- Layering pieces in clear bags with a patriotic ribbon for easy party favors or classroom treats.
If you’re searching for easy patriotic desserts for a crowd, a no bake Fourth of July treat, or a red white and blue dessert that travels well, this chocolate bark hits all the right notes.
It’s simple, festive, and guaranteed to be one of the first things to disappear from the table.
Save this one in your recipe box—you’ll be glad you did.
Red, White, and Blue Chocolate Bark Shopping List
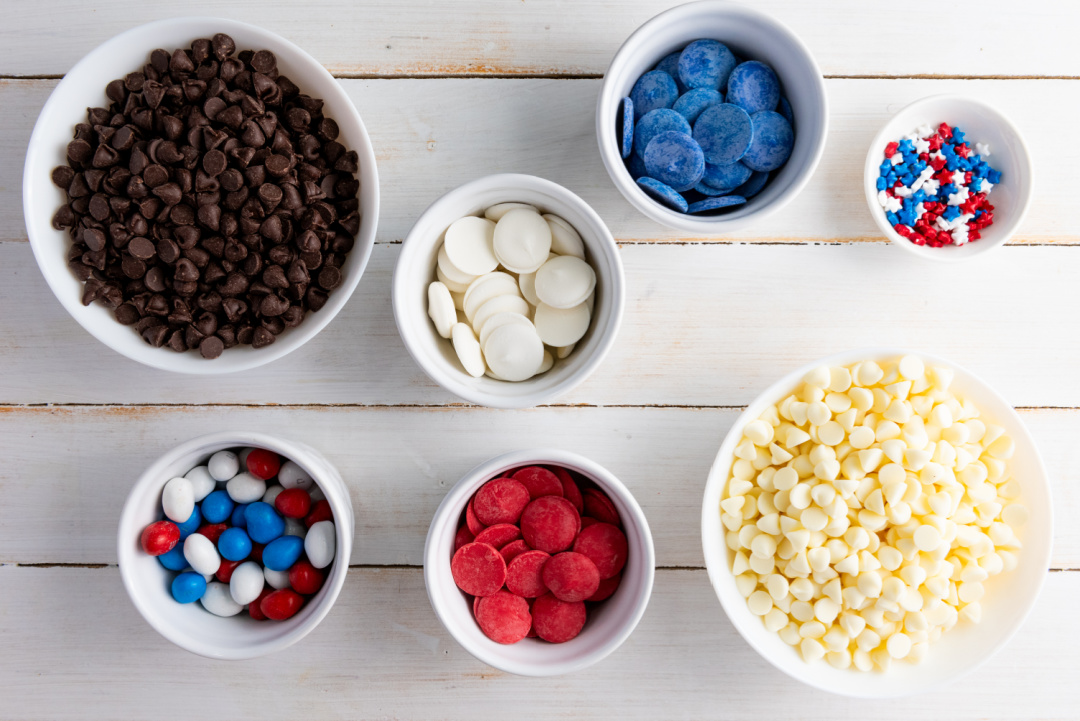
Ingredients
☐ Semi-sweet chocolate chips (2 cups)
☐ White chocolate chips (2 cups)
☐ Red candy melts (½ cup)
☐ White candy melts (½ cup)
☐ Blue candy melts (½ cup)
☐ Red, white, and blue sprinkles (1 tbsp)
☐ Red, white, and blue M&Ms (¼ cup)
Tools & Supplies
☐ Parchment paper
☐ 13×9-inch Baking tray
☐ Microwave-safe bowls
☐ Spoon or spatula
☐ Small sandwich or piping bags (for drizzling melted chocolate)
☐ Toothpicks (for swirling colors)
☐ Airtight container (for storing leftovers)
Optional Gift Supplies
☐ Clear cellophane treat bags or snack-size resealable bags
☐ Red, white, or blue ribbon or natural twine
☐ Patriotic-themed gift tags or printable labels
☐ Scissors (for cutting ribbon)
☐ Tape or twist ties (optional, for sealing bags before tying ribbon)
☐ Patriotic gift favor boxes or patriotic gift bags (optional for sturdier presentation)
☐ Tissue paper or paper crinkle filler (optional for padding)
Patriotic Bark Recipe
Prep Time: 15 minutes
Total Time: 2 hours (including setting time)
Servings: 12-15 pieces
Note: A 13×9 pan was used for this recipe
Ingredients:
- 2 cups white chocolate morsels
- 2 cups semi-sweet chocolate morsels
- 1/2 cup red candy melts
- 1/2 cup white candy melts
- 1/2 cup blue candy melts
- 1 tbsp red, white, and blue star sprinkles
- 1/4 cup red, white, and blue M&Ms
Directions:
Line a baking tray with parchment paper to prevent sticking.
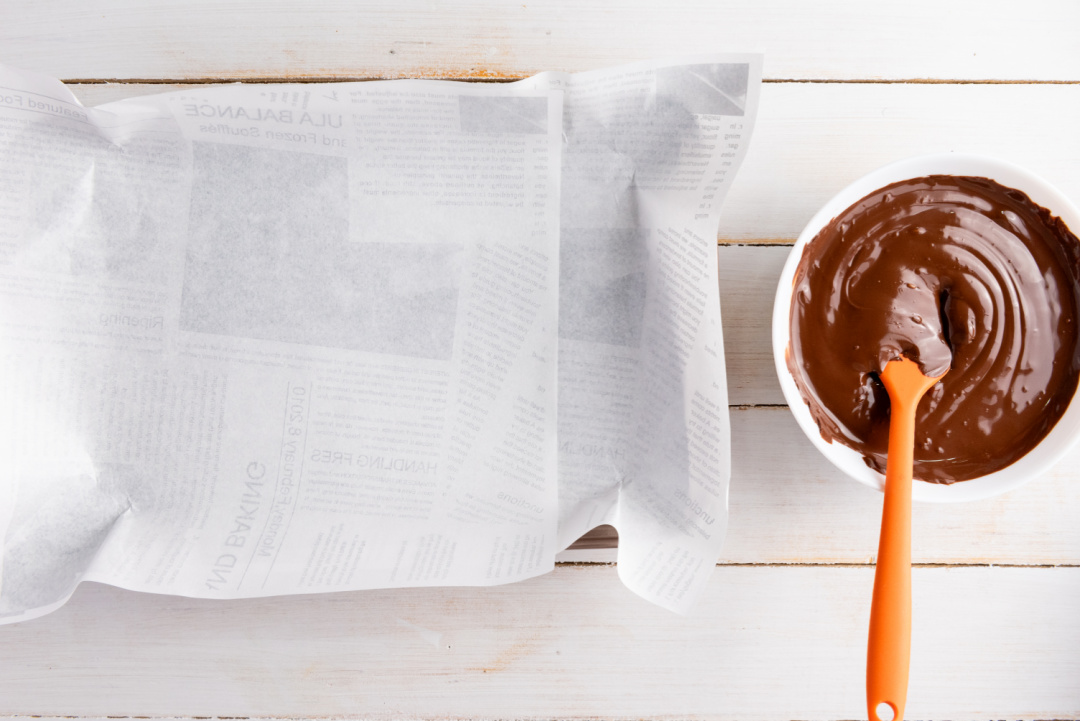
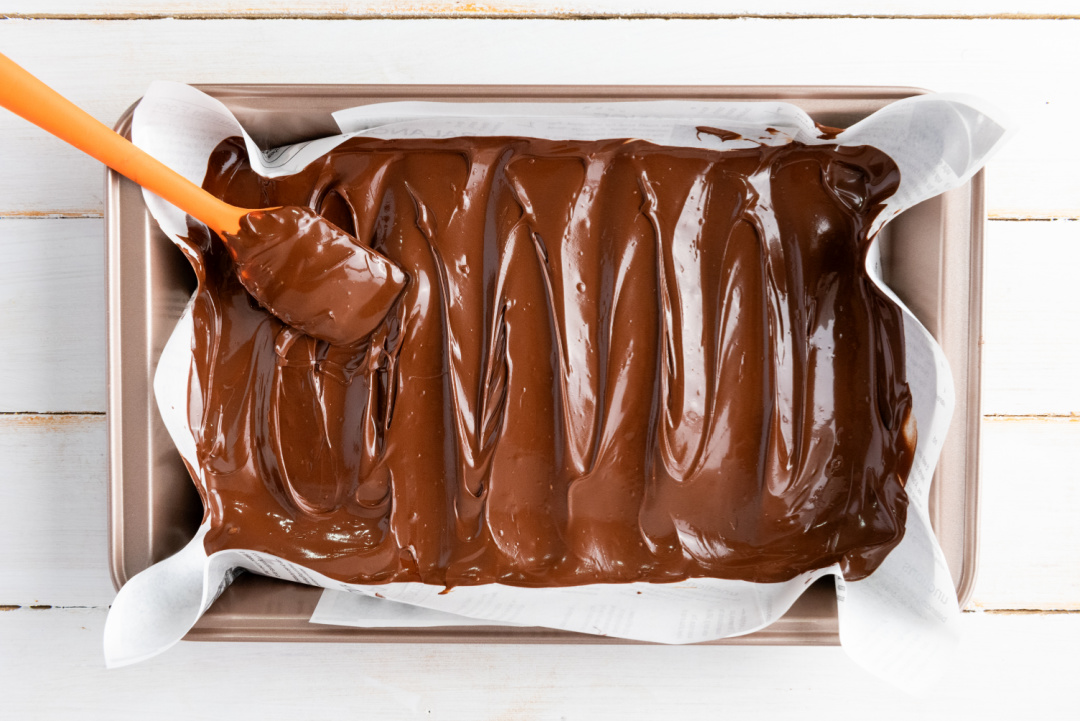
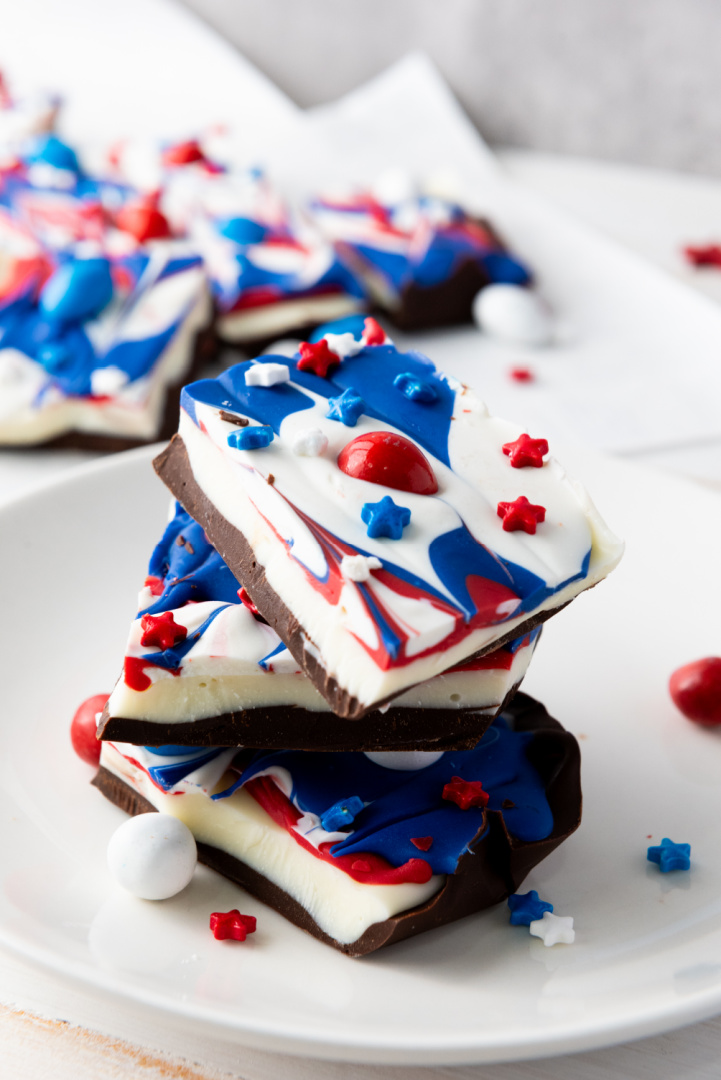
Begin by melting the semi-sweet chocolate morsels. You can do this in a microwave in 30-second bursts, stirring between each, until smooth.
Pour the melted semi-sweet chocolate onto the prepared tray, spreading it into an even layer.
Allow this layer to harden completely. You can speed up this process by placing the tray in the refrigerator.
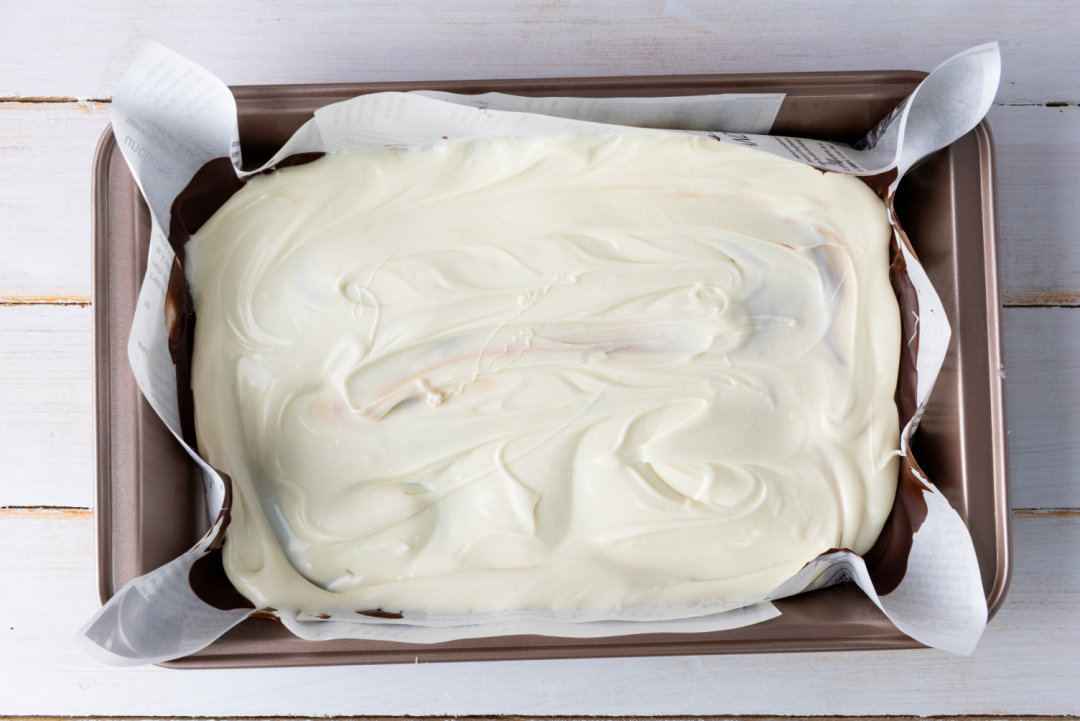
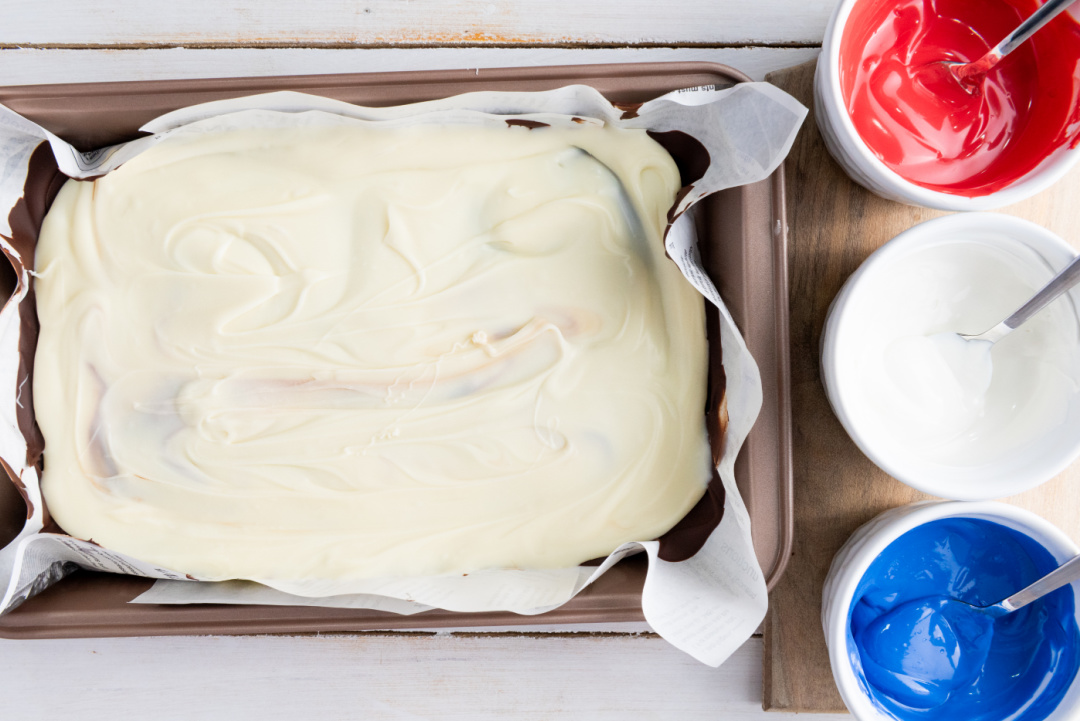
Melt the white chocolate morsels using the same method as before.
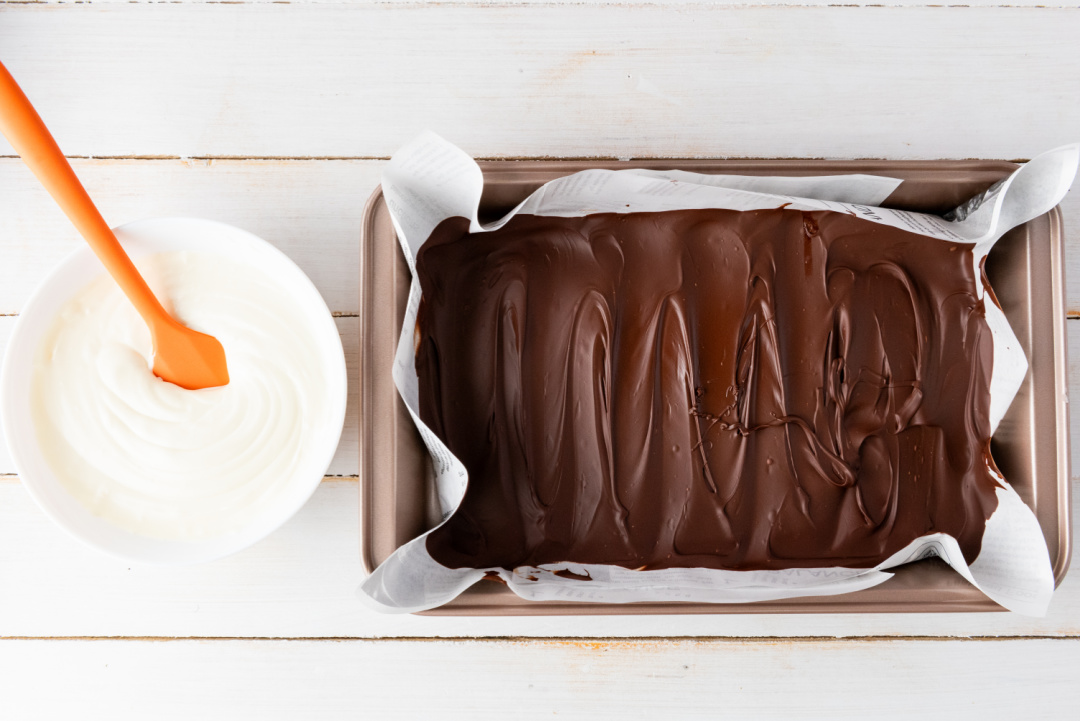
Once melted, pour it over the hardened semi-sweet chocolate layer. Let this white chocolate layer harden completely before proceeding.
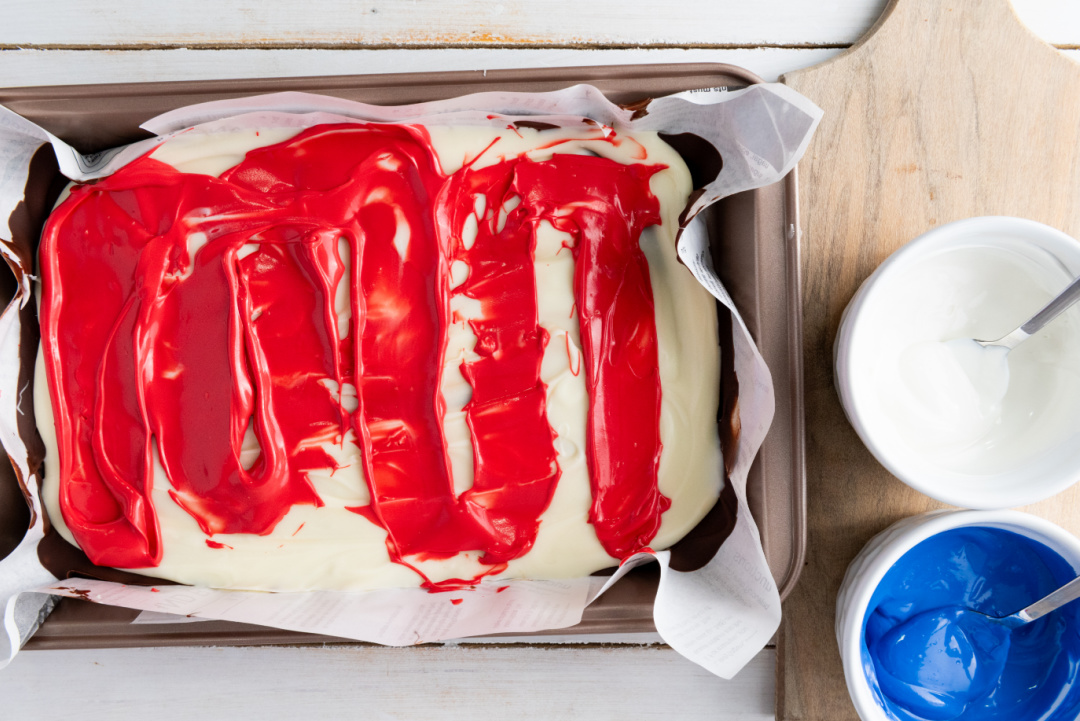
Melt the red, white, and blue candy melts separately. You can use small piping bags or a spoon to drizzle each color over the hardened white chocolate layer.
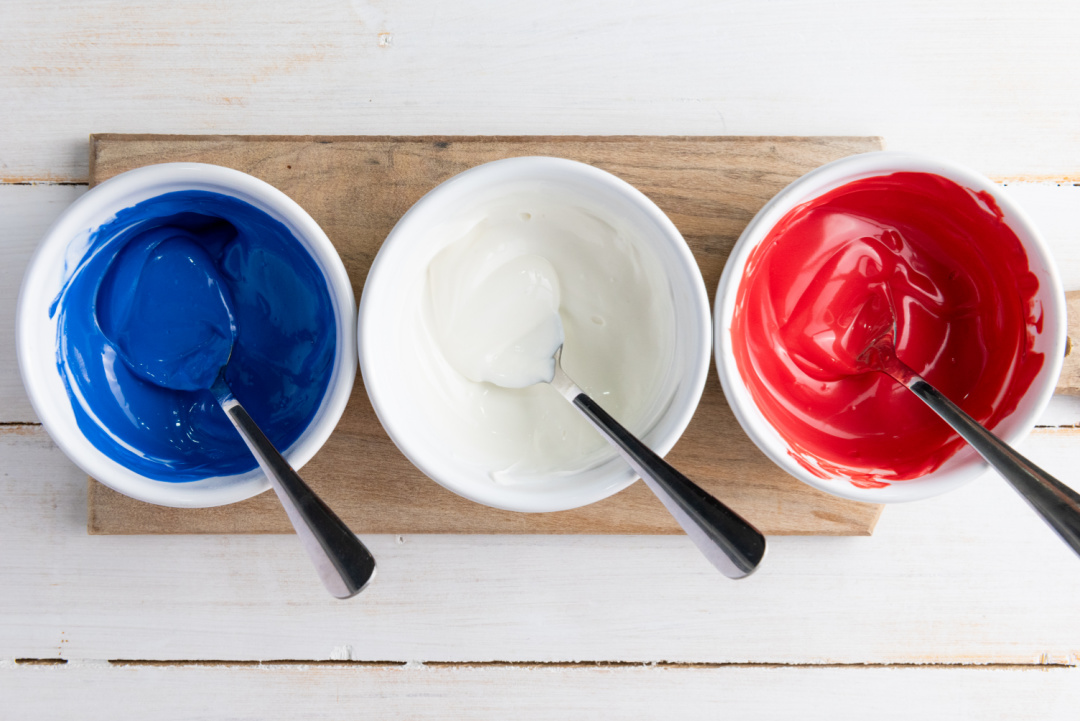
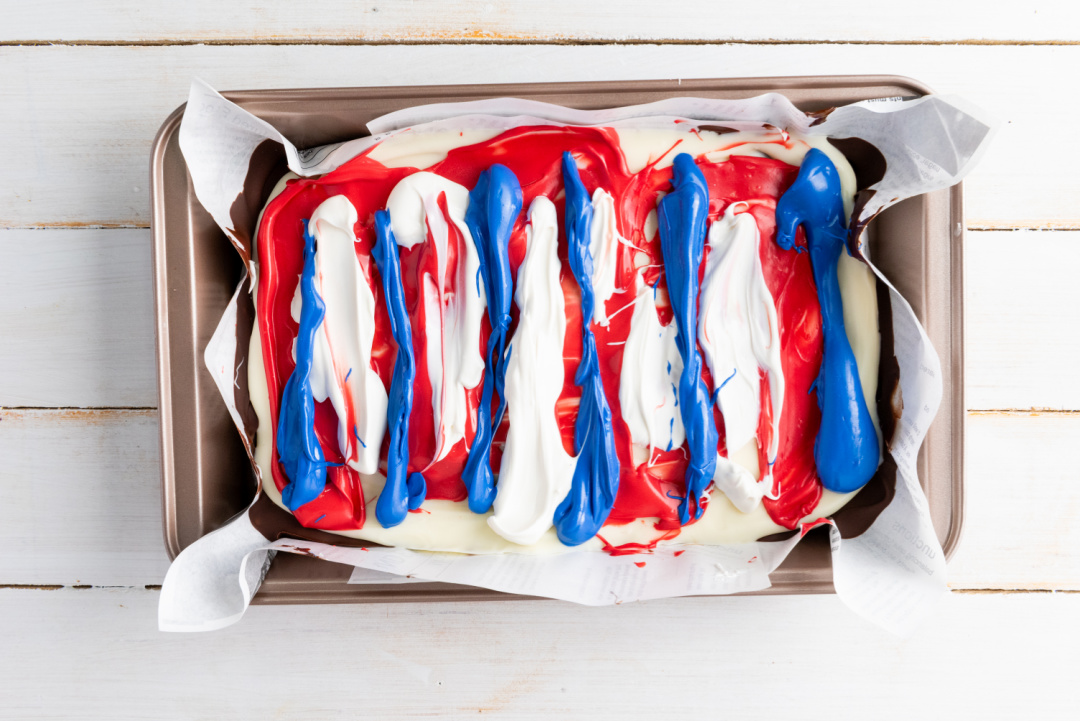
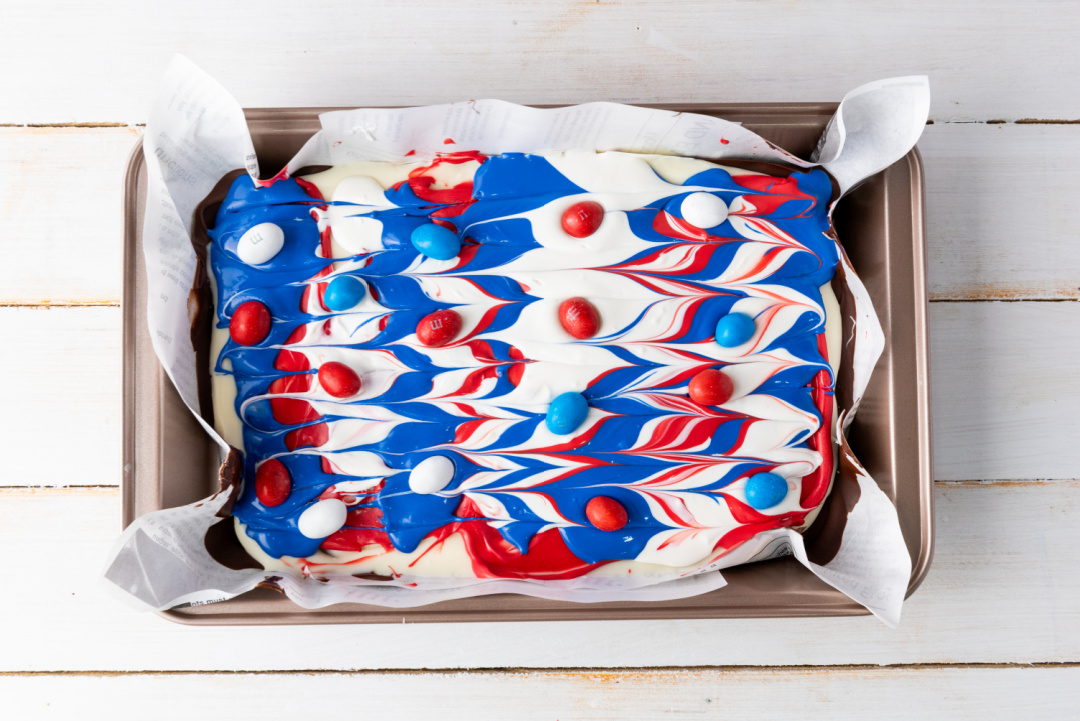
Use a toothpick to swirl the colors gently, creating a marbled effect. Do this before the candy melts harden to ensure a smooth pattern.

Sprinkle the red, white, and blue star sprinkles and M&Ms over the top while the candy melts are still slightly soft to ensure they stick.
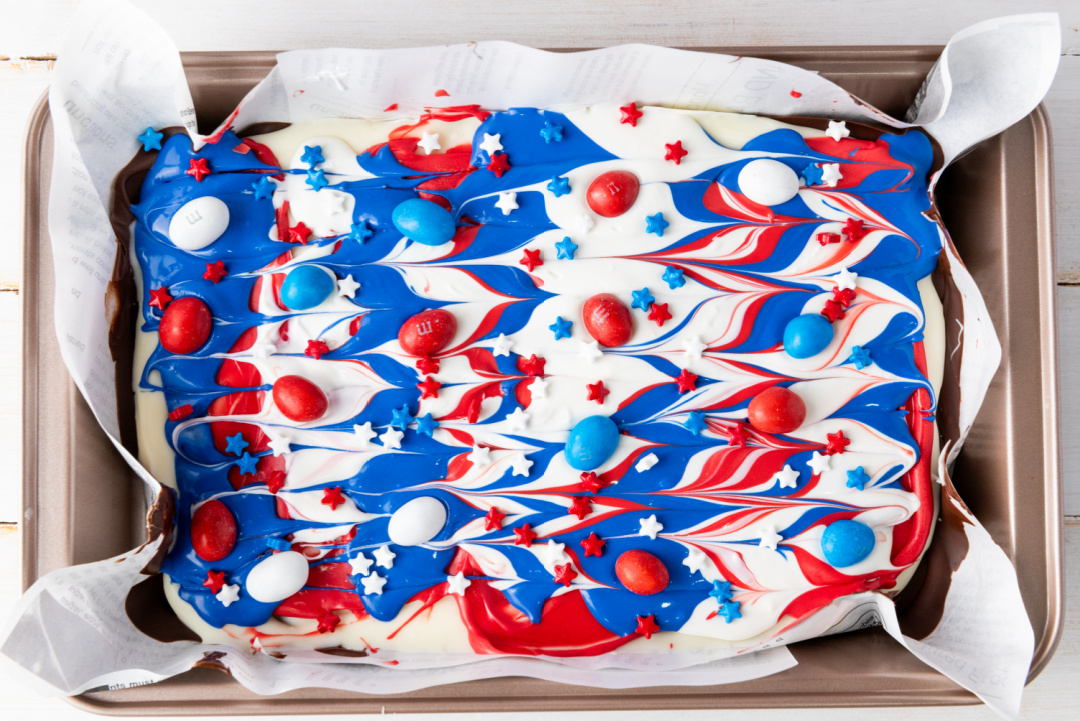
Allow the entire tray to harden completely, either at room temperature or in the refrigerator if you’re in a hurry.
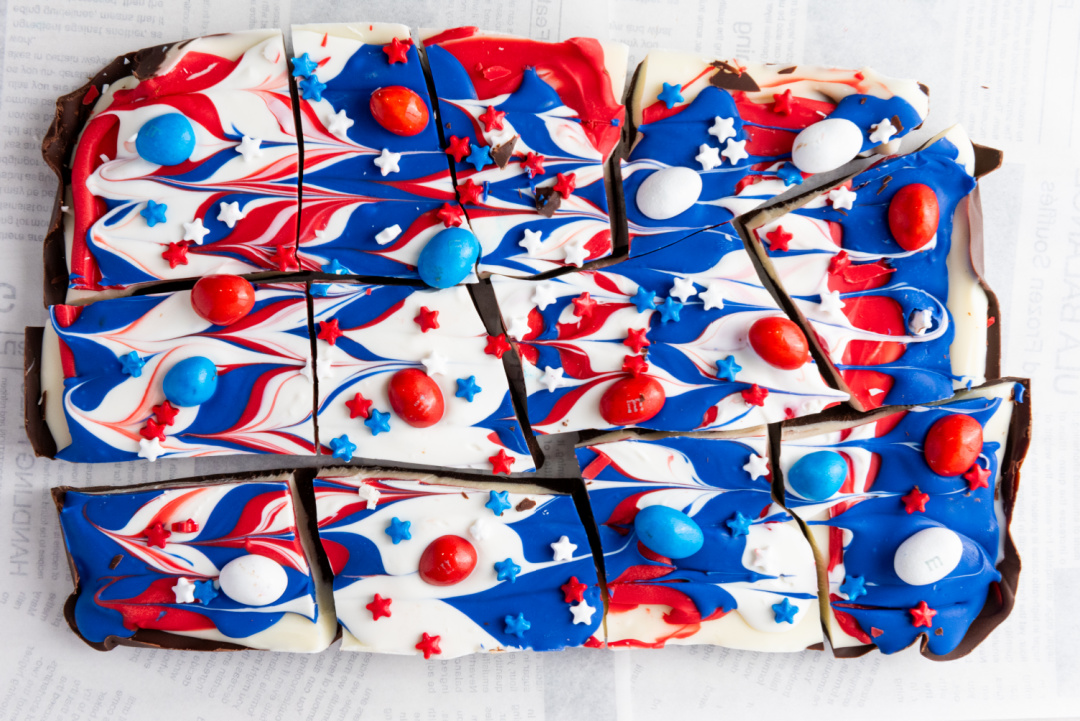
Once fully set, lift the bark out of the tray using the edges of the parchment paper and break it into pieces by hand.
Your colorful chocolate bark is ready to be served! Store any leftovers in an airtight container at room temperature or in the fridge.
Helpful Tips and Tricks for Making Patriotic Chocolate Bark
1. Use microwave-safe bowls for quick cleanup.
Melt your chocolates and candy melts in microwave-safe bowls to avoid using extra pans. Fewer dishes = happier mom.
2. Line your pan with parchment paper.
This makes it super easy to lift the bark out when it’s set—no sticking, no scraping.
3. Chill between layers to save time.
Pop each layer in the fridge or freezer for a few minutes to help the bark set faster. Just be careful not to leave it in too long or it may sweat once back at room temp.
4. Use a piping bag or sandwich bag for cleaner drizzle.
Fill a small sandwich bag with melted candy melts, snip the tip, and drizzle away. It gives you more control and keeps things less messy.
5. Let the kids decorate.
This is the perfect step for little hands. Once the chocolate is drizzled, let them add sprinkles and M&Ms. It’s fun for them and gives you a quick breather.
6. Break it up with your hands or use a knife for cleaner cuts.
If you want rustic pieces, go ahead and break it by hand. For a more uniform look (like for party favors), use a sharp knife to slice the bark after it’s chilled.
7. Store in the fridge if it’s hot outside.
If you’re serving this on a warm day, keep it refrigerated until right before serving so it doesn’t get too soft.
8. Customize it with allergy-friendly options.
Use allergy-safe chocolate or dye-free candies if needed for classroom parties or sensitive guests.
9. Make it ahead of time.
You can make this bark a few days in advance and store it in an airtight container. Perfect when you’re juggling other dishes or planning a party.
10. Package leftovers as favors.
Any extras can be packaged in clear treat bags or mason jars with a ribbon for an easy take-home treat or thank-you gift.
11. Swap colors for other holidays.
Once you master the method, you can switch up the colors and candies for other occasions—orange and black for Halloween, pink and red for Valentine’s Day, green and red for Christmas, etc.
These tips can help save time, reduce mess, and even make the bark a fun family activity. Moms love a recipe that’s not just easy, but flexible—and this one delivers.
Frequently Asked Questions About Red, White, and Blue Chocolate Bark
1. Can I use almond bark or candy coating instead of chocolate chips?
Yes! Almond bark or candy coating works just as well and melts smoothly. It’s a great option if that’s what you have on hand or prefer the flavor.
2. Do I have to use candy melts for the red, white, and blue drizzle?
Candy melts give you the best color and hold their shape well, but you can also use colored white chocolate if that’s easier to find. Just make sure you use oil-based food coloring—water-based colors will cause chocolate to seize.
3. How far in advance can I make this chocolate bark?
You can make it up to 5 days in advance. Just store it in an airtight container at room temperature or in the fridge, depending on the temperature in your home.
4. How should I store the bark to keep it fresh?
Store it in an airtight container in a cool, dry place. If your house is warm (especially during the summer), refrigerate it to prevent melting.
5. Can I freeze chocolate bark?
Yes, chocolate bark freezes well. Place it in a freezer-safe container with parchment paper between layers. When ready to serve, let it come to room temperature before opening the container to avoid condensation.
6. Can I make this bark nut-free?
Absolutely. Just double-check the labels on your chocolate and candy melts to make sure they’re processed in a nut-free facility. Skip any candy that may contain nuts.
7. Can kids help make this recipe?
Yes! This is a great recipe to get kids involved. Older kids can help melt and pour chocolate with supervision, while younger ones can decorate with sprinkles and M&Ms.
8. What size pan should I use?
A 13×9-inch baking tray works perfectly for this recipe. If you want thinner bark, use a larger tray; for thicker bark, go with a smaller one.
9. My chocolate isn’t melting smoothly—what should I do?
Add a small amount of coconut oil or vegetable shortening to the chocolate while melting. This helps it smooth out and pour easily.
10. Can I change up the toppings?
Definitely. Feel free to use patriotic-colored sprinkles, crushed pretzels, mini marshmallows, or any red, white, and blue candy you like.
11. Is this recipe gluten-free?
It can be, as long as you double-check the ingredients you’re using. Some candy melts and chocolate chips may contain traces of gluten, so read labels carefully if that’s a concern.
Patriotic Bark
Ingredients
- 2 cups white chocolate morsels
- 2 cups semi-sweet chocolate morsels
- 1/2 cup red candy melts
- 1/2 cup white candy melts
- 1/2 cup blue candy melts
- 1 tbsp red, white, and blue star sprinkles
- 1/4 cup red, white, and blue M&Ms
Instructions
Line a baking tray with parchment paper to prevent sticking.
Begin by melting the semi-sweet chocolate morsels. You can do this in a microwave in 30-second bursts, stirring between each, until smooth.
Pour the melted semi-sweet chocolate onto the prepared tray, spreading it into an even layer.
Allow this layer to harden completely. You can speed up this process by placing the tray in the refrigerator.
Melt the white chocolate morsels using the same method as before. Once melted, pour it over the hardened semi-sweet chocolate layer.
Let this white chocolate layer harden completely before proceeding.
Melt the red, white, and blue candy melts separately. You can use small piping bags or a spoon to drizzle each color over the hardened white chocolate layer.
Use a toothpick to swirl the colors gently, creating a marbled effect. Do this before the candy melts harden to ensure a smooth pattern.
Sprinkle the red, white, and blue star sprinkles and M&Ms over the top while the candy melts are still slightly soft to ensure they stick.
Allow the entire tray to harden completely, either at room temperature or in the refrigerator if you're in a hurry.
Once fully set, lift the bark out of the tray using the edges of the parchment paper and break it into pieces by hand.
Your colorful chocolate bark is ready to be served! Store any leftovers in an airtight container at room temperature or in the fridge.