Category: DIY

  • Puppy Dog Popsicle Stick Craft

    Create this adorable Puppy Dog Popsicle Stick Craft for Valentine’s Day!

    Valentine’s Day is coming up! Get ready to create fun crafts this year! Today I’m sharing my tutorial for how to make a puppy dog using popsicle sticks.

    This craft includes a free printable template for the puppy dog ears and nose.

    Printable Dog Valentine’s Day Cards

    Popsicle stick crafts are easy to make! I recently posted this adorable Love Bug Popsicle Stick Craft.

    Check it out if you are looking for more Valentine’s Day crafts to make this year. Create this craft and consider displaying this craft in your home or classroom this year.

    You can also wrap this gift up and give it to the special Valentine in your life.

    Puppy Dog Popsicle Stick Craft

    Supplies:

    • 4 large popsicle sticks
    • 1 small popsicle sticks
    • 2 googly eyes
    • printable template (see below)
    • cardstock
    • glue
    • black marker

    Get the free puppy template!

      We respect your privacy. Unsubscribe at anytime.

      Directions:

      Download printable and load cardstock in the printer. Print the PDF.

      Use scissors to cut each of the shapes, then cut the large heart in half.

      Lay the large popsicle sticks on a flat surface and glue the small stick to the back to hold them in place.

      Glue the two halves of the large heart to each side of the popsicle sticks to make ears.

      Turn the medium sized heart upside down and glue it to bottom of the popsicle sticks.

      Glue the small heart to the tip of the black heart as the dog’s nose.

      Glue two eyes between each ear.

      Use the marker to draw dots on each side of the nose.

      Display this cute puppy dog craft this Valentine’s Day!

      Puppy Dog Popsicle Stick Craft

      Puppy Dog Popsicle Stick Craft

      Materials

      • 4 large popsicle sticks
      • 1 small popsicle sticks
      • 2 googly eyes
      • Printable template
      • Cardstock
      • Glue
      • Black marker

      Instructions

      1.  Download printable and load cardstock in the printer. Print the PDF.

      2.  Use scissors to cut each of the shapes, then cut the large heart in half.

      3.  Lay the large popsicle sticks on a flat surface and glue the small stick to the back to hold them in place.

      4.  Glue the two halves of the large heart to each side of the popsicle sticks to make ears.

      5.  Turn the medium sized heart upside down and glue it to bottom of the popsicle sticks.

      6.  Glue the small heart to the tip of the black heart as the dog’s nose.

      7.  Glue two eyes between each ear.

      8.  Use the marker to draw dots on each side of the nose.

    • Snowflake Soap

      Snowflake Soap

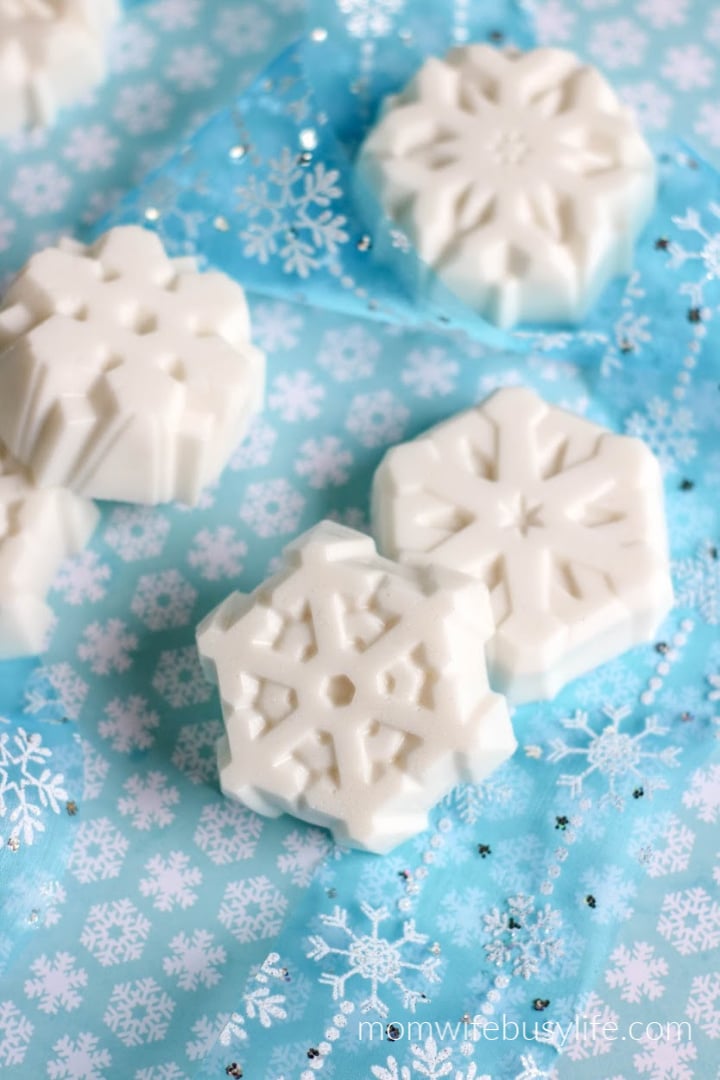
      Get crafty this winter and create this beautiful winter Snowflake Soap! Perfect for personal use or to give as a gift.

      Snowflake Soap

      When you think of winter, what comes to mind? You probably think of cold temps and SNOW!

      While we haven’t seen snow this year just yet, I’m sure we will have a few days where we get to enjoy snow days.

      Last year, my kids were off of school for an entire week due to snow! Three years ago, we had our very first white Christmas EVER!

      How to Make Curled Paper Snowflakes

      Bring the winter indoors this season with this DIY Winter Snowflake Soap Recipe! This recipe is fun and easy to make.

      Plus, you can get creative and customize the scents and colors of these bars. One of the perks of making your own soap is that you’ll know exactly what’s going into each bar!

      If you haven’t made any DIY soaps yet, this is a great recipe to try for beginners!

      These Snowflake Soap bars make great gifts during the holiday season, too!

      Package them up in clear cellophane bags with a pretty ribbon to give as gifts.

      Snowflake Soap

      Snowflake Soap

      Ingredients:

      Snowflake Soap

      Directions:

      Remove soap base from container and cut into pieces.

      Snowflake Soap

      Place in a microwave safe container and heat according to package directions. Once the soap is melted, work quickly as it will begin to harden immediately around the edges of the bowl.

      Meanwhile, mix together mica powder and melted coconut oil until blended.

      Snowflake Soap
      Snowflake Soap

      To the soap base, add essential oil and mica liquid. Stir to combine.

      If the soap has begun to harden, reheat in the microwave for about 10 seconds.

      Pour melted soap into the molds and allow soap to rest for at least 45 minutes before moving.

      Snowflake Soap

      When the soap is set, remove from the mold and package for gifts.

      Snowflake Soap

      ½ soap base makes 6 bars

      Snowflake Soap

      Snowflake Soap

      Snowflake Soap

      Snowflake Soap

      Materials

      • ½ soap base
      • Silicone soap mold
      • 10 drops essential oil, if desired
      • 1 teaspoon mica powder
      • 1 tablespoon coconut oil, melted

      Instructions

      Remove soap base from container and cut into pieces. Place in a microwave safe container and heat according to package directions. Once the soap is melted, work quickly as it will begin to harden immediately around the edges of the bowl.

      Meanwhile, mix together mica powder and melted coconut oil until blended.

      To the soap base, add essential oil and mica liquid. Stir to combine.

      If the soap has begun to harden, reheat in the microwave for about 10 seconds.

      Pour melted soap into the molds and allow soap to rest for at least 45 minutes before moving.

      When the soap is set, remove from the mold and package for gifts.

      ½ soap base makes 6 bars in the mold linked above

    • Snowman Mason Jar Gift

      Snowman Mason Jar Gift

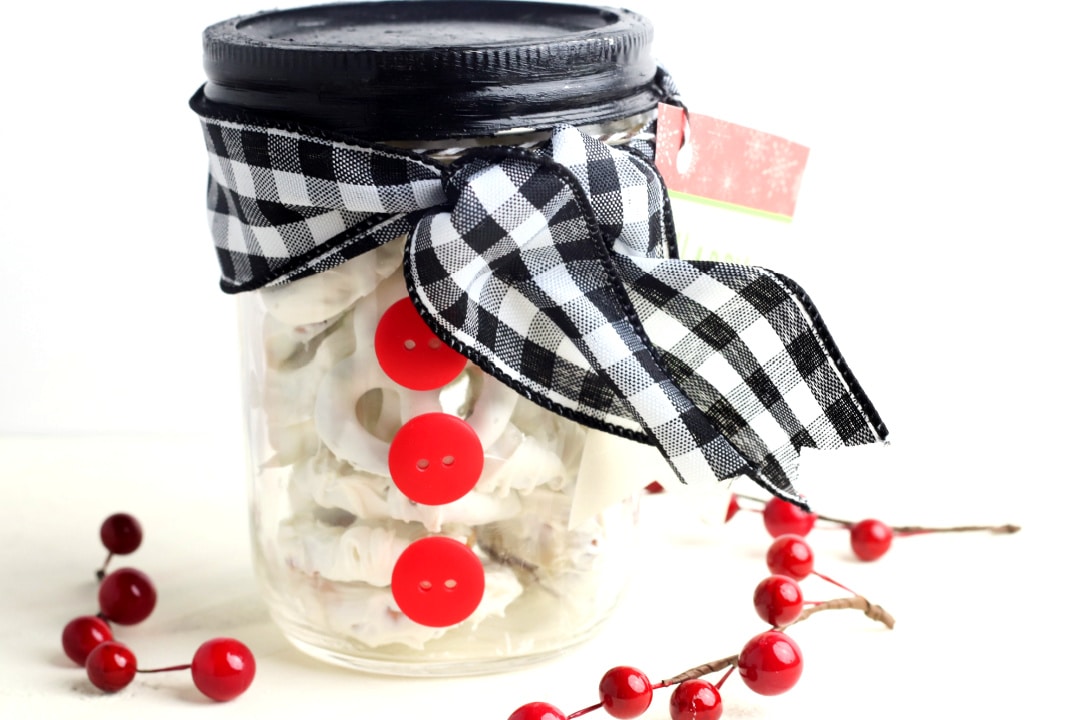
      Create this Snowman Mason Jar Gift this holiday season! Mason jar gifts are so easy and super fun to make, plus they make great gift ideas.

      Snowman Mason Jar Gift

      Get crafty this holiday season! Grab or purchase your empty mason jars and create holiday gifts in a jar to give to the ones you love this holiday season.

      Mason jar gifts are easy to make and can save you a lot of money when you make your own gifts.

      All you need for this craft are a few simple supplies: a jar, pretzels, melting chocolate, buttons, ribbon, and a just a few other items to make this super adorable holiday Snowman Mason Jar Gift.

      Milk Jug Snowman

      Build a Snowman Printables

      Snowman Crafts and Activities for Kids

      The best part about this craft is that you can get your kids involved in the process and help them make these craft.

      Kids will LOVE creating these snowman gifts. From the painting, to creating the pretzel treats, to gluing on the buttons and adding the ribbons and tags.

      Have fun with this craft this holiday season!

      Snowman Mason Jar Gift

      Supplies:

      >> CLICK HERE TO SIGN UP FOR MY EMAIL LIST AND DOWNLOAD YOUR PRINTABLE!

      Instructions:

      Melt chocolate according to package instructions. Dip pretzels in the chocolate and allow to cool completely.

      Place chocolate covered pretzels in the jar.

      Paint the lid of the jar black and allow to dry completely.

      Place lid on top of jar.

      Glue three buttons to the front of the jar.

      Tie ribbon around the top of the jar and secure in place with glue.

      Print the gift tags on card stock, cut out around outer edge, and tie to jar with piece of twine.

      Snowman Mason Jar Gift
      Snowman Mason Jar Gift

      Snowman Mason Jar

      Snowman Mason Jar

      Materials

      • Pretzels
      • White melting chocolate
      • Jar
      • Black paint
      • Red buttons
      • Plaid ribbon
      • Printable gift tags
      • Twine
      • Hot glue gun

      Instructions

      Melt chocolate according to package instructions. Dip pretzels in the chocolate and allow to cool completely. Place chocolate covered pretzels in the jar.

      Paint the lid of the jar black and allow to dry completely. Place lid on top of jar.

      Glue three buttons to the front of the jar.

      Tie ribbon around the top of the jar and secure in place with glue.

      Print the gift tags on card stock, cut out around outer edge, and tie to jar with piece of twine.

    • Christmas Sensory Bottle

      Christmas Sensory Bottle

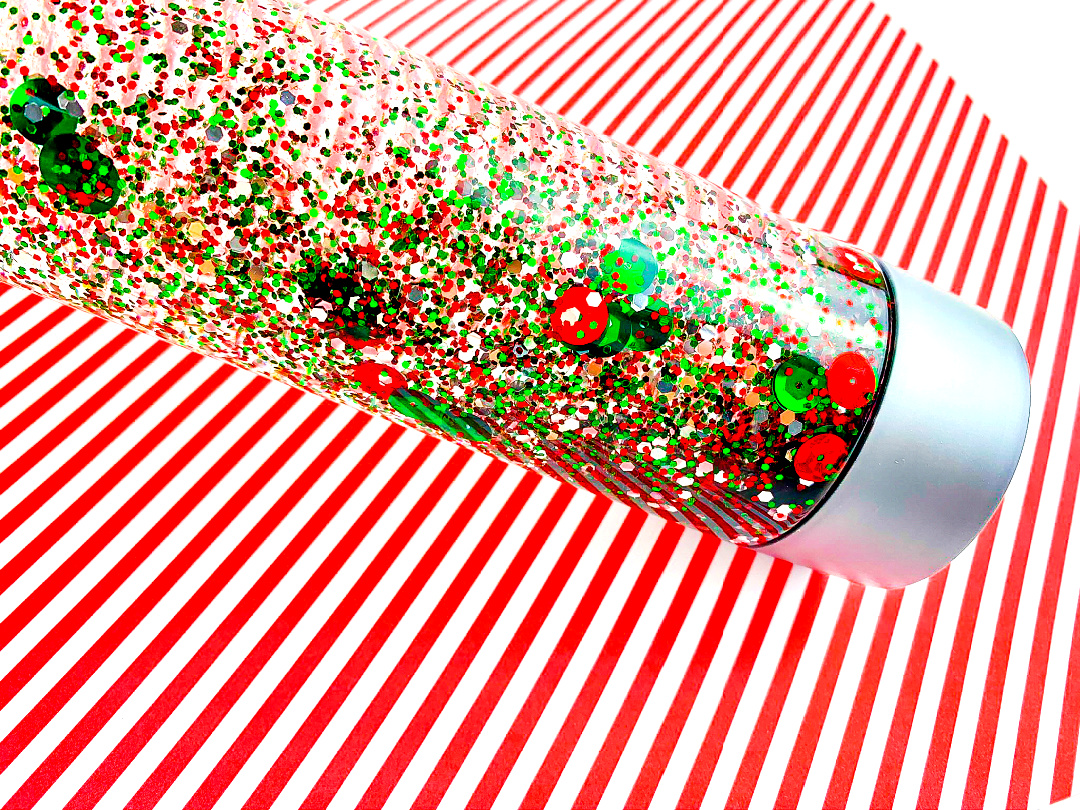
      Create this fun and festive red and green Christmas Sensory Bottle to keep the kids entertained this holiday season!

      Sensory bottles are a great way to keep kids engaged! Using their senses of sight and touch, kids can observe what happens with the contents of each sensory bottle.

      For this Christmas sensory bottle, I used bright and shiny red and green sequins as well as red, green, and silver glitter.

      Benefits of Sensory Bottles

      Snowflake Sensory Bottle

      New Year’s Sensory Bottle

      I also added red and green beads for extra fun and observing. Kids can find and even count the beads as they move around freely in the bottle.

      Christmas Sensory Bottle

      Supplies:

      Directions:

      Pour the glue into the sensory bottle. 

      Add the sequins, glitter, and beads. 

      Fill the remainder of the bottle with water. 

      Close the sensory bottle. Secure lid if desired. 

      Shake the bottle until all contents move around freely.

      Christmas Sensory Bottle

      Christmas Sensory Bottle

      Materials

      • 16oz. sensory bottle
      • 1 (5oz.) bottle of clear Elmer’s Glue
      • Red and green sequins
      • ½ tsp of each: Red, green, and silver glitter
      • Red and green beads
      • Water
      • (Optional: tape or glue to secure lid)

      Instructions

      Pour the glue into the sensory bottle. 

      Add the sequins, glitter, and beads. 

      Fill the remainder of the bottle with water. 

      Close the sensory bottle. Secure lid if desired. 

      Shake the bottle until all contents move around freely.

    • Paper Bag Turkey Craft

      Paper Bag Turkey Craft

      Is your Thanksgiving Day planned yet?

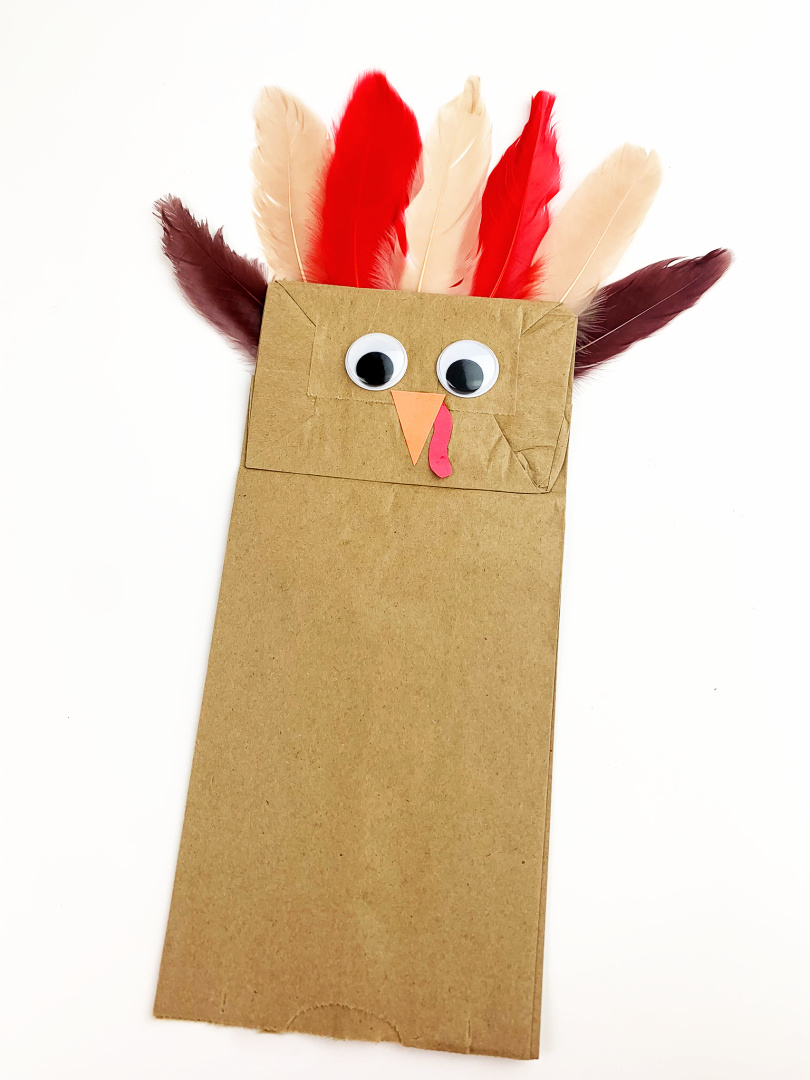
      If you are still looking for ideas, we’ve got one that is easy and fun for the kids – a Paper Bag Turkey Craft! With just a few supplies, you can have this project ready in no time.

      The best part is that the kids can get creative and make their turkeys look however they want. So why not give it a try? Scroll down to see how it’s done.

      Paper Bag Turkey Craft

      Making paper bag crafts can have benefits for children. It can help with their fine motor skills, color recognition, and creativity.

      They can also be a great way to recycle paper bags that would otherwise end up in the trash.

      Turkey Crafts for Kids

      Paper Bag Puppets

      Turkey Craft Thanksgiving Printable Template and Directions
      Turkey Craft Thanksgiving Printable Template and Directions


      Thanksgiving Turkey Craft  What I Am Thankful for Activity
      Printable Build-A-Turkey Thanksgiving Craft


      How do you make a paper bag turkey out of a lunch bag?

      Gather the craft supplies below to make this easy paper bag turkey!

      Paper Bag Turkey Craft

      Supplies:

      Paper Bag Turkey Craft

      Directions:

      Place the bag on the side without the flap. The opening of the bag should be at the bottom. 

      Glue the feathers at the top of the bag. Set aside and allow time to dry. 

      Paper Bag Turkey Craft
      Paper Bag Turkey Craft

      Turn the bag over. 

      Glue the googly eyes towards the middle of the paper bag flap.

      Using the orange construction paper, cut out a beak.

      Using the red construction paper, cut out a waddle. 

      Glue the beak and waddle on under the googly eyes. 

      Set aside and allow time to dry. 

      Pair this activity with the book: There Was an Old Lady that Swallowed a Turkey

      Thankful Turkey Thankful Turkey Printable I Am Thankful For
      Thankful Turkey Printable


      Thanksgiving Coloring Pages Printable Coloring Pages
      Printable Thanksgiving Coloring Pages


      Paper Bag Turkey

      Paper Bag Turkey

      Tools

      • Brown paper bag
      • Feathers
      • Googly eyes
      • Orange and red construction paper
      • scissors
      • glue
      • Book: There Was an Old Lady that Swallowed a Turkey

      Instructions

      Place the bag on the side without the flap. The opening of the bag should be at the bottom. 

      Glue the feathers at the top of the bag. Set aside and allow time to dry. 

      Turn the bag over. 

      Glue the googly eyes towards the middle of the paper bag flap.

      Using the orange construction paper, cut out a beak.

      Using the red construction paper, cut out a waddle. 

      Glue the beak and waddle on under the googly eyes. 

      Set aside and allow time to dry. 

      Pair this activity with the book: There Was an Old Lady that Swallowed a Turkey

    • Pine Cone Turkey Craft

      Pine Cone Turkey Craft

      Pine cone crafts are fun to make! Get creative this fall with pine cones and create this adorable Pine Cone Turkey Craft!

      Pine Cone Turkey

      Did you know that you can create a variety of pine cone crafts with the pine cones you find laying around in your own neighborhood?

      Follow along as I plan to create a variety of fun pine cone animal crafts and other themed pine cone crafts this year!

      If you can’t find pine cones near you, you can find crafting pine cones here.

      Toilet Paper Roll Turkey

      Paper Bag Turkey Craft

      Fall Leaf Turkey Craft

      Edible Apple Turkey

      Turkey Feather Color Matching Game

      The next time you are out on a nature walk with your kids, select a few of your favorite pine cones and create this turkey craft to display this year.

      Today I’m sharing how to make this colorful and adorable pine cone turkey.

      This craft is a great way to celebrate the fall season. It’s also a great activity for the kids to put together while you are busy in the kitchen putting the Thanksgiving meal together!

      I hope you enjoy making this fall pine cone turkey craft with your family!

      Pine Cone Turkey

      Pine Cone Turkey Craft

      Supplies:

      Directions:

      How to prepare your pine cones for the turkey craft:

      After you select your favorite pine cones, simply wash off the pine cones to remove dirt and other debris (and small critters, too!) Set aside to dry.

      Once washed and dried, you can bake your pine cones in the oven on a lined baking sheet on 200 degrees Fahrenheit for about 20-30 minutes. Allow time to cool.

      **This is important if you are bringing pine cones indoors, as you do not want to bring any bugs into your home that can cause problems! (This is always an optional step based on your personal preference.)

      If you prefer to skip this step, you can consider purchasing craft pine cones.

      Now it’s time to make your pine cone turkey craft!

      Turn the pine cone on it’s side.

      Insert the turkey’s tail feathers into the pine cone scales located close to the bottom of the pine cone. There’s no need for glue unless you’d like to use glue to attach the feathers more securely. I did not use glue to attach the feathers for this turkey craft.

      pine cone turkey supplies

      Continue adding the desired amount of tail feathers. I like to give add extra feathers for a full tail feather effect!

      Using the hot glue gun, place a drop of hot glue onto the back of the large pom pom. Attach the pom pom onto the top of the pine cone (the pointiest part of the pine cone!)

      If you need to remove the stem of the pine cone for the pom pom to stick better, you can remove it. The stem should break off easily.

      pine cone turkey craft supplies

      Using the foam sheets of paper, cut a waddle and a beak. I didn’t use any patterns for this. You may use my example below for what it can look like.

      Apply hot glue to the back of the googly eyes, beak, and waddle and attach to the pom pom as seen below.

      pine cone turkey head

      Your Pine Cone Turkey is now ready for display! Set your turkey out as a Thanksgiving decoration this year.

      pine cone turkey

      Here are a few turkey themed books to add to your home or classroom library this year:

      More Pine Cone Related Crafts and Activities:

      Pine Cone Spider

      Pine Cone Bird Feeder

      More Turkey Related Crafts and Activities:

      Turkey Feathers Color Matching Game (FREE Printable Turkeys Included)

      Edible Apple Turkey Craft

    • Toilet Paper Roll Turkey Craft

      Toilet Paper Roll Turkey Craft

      Looking for a fun and easy Thanksgiving craft project that kids can help with? Try making a Toilet Paper Roll Turkey Craft!

      Toilet Paper Roll Turkey Craft

      This is a great way to use up leftover rolls of toilet paper, and the finished project is adorable. Kids will love putting on the finishing touches, like feathers and googly eyes.

      Gather your supplies and get started – your little ones are going to love this one!

      Turkey Crafts for Kids

      Build A Turkey Activities

      Turkey Coloring Pages

      Toilet Paper Roll Turkey Craft

      Supplies:

      Toilet Paper Roll Turkey Craft

      Directions:

      Glue the desired amount of feathers on the back of the toilet paper roll. (3-6 feathers is a recommendation.) Set aside to dry. 

      Toilet Paper Roll Turkey Craft

      Glue the googly eyes onto the front of the toilet paper roll.

      Cut out a beak from the orange construction paper. Glue on under the googly eyes. 

      Cut out a red (wattle) and glue under the beak. Allow plenty of time to dry.

      Toilet Paper Roll Turkey Craft

      Display!  

      Toilet Paper Roll Turkey Craft
      Toilet Paper Roll Turkey Craft
      Thanksgiving Turkey Craft  What I Am Thankful for Activity
      Thanksgiving Turkey Craft


      Thanksgiving Coloring Pages Printable Coloring Pages
      Printable Thanksgiving Coloring Pages


      Turkey Coloring Page Turkey Coloring Sheet Thanksgiving
      Turkey Coloring Page


      Thankful Turkey Activity  Cut and Paste  Thanksgiving Craft
      Thankful Turkey Activity


      Toilet Paper Roll Turkey

      Toilet Paper Roll Turkey

      Materials

      • Toilet paper rolls
      • Googly eyes
      • Feathers
      • Red and orange construction paper
      • Glue
      • Scissors

      Instructions

      Glue the desired amount of feathers on the back of the toilet paper roll. (3-6 feathers is a recommendation.) Set aside to dry. 

      Glue the googly eyes onto the front of the toilet paper roll.

      Cut out a beak from the orange construction paper. Glue on under the googly eyes. 

      Cut out a red (wattle) and glue under the beak. Allow plenty of time to dry.

      Display!