Category: DIY

  • Paper Plate Pumpkin

    Paper plate crafts are fun to make! Create this easy Paper Plate Pumpkin craft with the kids this fall season!

    Paper Plate Pumpkin

    Turn a simple paper plate into a fun fall pumpkin craft for kids this fall season!

    This easy paper plate craft for kids is fun to make and is perfect to display in your home or classroom for Halloween or Thanksgiving!

    While you are here, enjoy these other pumpkin activities:

    Paper Plate Pumpkin

    Supplies:

    Directions:

    Paint the paper plate orange. Set aside to dry. Once dry, apply another coat if desired. Set aside to dry completely.

    Cut a brown stem out of the brown construction paper.

    Cut a green leaf out of the green construction paper.

    Turn the paper plate over to the back and glue the stem on. Allow to dry.

    Turn the paper plate over to the front and glue the leaf next to the stem.

    Cut the ribbon into a 4-6 inch piece.   

    Turn the paper plate to the back and glue the ribbon to the back. Once dry, you can use a strong piece of tape to make sure the ribbon stays secure on the paper plate. Use scissor technique to curl the ribbon.

    Display the pumpkin paper plate craft!

    Paper Plate Pumpkin
    Printable Fall Coloring Pages For Kids Or Adults Autumn
    Printable Fall Coloring Pages For Kids


    Fall Coloring Pages Autumn Coloring Book for Kids Fall Leaf
    Fall Coloring Pages


  • Spider Paper Plate Craft

    Create this simple and adorable Spider Paper Plate Craft for Halloween with the kids this fall season!

    Spider Paper Plate Craft

    This week, I want to share with you a fun spider craft kids can do with paper plates. It’s easy and perfect for the fall season!

    When you are looking for a Halloween craft to make with your child, try this fun spider paper plate craft!

    Pine Cone Spider Craft

    Pipe Cleaner Spider Craft

    With only a few supplies needed and step-by-step instructions, it is easy to get started.

    Your little one will have an awesome time making their own spider crafts this year. It’s perfect for school or home projects!

    Spider Paper Plate Craft

    Supplies:

    • Large white paper plate
    • Black craft paint
    • 4 Black pipe cleaners
    • Hole punch
    • Googly eyes
    • Paint brush
    • Scissors
    • Glue
    • Optional: white yarn (for a web)
    Spider Paper Plate Craft Supplies

    Directions: 

    Paint the back side of a paper plate black. Set aside and allow to dry. 

    Paint a second coat on the paper plate if needed. Set aside to dry.

    Once dry, use the hole punch to punch four holes on each side of the plate. Space apart by about an inch to two inches. 

    Cut the pipe cleaners in half. 

    Place a pipe cleaner in each hole and secure the pipe cleaner to the plate. 

    Bend the bottom part of the pipe cleaner to finish the legs for the spider. 

    Making sure the paper plate is facing down, glue the googly eyes on the front part of the paper plate towards the bottom.

    If desired, you can use a string to tie (for the spider to hang from a web) to the paper plate by punching a hole in the top part of the plate. 

    Spider Paper Plate Craft

    Spider Paper Plate Craft

    Spider Paper Plate Craft

    Materials

    • Large white paper plate
    • Black craft paint
    • 4 Black pipe cleaners
    • Hole punch
    • Googly eyes
    • Paint brush
    • Scissors
    • Glue
    • Optional: string (for a web)

    Instructions

    Paint the paper plate black. Set aside and allow to dry.

    Paint a second coat on the paper plate if needed. Set aside to dry.

    Once dry, use the hole punch to punch four holes on each side of the plate. Space apart by about an inch to two inches.

    Cut the pipe cleaners in half.

    Place a pipe cleaner in each hole and secure the pipe cleaner to the plate.

    Bend the bottom part of the pipe cleaner to finish the legs for the spider.

    Turn the paper plate over facing down. Glue the googly eyes on the front part of the paper plate.

    If desired, you can use a string to tie (for the spider to hang from a web) to the paper plate by punching a hole in the top part of the plate. 

  • Jack-o-Lantern Oranges

    Decorate oranges with a fun or creepy face! Learn how to create these simple and easy Jack-o-Lantern Oranges!

    Jack-o-Lantern Oranges

    If you are looking for a fun Halloween activity to do with the kids this fall, create Jack-o-Lantern Oranges! You can set these oranges around as decorations or serve them as a snack this fall season.

    Let the kids get creative and have them create a variety of oranges with different Jack-o-Lantern faces! Draw scary faces, funny faces, or silly faces!

    Here are a few Jack-o-Lantern face ideas if you need help figuring out what faces to draw on your oranges:

    Supplies:

    Oranges

    Black Permanent marker or black paint marker 

    Jack-o-Lantern Oranges

    Here are a few books about Jack-o-Lanterns to read to supplement this activity:

    Directions: 

    Using the permanent marker, draw a face on each orange. Be creative and mix it up! Draw different eyes, mouths, and/or noses! You can look up different face patterns online if desired. 

    Jack-o-Lantern Oranges
    Jack-o-Lantern Oranges

    If it’s too hard to draw with the permanent marker, try using a paint marker instead.  

    Jack-o-Lantern Oranges
    Jack-o-Lantern Oranges
    Jack-o-Lantern Oranges
    Jack-o-Lantern Oranges

    Here are more options for decorating with pumpkins this fall!

  • Pine Cone Spider Craft for Kids

    Pine Cone Spider Craft for Kids

    Create this adorable Pine Cone Spider craft for kids using a pine cone, googly eyes, pipe cleaners, and craft paint!

    Pine Cone Spider

    The next time you head out with the kids for a nature walk, consider searching for and gathering pine cones to make a variety of pine cone crafts this year! Pine cone crafts are super fun and simple to make. Turn them into animals, bird feeders, and so much more!

    With the fall season approaching, I wanted to create a spider pine cone craft to display this year with our other fall DIY decorations we’ve made over the last few years.

    Spider Paper Plate Craft

    Pipe Cleaner Spider Craft

    This spider is easy to make! Grab your art supplies and enjoy creating this spider craft with the kids.

    Pine Cone Spider

    Supplies:

    Pine Cone Spider Supplies

    Directions:

    How to Prepare Your Pine Cones for Crafts:

    Before creating pine cone crafts, it’s best to prepare the pine cones by rinsing them off, allowing them to dry, and then baking the pine cones in the oven at 200 degrees Fahrenheit for at least 30 minutes. This helps to rid the pine cones of excess dirt or bugs before crafting. When preparing this pine cone, I did find some webbing inside that I cleaned our before painting!

    Set up your work space for painting. I painted my pine cone with a paper plate underneath to catch the spills or messes.

    Pour the black craft paint into a small disposable bowl.

    paint for Pine Cone Spider

    Paint the entire pine cone black. Set aside to dry.

    Gather the pipe cleaners together. Twist them around in the center so that they are stay together.

    Pine Cone Spider Craft

    Insert the pipe cleaners (legs of the spider) into the grooves of the pine cone. Pull the legs down to the side to touch the surface and separate if needed.

    pine cone spider craft for kids

    For this craft, we used the bottom of the pine cone for the face of the spider. This will give you plenty of room to assemble the spider eyes.

    Using your hot glue gun, place a small dot of glue behind each googly eye and stick the eyes onto the spiders face in desired pattern.

    pine cone spider
    pine cone spider

    We hope you enjoy creating this Pine Cone Spider this year! While you are here, check out these great books about spiders below!

    Here are more fun spider decorations to decorate with this fall season:

  • Pumpkin Painting in a Bag Craft

    Kids love to paint! This mess-free Pumpkin Painting in a Bag Craft for kids is a great way to finger paint without all of the mess. This is a great fall activity!

    Pumpkin Painting in a Bag Craft

    Pumpkin Painting in a Bag Craft

    Supplies:

    • Tempera Paint
    • Gallon zip top freezer bag
    • Masking tape
    • Cardstock
    • Scissors
    • Template

    Directions:

    Trace template of your choosing over cardstock and cut out the design.

    Squeeze paint into the plastic bag. Release all the air from the bag and seal.

    Choose whether to tape the plastic bag to the table OR to the cardstock. If you are taping the plastic bag to the table, tape the cardstock over the plastic bag.

    Instruct children to move the paint around the bag to fill the open space in the cardstock.

    Pumpkin Painting in a Bag Craft

    Pumpkin Painting in a Bag Craft

    Materials

    • Tempera Paint
    • Gallon zip top freezer bag
    • Masking tape
    • Cardstock
    • Scissors
    • Template

    Instructions

    Trace template of your choosing over cardstock and cut out the design.

    Squeeze paint into the plastic bag. Release all the air from the bag and seal.

    Choose whether to tape the plastic bag to the table OR to the cardstock. If you are taping the plastic bag to the table, tape the cardstock over the plastic bag.

    Instruct children to move the paint around the bag to fill the open space in the cardstock.


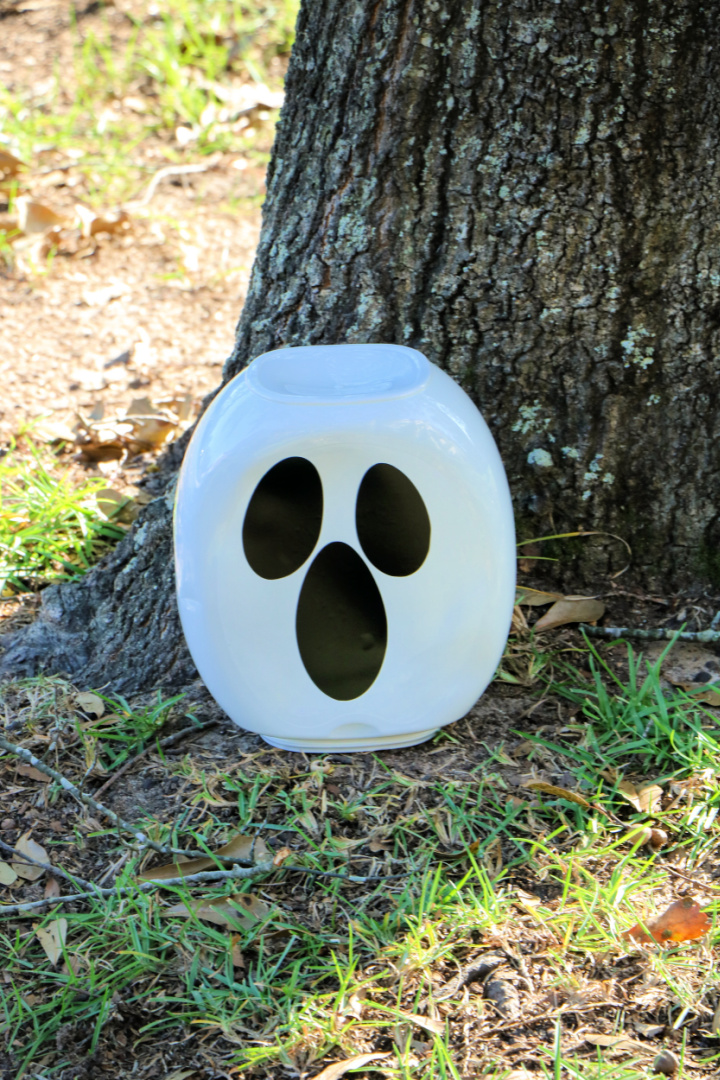
  • Laundry Pod Container Ghost Craft

    Laundry Pod Container Ghost Craft

    Recycle your laundry containers! Create this Laundry Pod Container Ghost Craft to display this fall season. FREE ghost face template included!

    Tide Pod Container Ghost Craft

    Milk Jug Ghost Craft

    Laundry Pod Container Ghost Craft

    Supplies:

    • 1 empty laundry pods container (I used Tide brand)
    • Ghost template
    • Printer paper OR 8.5×11 blank adhesive label OR black adhesive vinyl
    • Liquid glue (if not using adhesive)
    • Scissors (if not using a cutting machine)

    Directions:

    Remove the label from the laundry pods container by soaking in hot water, scraping, and then using GooGone to remove completely.

    You can also use a heat gun to warm the label but the ease of this option varies based on the brand. For instance, I found using a heat gun to be easy on Gain containers but difficult on Tide containers.

    Remove the top from the container and discard.

    Print template and cut.

    Apply the template to the side of the container.

    Display your ghost decoration this Halloween on your porch or in your yard!

    Laundry Pod Container Ghost Craft

    Laundry Pod Container Ghost Craft

    Materials

    • 1 empty Tide laundry pods container
    • Ghost template
    • Printer paper OR 8.5×11 blank adhesive label OR black adhesive vinyl
    • Liquid glue (if not using adhesive)
    • Scissors (if not using a cutting machine)

    Instructions

    Remove the label from the laundry pods container by soaking in hot water, scraping, and then using GooGone to remove completely. You can also use a heat gun to warm the label but the ease of this option varies based on the brand. For instance, I found using a heat gun to be easy on Gain containers but difficult on Tide containers.

    Remove the top from the container and discard.

    Print template and cut.

    Apply the template to the side of the container.
    

  • Halloween Cookie Decorating Kit

    It’s that time of year again when the leaves start changing coloring, the days get shorter, and pumpkins start appearing on doorsteps. Yes, Halloween is just around the corner!

    If you’re like me, you might be looking for some fun Halloween-themed activities to do with your kids.

    Well, look no further than right here!

    I’ve got a great idea for you: order a Halloween Cookie Decorating Kit. Your kids will love it!

    Fall Cookie Decorating Kits

    Thanksgiving Cookie Decorating Kits

    Christmas Cookie Decorating Kits

    Best Cookie Decorating Kits (so many adorable themes to choose from!)

    Halloween Cookie Decorating Kit

    Halloween Cookie Decorating Kit Ghost DIY Cookie Kit large
    Halloween Cookie Decorating Kit


    Halloween Cookie Decorating Kit Coffee Shop DIY Cookie Kit
    Halloween Cookie Decorating Kit


    Halloween Decorating Cookie Kit large Cookies Decorating
    Halloween Decorating Cookie Kit


    Halloween Cookie Decorating Kit INCLUDES 24 ITEMS large
    Halloween Cookie Decorating Kit


    Halloween Cookie Decorating Kit INCLUDES 24 ITEMS
    Halloween Cookie Decorating Kit


    Halloween Cookie Decorating Kit large Cookies INCLUDES 24
    Halloween Cookie Decorating Kit


    Halloween Cookie Decorating Kit DIY Cookie INCLUDES 25
    Halloween Cookie Decorating Kit


    Cookie Decorating Kit DIY Decorating Cookies Kit extra
    Halloween Cookie Decorating Kit


    Halloween Cookie Decorating Kit DIY Cookie Kit large
    Halloween Cookie Decorating Kit


    Halloween Cookie Decorating Kit large Cookies INCLUDES 24
    Halloween Cookie Decorating Kit


    Hocus Pocus DIY Cookie Kit  Sugar Cookies  Royal Icing
    Hocus Pocus DIY Cookie Kit


    DIY Halloween Sugar Cookie Decorating and Craft Kit
    DIY Halloween Sugar Cookie Decorating Kit


    Halloween Cookie Decorating Kit large Cookies  INCLUDES 24
    Halloween Cookie Decorating Kit


    Halloween Spooky Pizza DIY Cookie Decorating Kit  Decorate
    Halloween Spooky Pizza DIY Cookie Decorating Kit


    DIY Halloween Cookie Decorating Kit
    Halloween Cookie Decorating Kit


    Undecorated Halloween Sugar Cookie Kits X 2
    Undecorated Halloween Sugar Cookie Kits X 2


    DIY Halloween Cookie Decorating Kit Sugar Cookies Decorator
    DIY Halloween Cookie Decorating Kit