Category: DIY

  • Pumpkin Counting from 1-10 Activity

    Pumpkin Counting from 1-10 Activity

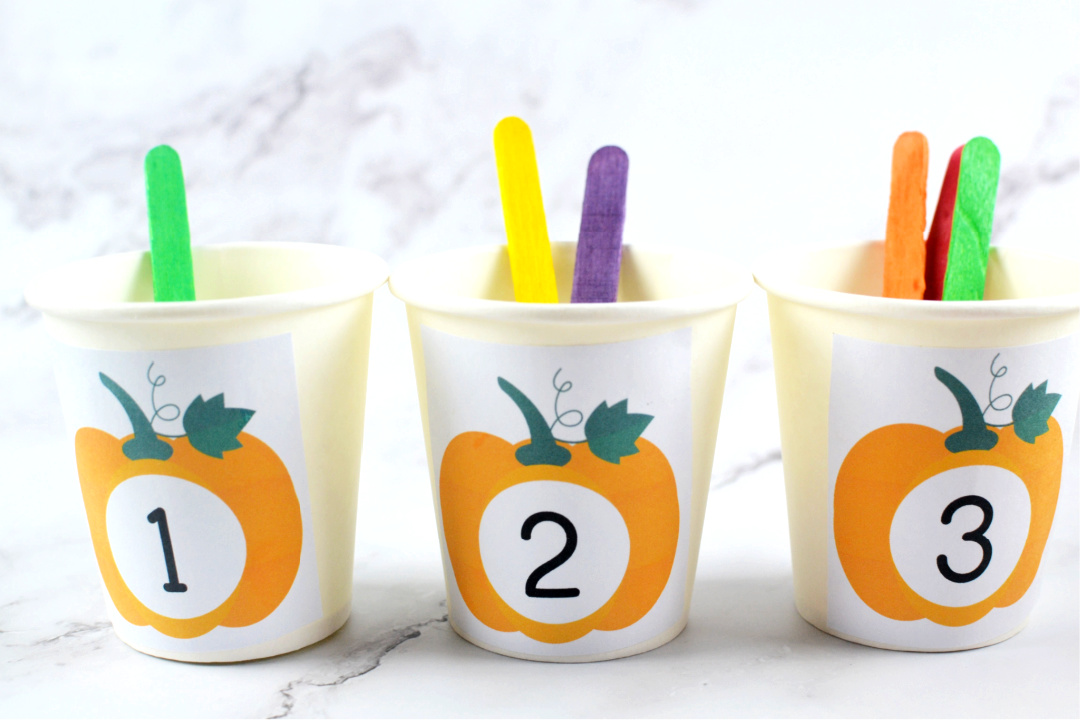
    Enjoy this fun fall Pumpkin Counting from 1-10 Activity for kids! This activity includes a free printable pumpkin template with numbers 1-10.

    The fall season is the perfect season to take advantage of fun and unique learning games with the kids!

    This Pumpkin Counting Activity for Kids is simple and easy to create and highly engaging for toddlers learning how to count from 1 to 10!

    Printable Pumpkin Activities

    Set these counting cups up in a learning center at school or homeschool!

    If you children are learning virtually this year, this activity would be a great supplemental activity to complete with your counting lessons.

    Pumpkin Counting from 1-10 Activity

    Supplies:

    Pumpkin Counting Activity

    Directions:

    Print the Counting Pumpkins PDF Template.

    Cut the numbers out with a pair of scissors. You can follow the outline of the pumpkin or you may cut the number in a square or rectangle shape.

    Pumpkin Counting Activity

    Take each number square and place a dot of glue each each corner. Paste each number to a different cup.

    Get the popsicle sticks and get ready to start practice counting.

    Add the amount of sticks to match the number on each cup starting at 1. Complete this step until your child has placed the right amount of sticks in each cup.

    When the child completes the activity, feel free to start over, counting down from 10 to 1.

    Children can practice color sorting with the sticks if they wish, too. For example, add 5 blue popsicle sticks to the number 5 cup or 7 green popsicle sticks to the number 7 cup and so on.

    Get the free printable counting pumpkins!

      We respect your privacy. Unsubscribe at anytime.

      Enjoy this FREE Printable Pumpkin Activity Pack!

      Pin to Pinterest:

    • Paper Plate Pumpkin Wreath

      Create this Paper Plate Pumpkin Wreath with the kids this fall season to display in your home or classroom!

      Fall is a season filled with colorful foliage, pumpkin patches, and cozy vibes.

      It’s the perfect time to engage in fun and creative activities with your kids.

      One exciting craft project that will spark their creativity and add a touch of autumnal charm to your home is the Paper Plate Pumpkin Wreath!

      Pumpkin Crafts

      Aluminum Can Pumpkin Craft

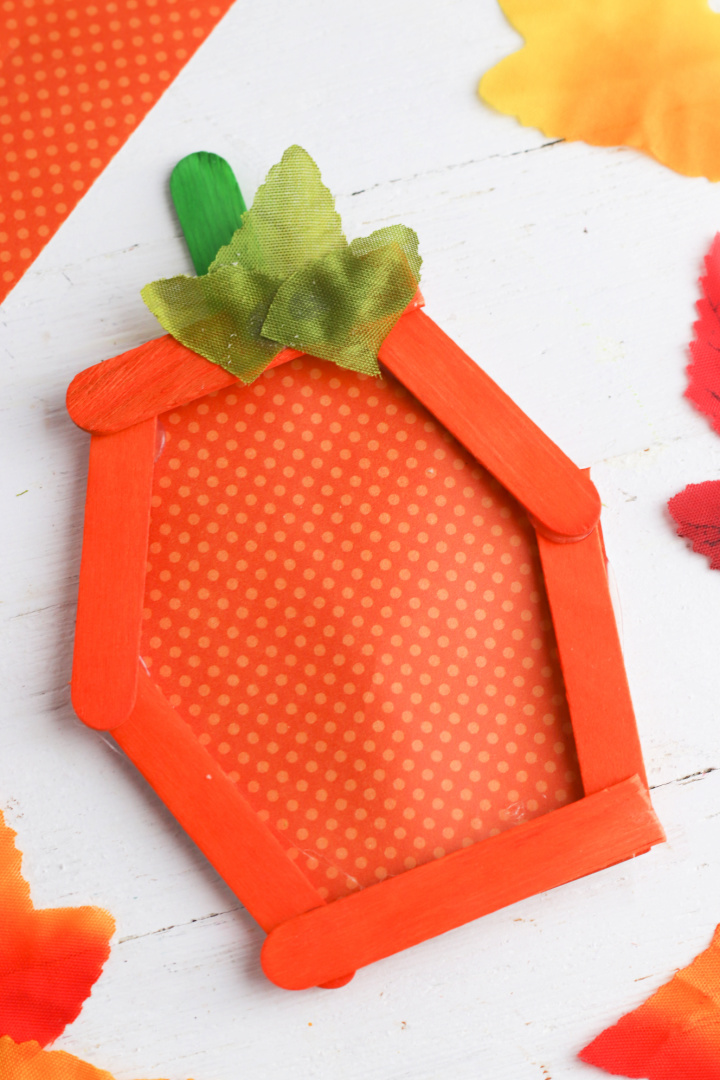
      Pumpkin Popsicle Stick Craft

      Pumpkin Melted Bead Suncatcher

      With just a few supplies and simple directions, you and your little ones can create a festive and adorable decoration that celebrates the spirit of the season.

      Get ready for some crafty fun as we guide you through the steps and explore various ways to display your masterpiece!

      How to Display Your Paper Plate Pumpkin Wreath

      Front Door Delight

      Hang your Paper Plate Pumpkin Wreath on your front door to welcome guests with a touch of festive charm.

      Use a wreath hanger or attach a colorful ribbon to the top of the wreath and tie it securely to your door knocker.

      Every time you and your family come home, the cheerful pumpkins will greet you, setting the autumn mood.

      Wall Decor Wonder

      Find a prominent spot on your wall to display your pumpkin wreath as wall decor.

      Use adhesive hooks or picture hangers to secure the wreath to the wall.

      It can be a great addition to your living room, hallway, or even the kids’ playroom.

      Your little ones will be proud to showcase their artistic creation to family and friends.

      Mantel Magic

      If you have a fireplace mantel, adorn it with your Paper Plate Pumpkin Wreath as a centerpiece.

      Place the wreath in the center and arrange other fall-themed decorations around it.

      Add some miniature pumpkins, artificial fall leaves, and even some cozy LED candles to create a warm and inviting atmosphere.

      Window Wonderland

      Let your Paper Plate Pumpkin Wreath catch the attention of passersby by hanging it in a window.

      Attach a suction cup hook to the windowpane and secure the wreath to it using the ribbon or a piece of string.

      The sunlight filtering through the pumpkins will create a beautiful display of colors.

      Tabletop Treat

      Transform your dining or coffee table into a fall-themed oasis by using your Paper Plate Pumpkin Wreath as a centerpiece.

      Place it in the middle of the table and arrange additional fall elements, such as acorns, pinecones, or faux fall foliage, around the wreath.

      It’s a wonderful way to infuse your meals or coffee time with the cozy ambiance of the season.

      Classroom Creativity

      If you’re a teacher or your kids attend school, consider bringing the Paper Plate Pumpkin Wreath to the classroom.

      Hang it on a bulletin board or display it in the classroom for all to admire.

      It will inspire creativity and celebrate the season, creating a warm and festive learning environment.

      Get started on your Paper Plate Pumpkin Wreath!

      Crafting with your kids not only strengthens the bond between you but also sparks their imagination and fosters their creativity.

      The Paper Plate Pumpkin Wreath is a perfect craft project for fall, allowing your little ones to explore colors, shapes, and the joy of making something special.

      Once completed, choose the display option that suits your style and home best.

      Whether on the front door, wall, mantel, window, table, or classroom, your Paper Plate Pumpkin Wreath will bring the spirit of fall to life and fill your surroundings with a touch of handmade charm.

      Paper Plate Pumpkin Wreath

      Supplies:

      Get your free printable pumpkin template!

        We respect your privacy. Unsubscribe at anytime.

        Directions:

        Print the pumpkin template on cardstock and cut it apart. The free template above will serve as a guide for creating your pumpkin shapes.

        Trace the pumpkin shapes onto colored construction paper using a pencil or marker.

        Choose various shades of orange to give your wreath dimension and visual appeal. Let your kids’ imagination run wild with different color combinations!

        Cut out the pumpkin shapes along the traced lines. This step allows your little ones to practice their scissor skills and contribute to the craft.

        Take the white dinner-size paper plate and remove the center circle, leaving only the outer ring. This will create the wreath shape for your pumpkin masterpiece.

        Attach the pumpkin shapes to the paper plate wreath using glue dots or glue.

        Encourage your kids to arrange the pumpkins creatively, overlapping them and alternating colors to add depth and visual interest.

        Use the hole punch to punch a hole in the paper plate.

        Tie the ribbon to the paper plate. hand and display!

        Paper Plate Pumpkin Wreath

        Paper Plate Pumpkin Wreath

        Materials

        • Cardstock or construction paper in various shades of orange
        • Glue dots or glue
        • White dinner-size paper plate
        • Scissors
        • Pumpkin template printed on cardstock

        Instructions

        Print the pumpkin template on cardstock and cut apart.

        Trace pumpkin shapes onto colored construction paper. Cut the pumpkins.

        From the paper plate, remove the center circle to create the wreath shape.

        Attach the pumpkins to the paper plate wreath using glue dots.


      • Apple Bird Feeder

        Apple Bird Feeder

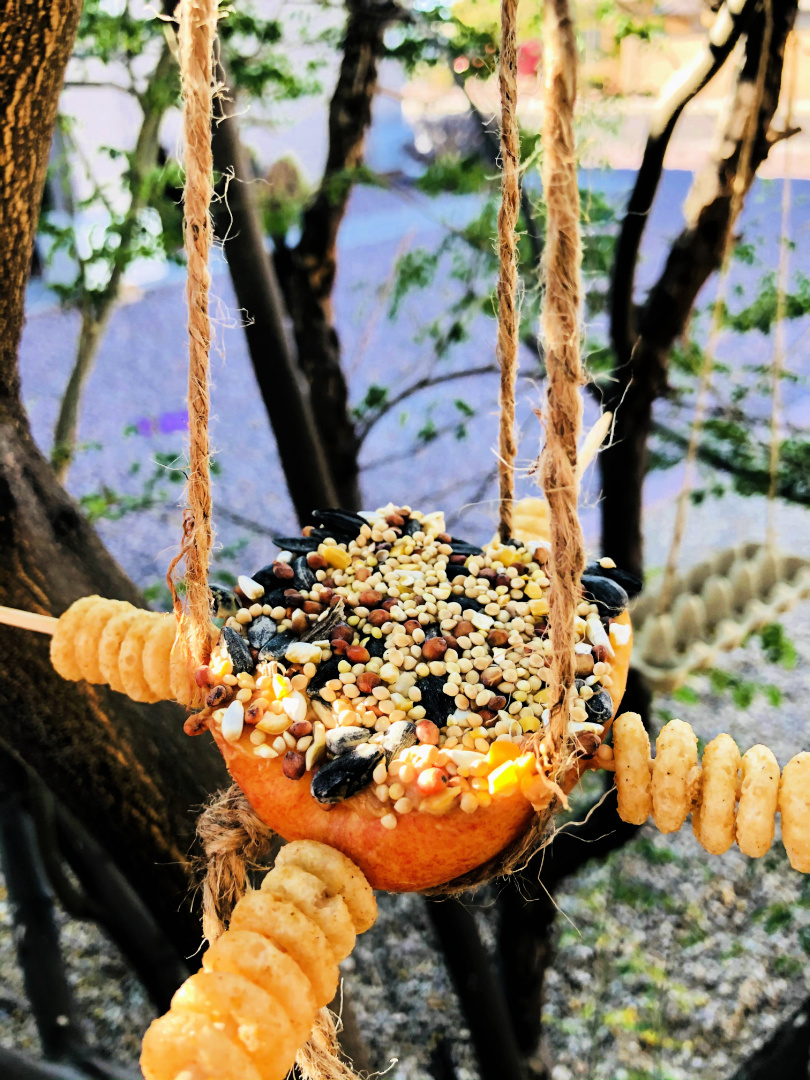
        Create this DIY Apple Bird Feeder to hang in your yard this spring or summer season! Your backyard birds will be thankful for this tasty treat!

        This spring season, get out your craft supplies and enjoy creating a variety of DIY bird feeders to hang in your yard this year!

        DIY bird feeders are easy to make! There’s no need to spend a lot of money on fancy bird feeders to display when you can create your own with supplies you most likely have in your home already!

        You don’t want to miss my other DIY bird feeders including:

        Today, I’m sharing how to create a DIY Apple Bird Feeder for your backyard birds.

        My family and I have enjoyed watching birds in our backyard as a fun activity to do together. After you hang your bird feeder in a safe location, sit back and watch to see what birds visit your backyard!

        Apple Bird Feeder

        Supplies:

        • apple
        • peanut butter
        • bird seed 
        • whole grain cereal o’s 
        • jute cord 
        • wooden skewers 

        Directions:

        Cut the apple in half. (Have a parent or adult complete this step!)

        Coat apple halves with peanut butter.

        Press in birdseed.

        Push the skewers through each coated apple half in a X pattern. (I recommend having and adult complete this step!)

        Place 6-8 pieces of the cereal next to the apple on each skewer.

        Cut 3 pieces of the jute cord to desired hanging length and tie a knot at the top and bottom of the combined cords.

        Place the apple in the cord “cradle.”

        Hang outside and watch the birds enjoy!  

        Apple Bird Feeder

        Apple Bird Feeder

        Materials

        • Apple
        • Peanut Butter
        • Bird Seed
        • Whole Grain Cereal O’s
        • Jute Cord
        • Wooden Skewer

        Instructions

        Cut the apple in half. 

        Coat apple halves with peanut butter.

        Press in birdseed.

        Push the skewers through each coated apple half in a X pattern.

        Place 6-8 pieces of the cereal next to the apple on each skewer.

        Cut 3 pieces of the jute cord to desired hanging length and tie a knot at the top and bottom of the combined cords.

        Place the apple in the cord “cradle.”

        Hang outside and watch the birds enjoy!

      • Crab Paper Plate Craft

        Learn how to create this adorable Crab Paper Plate Craft this summer with the kids!

        Crab Paper Plate Craft

        Did you know that you can take something as simple as a paper plate and turn it into a beautiful piece of art?!

        Today, I’m sharing how to create an adorable crab paper plate craft! Get your art supplies out and gather at the table with the kids to make this fun crab craft today!

        This crab is perfect to create for the summer season. It may be difficult to visit a beach this summer, so bring the beach indoors with this craft.

        Keep reading below for more fun summer activities including sand slime, ocean sensory bins, a beach movie day, and more to take advantage of this summer.

        Plus, find 15 Summer Activities to Keep Kids Busy!

        Crab Paper Plate Craft

        • 1 paper plate
        • Red paper
        • Pencil
        • Glue
        • Scissors
        • pipe cleaner
        • Popsicle stick, if desired
        • Printable Crab Paper Plate templates *see below

        Get the free crab template!

          We respect your privacy. Unsubscribe at anytime.

          To use a print and cut device (such as Cricut Explore), use the PNG images. Upload to your machine software and cut according to manufacturer’s instructions. Size the pieces as follows:

          • Crab claws = 7 inches in height
          • Red eye = 3 inches in width
          • White eye = 2 inches in width
          • Black eye = 1 inch in width

          If not using the print and cut option, print the PDF and cut pieces apart.

          Trace the paper plate on a piece of red paper. Cut the circle from the paper.

          Cut slits around the edge of the edge.

          Glue the paper to the paper plate with the edges overlapping as needed to fit the curve of the paper plate. Allow the plate to dry completely.

          Create the eyes by gluing the round pieces in a stack with the red under the white and the black in the middle of the white. Cut a chenille stem in half and attach one eye to each piece.

          Decorate the paper plate by attaching pieces with glue.

          Glue or tape the paper plate to the popsicle stick, if desired.

          Allow the craft to dry completely before playing or displaying.

        • Memorial Day Crafts for Kids

          Enjoy these Memorial Day Crafts for Kids to celebrate Memorial Day this year!

          Memorial Day Crafts for Kids
          Photo by Blessing Ri on Unsplash

          Do you have plans this weekend to observe the Memorial Day holiday?

          What is Memorial Day and why do we celebrate it?

          Memorial Day is an American holiday honoring the men and women who died while serving in the U.S. military. Memorial Day falls on the last Monday during the month of May! This year, Memorial Day 2021 is Monday, May 31.

          For many, Memorial Day is a time to get together with family and friends.

          We will be heading out to the lake this year to enjoy our Memorial Day weekend with the kids! I want to make sure we have plenty of fun and entertaining activities to keep them entertained.

          You can create these activities at home, create them before heading out, or take your craft supplies with you and create these fun crafts together! Here are some ideas for craft supplies:

          If you are looking for crafts to work on with your kids this Memorial Day, here are a few great ideas for you!

          15+ Patriotic Crafts for Kids (includes FREE printables!)

          Memorial Day Crafts for Kids

          Red, White, and Blue Sensory Bottle

          Kids will enjoy creating and shaking up this fun and patriotic sensory bottle with floating stars and glitter!

          Red, White, and Blue Slime

          Create this stretchy and glittery red, white, and blue slime to keep kids entertained this Memorial Day.

          Red, White, and Blue Wind Sock

          Windsocks are easy to make, plus they make great decorations! Kids will love this DIY windsock to run around with outdoors this Memorial Day holiday weekend!

          Firework Kids Craft

          Here’s an easy firework craft for kids. All you need is some liquid paint and drinking straws!

          Red, White, and Blue Sensory Rice

          Learn how to make this red, white, and blue rice for sensory play!

          Patriotic Bubble Wrap Stomp Painting

          Kids LOVE bubble wrap! Here’s a fun spin on using bubble wrap and paint to create a fun patriotic picture!

          Sensory Bin USA Sensory Bin Memorial Day Sensory Bin
          Memorial Day Sensory Bin


          This patriotic sensory bin will keep tiny hands entertained and engaged in sensory play!

          PATRIOTIC Play Kit Playdough Sensory Play Kit Sensory Bin


          Patriotic Play Dough Kit at Etsy: Buy NOW!

          How cool is this! This Patriotic Play Dough Kit comes with a variety of fun items to engage with for play time!

          Printable Memorial Day Activities:

          Memorial Day Handprint Kid Craft May Baby Handprint Art DIY
          Memorial Day Handprint Kid Craft


          Memorial Day Handprint Kid Craft Baby Handprint Art DIY Kids
          Memorial Day Handprint Kid Craft


          Memorial Day 5-in-1 Word Games Patriotic Bundle USA America
          Memorial Day 5-in-1 Word Games Patriotic Bundle


          Memorial Day Coloring Pages INSTANT DOWNLOAD  Patriotic
          Memorial Day Coloring Pages


          Memorial Day Activity pack Kids Games Printable I Spy Word
          Memorial Day Activity Pack for Kids


          Memorial Day Games Memorial Day Party Games Trivia
          Memorial Day Games for Kids


        • FREE “I’m Bored” Jar Printable Pack

          FREE “I’m Bored” Jar Printable Pack

          Are you tired of hearing your kids say, “I’m bored?” If so, create this I’m Bored Jar to keep around to prevent or help bust boredom!

          I’ll provide you with a free printable pack to help you get started.

          FREE

          As parents, nothing is more frustrating than hearing your kids say “I’m bored” during the summer break.

          But what if there’s a way to keep them entertained and engaged without spending every waking moment planning activities or shelling out money for summer camps?

          Enter the “I’m Bored” jar – a classic parenting hack that’s been around for ages and for good reason too!

          FREE Summer Bucket List Bingo Printable

          15 Summer Activities for Kids

          Summer Activities to Keep Kids Busy

          Summer Coloring Pages

          In this post, I’ll discuss why parents should create an “I’m Bored” jar for their kids this summer and the benefits of doing so.

          I’ll also show you how you can print and use my free I’m Bored printable pack so that you can get started on your own jar, TODAY! Win!

          Are you ready to say goodbye to summer boredom? Let’s dive in!

          The “I’m Bored” jar encourages creativity

          When kids are looking for something to do, they often turn to their screens or rely on their parents for ideas.

          The “I’m Bored” jar changes that by encouraging them to use their imagination and be creative.

          By filling the jar with fun and unique prompts, kids can explore new ideas and activities on their own, without relying on anyone else’s guidance.

          FREE

          It’s a fun way to spend time together

          As parents, we often find ourselves with little time to share with our kids.

          By creating an “I’m Bored” jar, you can have fun coming up with ideas and filling the jar together.

          It’s a great way to spend time discussing and exploring ways to keep busy, and it creates a sense of teamwork and accomplishment that will leave everyone feeling satisfied.

          It’s budget-friendly

          Summer camps and activities can be costly, and not every family has the resources to pay for them.

          The “I’m Bored” jar is a cost-effective solution that requires nothing more than a jar, craft supplies, and some creativity.

          By filling the jar with free or low-cost activities, you can provide your kids with endless entertainment without breaking the bank.

          FREE

          It helps kids develop independence

          Summer is a great time for kids to learn new skills and become more independent.

          By using the “I’m Bored” jar, kids can explore new activities and learn how to manage their time and resources.

          It’s a fun way to instill responsibility and independence in kids that will help them in the long run.

          FREE

          It brings a sense of anticipation and surprise

          Finally, the “I’m Bored” jar is a fun way to add some mystery and excitement to your child’s day.

          By choosing one prompt at random, kids never know what they’re going to get, which can add an element of surprise to their day.

          It also keeps them engaged since they’re curious about what they’re going to pick next.

          The “I’m Bored” jar is a simple yet effective parenting hack that’s perfect for summer break.

          By encouraging creativity, teamwork, independence, and providing endless options for entertainment, it’s no wonder that parents have been using this hack for ages.

          So, are you ready to create your “I’m Bored” jar and say goodbye to summer boredom?

          Get started today and watch as your kids discover new activities and skills!

          FREE

          FREE Printable “I’m Bored” Jar Pack

          This pack includes 5 pages including premade 30 labels and 10 fill in the blank labels to write in your own ideas.

          Here’s what you’ll need.

          Supplies:

          • plastic or glass jar
          • FREE “I’m Bored” Jar Printable
          • scissors
          • permanent Marker (for use on the blank labels)
          • printer and color ink
          • optional: laminator and laminator sheets (helps your labels last longer!)

          Directions:

          Download and print the 5-page “I’m Bored” jar pack.

          Get your free “I’m Bored” Jar printable pack!

            We respect your privacy. Unsubscribe at anytime.

            Cut out the main cover label and place in or secure to the outside of the jar.

            Cut out the labels and place them in the jar. Fill out the blank labels if desired. You can have your kids come up with ideas for these labels.

            When you kids come to you saying they are bored, have them reach in the jar and pick out a label to complete! Repeat as necessary.

          • Sweet Treat Mason Jar Gift For Mom

            Create this beautiful “A Little Treat for a Mom So Sweet” mason jar for mom this year for Mother’s Day or just because! FREE printable gift tag included.

            Mason Jar For Mom

            Celebrate your mom this year with a special mason jar filled with yummy treats just for her!

            Mason jar gifts are super easy and affordable to make. Gather a jar, your mom’s favorite treat, print the gift tag, add a pretty ribbon and your gift is ready to give!

            This is the perfect Mother’s Day gift idea this year!

            If my kids made this jar for me, I’d love (hint hint) for them to fill it with milk or dark chocolate treats, but you can get creative and fill it with other types of homemade treats that fit well in the jar.

            You can even add baking ingredients so that she can make her favorite cookies!

            Get creative with your gift in a jar and have fun creating yours!

            Mason Jar Gift for Mom

            Supplies:

            • Printable gift tag

            Get this free printable treat tag!

              We respect your privacy. Unsubscribe at anytime.

              Instructions:

              Print the gift tag on cardstock.

              printable tag for mason jar craft

              Cut it out around the outer edge. Use a hole punch to punch a hole in the corner of the tag.

              Fill the jar with a sweet treat.

              mason jar for mom

              Place the lid on top.

              Tie the tag on the jar with a piece of ribbon.

              Mason Jar Gift For Mom

              Mason Jar Gift For Mom

              Materials

              • Printable gift tag
              • Cardstock
              • Scissors
              • Hole punch
              • Ribbon
              • Jar
              • Sweet treat

              Instructions

              Print the gift tag on cardstock and cut it out around the outer edge. Use a hole punch to punch a hole in the corner of the tag.

              Fill the jar with a sweet treat and place the lid on top. Tie the tag on the jar with a piece of ribbon.


              More printable gift tag ideas for Mother’s Day mason jar gifts:

              Mother's Day Gift Tags / 3 Styles / Happy Mother's Day
              Mother’s Day Gift Tags


              Printable Gift tags for Mother's Day Mason jar with boho
              Printable Gift Tags for Mother’s Day


              Mother's Day Gift Tags / 8 Styles / Happy Mother's Day
              Mother’s Day Gift Tags


              Editable Happy Mother's Day Favor Tag Mothers Day Gift Tag
              Editable Happy Mother’s Day Gift Tag


              Happy Mother's Day Printable Tag Mothers Day Tag Gift Tag
              Happy Mother’s Day Printable Tag


              Instant Download Happy Mother's Day Floral Gift Tag
              Instant Download Happy Mother’s Day Floral Gift Tag


              Mother's Day Gift Tags / 8 Styles / I Love You Mom / Thank
              Mother’s Day Gift Tags