Category: DIY

  • How to Dye Eggs with Shaving Cream

    How to Dye Eggs with Shaving Cream

    Learn How to Dye Eggs with Shaving Cream this Easter season!

    how to dye eggs with shaving cream

    I’ve been dyeing Easter eggs with my kids now for over 10 years! We love finding ways to mix it up and try new ways to dye eggs.

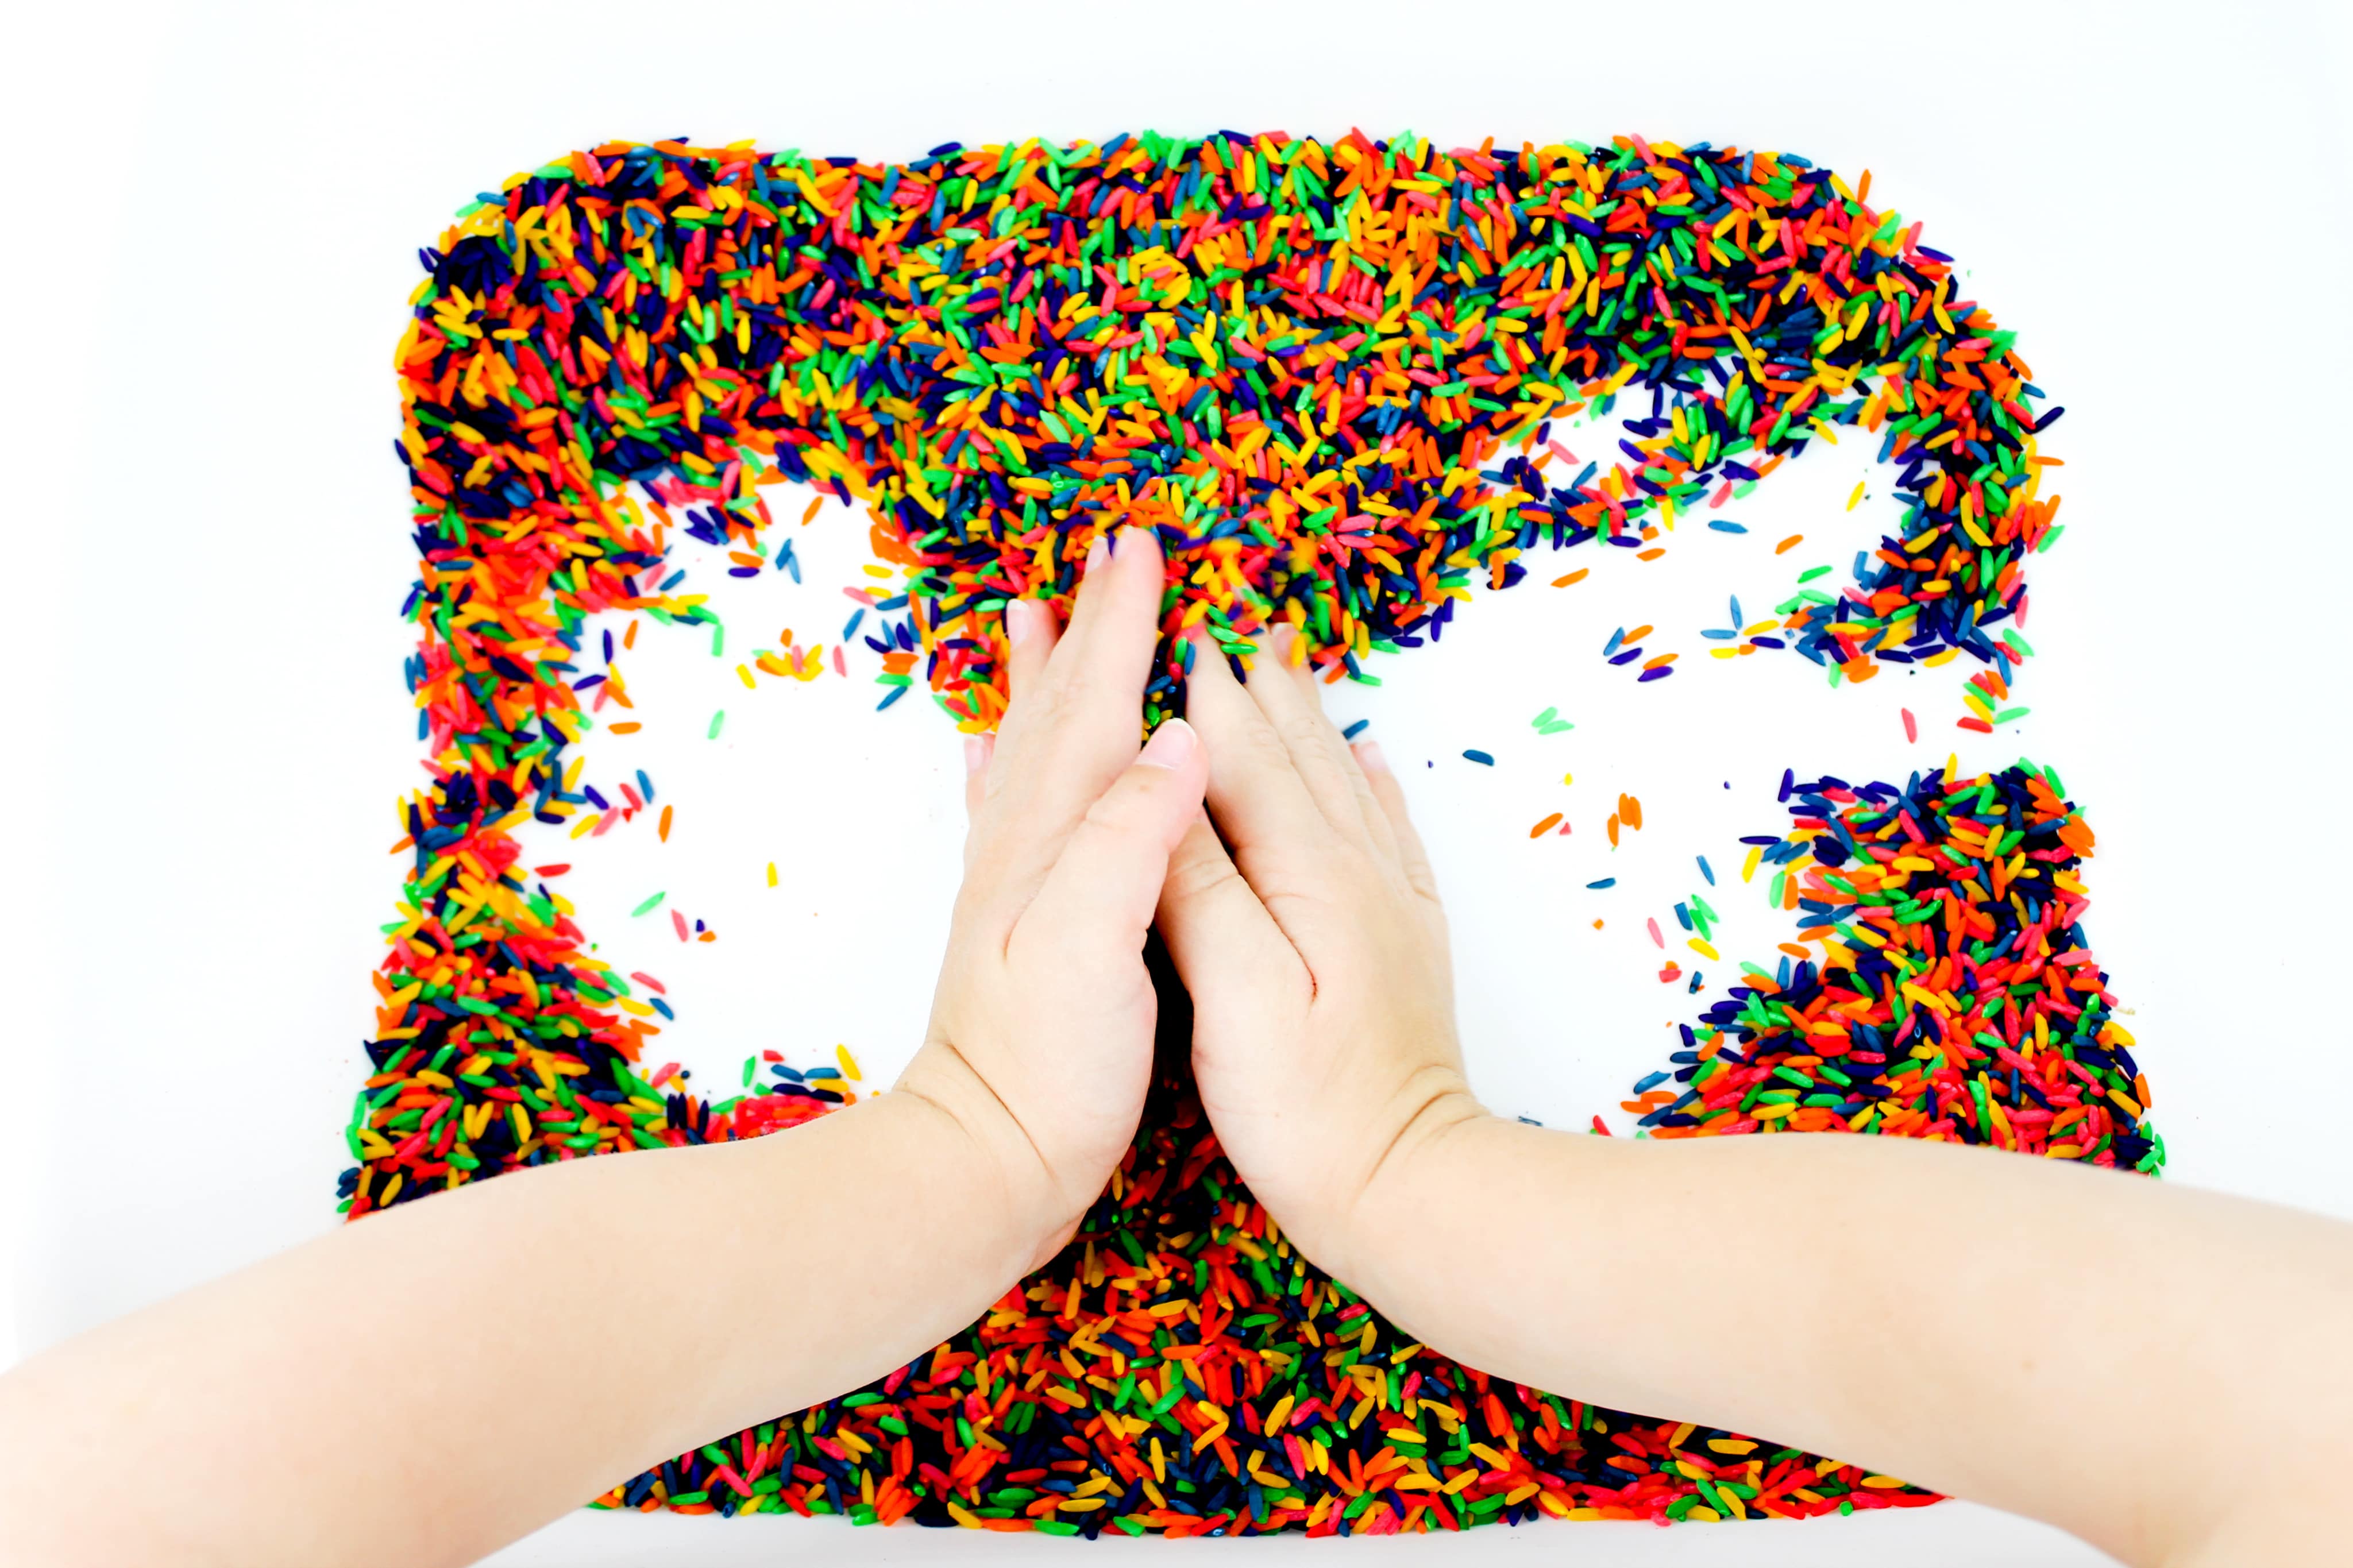
    How to Dye Eggs with Rice (one of our favorite ways!)

    How to Dye Eggs with Whipped Cream

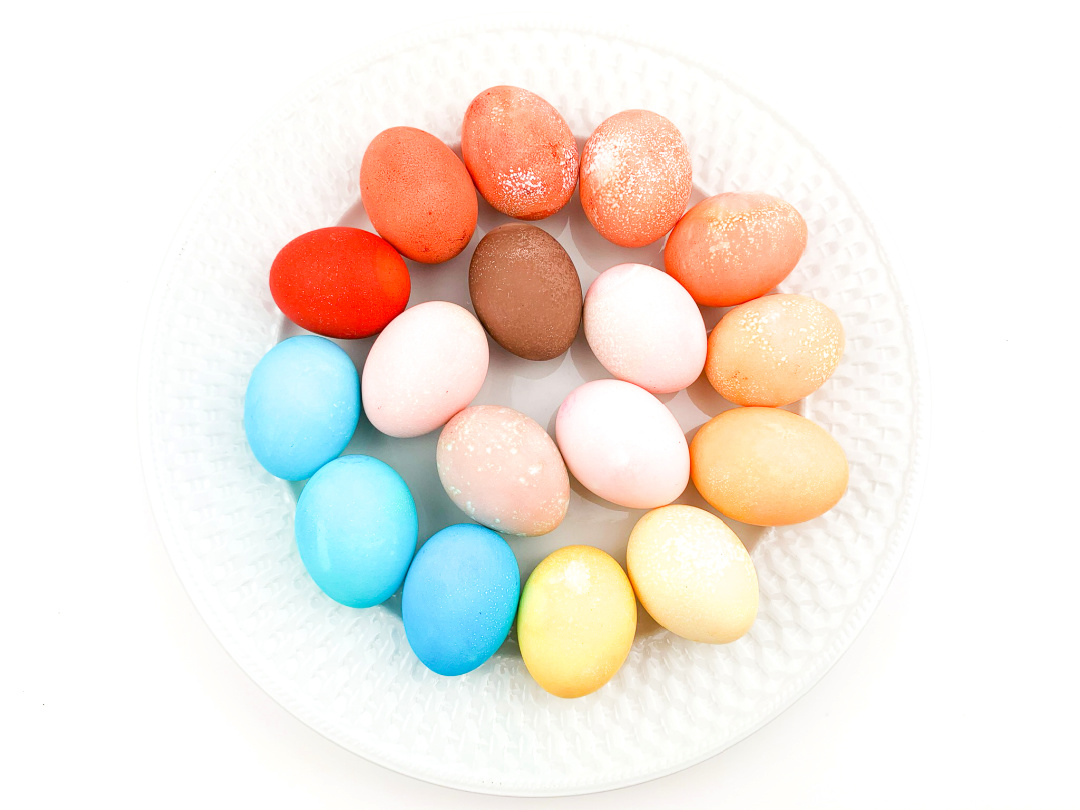
    How to Dye Eggs with Kool-Aid

    Today, I’m sharing how to dye eggs with shaving cream! This method is similar to the whipped cream method of dyeing eggs listed above. The only thing different is one cream is edible and the other is not!

    As always, I do recommend adult supervision when using ingredients like shaving cream. Pay close attention especially with the little ones when completing this activity!

    You don’t need a lot of shaving cream in each muffin cup. In fact, I recommend using just a small squirt, since the shaving cream will rise.

    Also, it’s important to note that I do not recommend using water at all for this method. I learned this the hard way once when I tried to wash the shaving cream off of the eggs. The dye came off completely!

    Read my tips below on how you can create vibrant, beautiful eggs with shaving cream!

    How to Dye Eggs with Shaving Cream

    Supplies:

    • boiled eggs
    • food coloring
    • muffin pan
    • shaving cream (foam, not shaving gel)
    • paper towel lined trays
    • straws or toothpicks
    • plastic spoon
    • tissue (like Kleenex)
    • plastic gloves (optional)
    supplies for dyeing eggs with shaving cream

    Directions:

    Squirt a small amount of shaving cream in each muffin cup.

    shaving cream in a muffin tin

    Use the spoon to spread the shaving cream out evenly in each cup.

    shaving cream in a muffin tin

    Using desired colors, add a 1-3 drops of food coloring into each muffin cup.

    food coloring in shaving cream

    Use the straws or toothpicks to mix the colors around in the shaving cream. Try not to mix the colors if you are wanting to create single colored eggs. (I’ll be sharing how to mix colors at the end of this post!)

    colored shaving cream

    Place an egg in each muffin cup. Put on gloves if you’d like (I do recommend this if you don’t want your hands to turn colors from the food coloring!)

    eggs in shaving cream

    Roll each egg around into the colored shaving cream until the egg has been colored. You can help color the egg by rubbing some of the coloring around onto the shell.

    dyeing eggs with shaving cream

    Once each egg is colored, place each egg onto a paper towel lined tray. Space the eggs apart so they do not touch. Set aside for about 30 minutes or longer.

    colored shaving cream eggs

    If you have more boiled eggs to use you can squirt more shaving cream into each muffin cup. Now it’s time to try mixing colors!

    Add a different color in each muffin cup.

    shaving cream and food coloring

    Place an egg in each muffin cup and turn the egg around in the muffin cup until the egg is covered.

    easter eggs in shaving cream

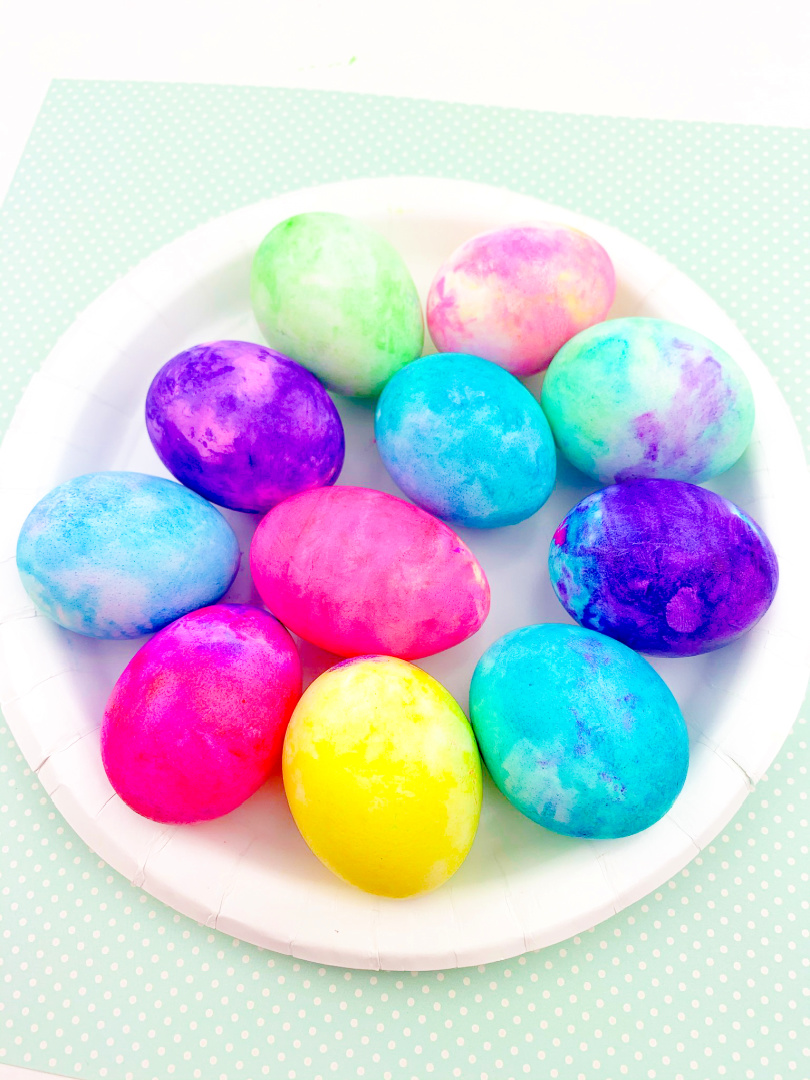
    Complete the same steps above and now you have pretty multi-colored shaving cream eggs!

    easter eggs in shaving cream

    Take a tissue and place it around each egg. Gently dab the tissue up against the egg, trying to remove the shaving cream from the egg. You may need to use two tissues for this process until all shaving cream is removed. Try not to rub the egg or the coloring may smear, and as mentioned earlier, do not use water or the coloring could wash off!

    dye eggs with shaving cream
    shaving cream dyed eggs
    shaving cream dyed eggs
    shaving cream dyed eggs

    How to Dye Eggs with Shaving Cream

    How to Dye Eggs with Shaving Cream

    Materials

    • boiled eggs
    • food coloring
    • muffin pan
    • shaving cream (foam, not shaving gel)
    • paper towel lined trays
    • straws or toothpicks
    • plastic spoon
    • tissue (like Kleenex)
    • plastic gloves (optional)

    Instructions

    Squirt a small amount of shaving cream in each muffin cup. Use the spoon to spread the shaving cream out evenly in each cup.

    Using desired colors, add a 1-3 drops of food coloring into each muffin cup. Use the straws or toothpicks to mix the colors around in the shaving cream. Try not to mix the colors if you are wanting to create single colored eggs. (I’ll be sharing how to mix colors at the end of this post!)

    Place an egg in each muffin cup. Put on gloves if you’d like (I do recommend this if you don’t want your hands to turn colors from the food coloring!) Roll each egg around into the colored shaving cream until the egg has been colored. You can help color the egg by rubbing some of the coloring around onto the shell.

    Once each egg is colored, place each egg onto a paper towel lined tray. Space the eggs apart so they do not touch. Set aside for about 30 minutes or longer.

    Take a tissue and place it around each egg. Gently dab the tissue up against the egg, trying to remove the shaving cream from the egg. You may need to use two tissues for this process until all shaving cream is removed. Try not to rub the egg or the coloring may smear, and as mentioned earlier, do not use water or the coloring could wash off!

    Now you have vibrant, shaving cream colored eggs!

    If you have more boiled eggs to use you can squirt more shaving cream into each muffin cup.

    Now it’s time to try mixing colors!

    Add a different color in each muffin cup. Place an egg in each muffin cup and turn the egg around in the muffin cup until the egg is covered.

    Complete the same steps above and now you have pretty multi-colored shaving cream eggs!

  • How to Dye Easter Eggs with Whipped Cream

    How to Dye Easter Eggs with Whipped Cream

    Learn how to dye Easter Eggs with Whipped Cream! This is a fun way to dye eggs this year.

    how to dye Easter Eggs with Whipped Cream

    Easter is coming up!

    My girls are at the age where they love to experiment with different ways of doing things, especially with food coloring. 

    More fun ways to dye Easter Eggs:

    During the month leading up to Easter, we dye a lot of Easter eggs. I’ve heard of dyeing Easter eggs with shaving cream, but I wanted to try something a little bit safer and try dyeing eggs in whipped cream!

    I think dyeing eggs with whipped cream provides more of a “hands-on” experience than just dipping them in water/vinegar/food coloring and then taking them out.

    Dyeing Easter eggs with whipped cream does allow the colors to mix a little more for a cool effect on each egg!

    How to Dye Easter Eggs with Whipped Cream

    Supplies:

    • 1 tub of whipped cream
    • large muffin pan
    • plastic spoon
    • toothpicks
    • food coloring
    • boiled eggs
    • bowl of white vinegar

    Directions:

    Hard-boil the eggs by covering them with cool water by about 1 inch. Bring water to a boil over medium heat. Cover and remove from heat. Let sit 12 minutes.

    Fill the cups of a muffin pan with whipped cream.

    whipped cream eggs 5

    Add about 6-8 different drops of food coloring into each cup.

    whipped cream eggs 6

    Using a toothpick or spoon to swirl the colors slightly in each cup. Be sure to wipe off the spoon or use new toothpicks for the other colors so that you don’t mix them!

    whipped cream easter eggs 7

    Dip each egg in a bowl of vinegar for a few seconds.

    6. Place the egg into a muffin cup. Allow the eggs to sit in the color for about a minute or two.

    **NOTE: Do not leave the eggs in the vinegar too long! The first time I tried dyeing the eggs, I had a major fail. I accidentally left the eggs in the vinegar too long. BIG mistake. That’s why it’s important to only dip the eggs for a few seconds. I did this a second time and finally got it right! 

    whipped cream easter eggs 8

    Slightly turn the egg over to color the other side. Wipe off your fingers when turning the eggs in the other cups to avoid mixing the colors.

    whipped cream eggs 10

    Take each egg out of the cup and rinse the egg off. Pat dry.

    If the color isn’t as bold as you’d like, re-dip egg into the vinegar and place back into the colors and roll the egg around until you get it as bold as you’d like. You can even add a few drops of food coloring if you’d like to get the colors just right! I re-dipped only a few of the eggs to get a better color on them. 

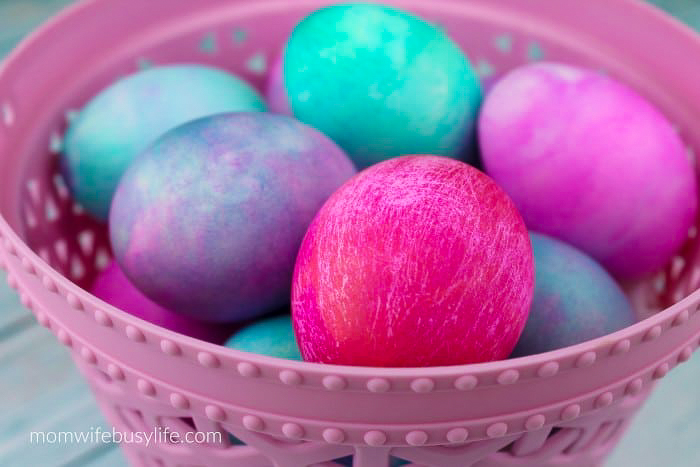
    Here’s how our eggs turned out. We placed them in a pretty basket! My girls are going to hide them for fun and find them!

    How to Dye Easter Eggs with Whipped Cream
    How to Dye Easter Eggs with Whipped Cream

    This is just one of the many ways that you can dye Easter eggs this holiday season!

    How to Dye Easter Eggs with Whipped Cream

    How to Dye Easter Eggs with Whipped Cream

    Materials

    • 1 tub of whipped cream
    • large muffin pan
    • spoon or toothpicks
    • food coloring
    • boiled eggs
    • bowl of vinegar

    Instructions

    1. Hard-boil the eggs by covering them with cool water by about 1 inch. Bring water to a boil over medium heat. Cover and remove from heat. Let sit 12 minutes.

    2. Fill the cups of a muffin pan with whipped cream.

    3. Add about 6-8 different drops of food coloring into each cup.

    4. Using a toothpick or spoon to swirl the colors slightly in each cup. Be sure to wipe off the spoon or use new toothpicks for the other colors so that you don’t mix them!

    5. Dip each egg in a bowl of vinegar for a few seconds.

    6. Place the egg into a muffin cup. Allow the eggs to sit in the color for about a minute or two.

    **NOTE: Do not leave the eggs in the vinegar too long! The first time I tried dyeing the eggs, I had a major fail. I accidentally left the eggs in the vinegar too long. BIG mistake. That’s why it’s important to only dip the eggs for a few seconds. I did this a second time and finally got it right! 

    7. Slightly turn the egg over to color the other side. Wipe off your fingers when turning the eggs in the other cups to avoid mixing the colors.

    8. Take each egg out of the cup and rinse the egg off. Pat dry. If the color isn’t as bold as you’d like, re-dip egg into the vinegar and place back into the colors and roll the egg around until you get it as bold as you’d like. You can even add a few drops of food coloring if you’d like to get the colors just right! I re-dipped only a few of the eggs to get a better color on them. 

  • Chicken Toilet Paper Roll Craft

    Create this cute yellow Chicken Toilet Paper Roll Craft this spring season with the kids!

    Chicken Toilet Paper Roll Craft

    Are you doing a unit on farm animals? Learning about the life cycle of a chicken?

    Maybe you just want to create animal crafts! If so, this craft is for you!

    Yellow Chick Paper Plate Craft

    Toilet paper roll crafts are easy and fun to make. Today, I’m sharing my tutorial on how to make a chicken out of a toilet paper roll!

    This chick is adorable and perfect to display in your home or classroom this year.

    I hope you enjoy this craft! At the end of the post, I share more chicken activities that you can use as a supplement to your chicken or farm animal unit.

    Chicken Toilet Paper Roll Craft

    Supplies:

    • Empty Toilet Paper Roll
    • Construction Paper or Foam Paper
    • Paint Pens or Markers 
    • Googly Eyes 
    • Craft Feathers
    • Hot Glue Gun and Hot Glue Sticks
    chicken craft supplies

    Directions:

    Cut foam or construction paper to size and glue around entire roll. 

    yellow toilet paper roll

    Glue on googly eyes.

    yellow toilet paper roll with eyes

    Cut a small paper triangle for the nose and attach just below the eyes.

    Use paint pens or markers to decorate the roll as desired. 

    Arrange & attach the craft feathers at the head (glue inside roll) and tail (glue from behind roll) with hot glue. 

    Your feathered friend is complete!

    Chicken Toilet Paper Roll Craft

    Chicken Toilet Paper Roll Craft

    Materials

    • Empty Toilet Paper Roll
    • Foam or Construction Paper
    • Paint Pens or Markers
    • Craft Eyes
    • Craft Feathers
    • Hot Glue Gun and Hot Glue Sticks

    Instructions

    Cut foam or construction paper to size and glue around entire roll.
    Glue on craft eyes.
    Cut a small paper triangle for the nose and attach just below the eyes.
    Use paint pens or markers to decorate the roll as desired.
    Arrange & attach the craft feathers at the head (glue inside roll) and tail (glue from behind roll) with hot glue.
    Your feathered friend is complete!

  • Easter Bunny Toilet Paper Roll Craft

    Are you looking for simple Easter crafts to do with the kids? Celebrate Easter this year with this easy to make Easter Bunny Toilet Paper Roll Craft for kids.

    Easter is around the corner! Before you know it, the Easter bunny will be hopping around the neighborhood leaving treats for the boys and girls!

    This Easter, have your child create this easy Easter Bunny Toilet Paper Roll Craft! Toilet paper roll crafts are fun to make.

    Just save your empty toilet paper rolls, add them to a storage container and get crafty all year long!

    You may also like:

    Printable Easter Bunny Coloring Pages

    More Easter Bunny crafts:

    We hope you enjoy creating this craft below this year. Display this adorable Easter bunny in your home or classroom!

    Easter Bunny Toilet Paper Roll Craft

    Supplies: 

    • Empty Toilet Paper Roll 
    • Construction Paper or Foam Paper 
    • Googly Eyes 
    • Paint Pen or Marker 
    • Craft Pom Pom 
    • Hot Glue Gun and Hot Glue Sticks
    easter bunny craft supplies

    Directions:

    Cut paper to size and glue onto roll, covering completely. 

    toilet paper roll craft

    Glue on the craft eyes. 

    googly eyes on toilet paper roll

    Use paint pen or marker to draw a nose, mouth, and teeth.

    easter bunny face

    Cut ear shapes from the paper, adding details with the paint pen or marker. 

    Glue ears to the top of the roll, just above the eyes. 

    Cut bowtie shape from paper, adding detail with paint pen or marker. 

    Attach bowtie with glue.

    Glue on the pom pom tail to one side of the roll. 

    Your Easter Bunny is complete! 

    Easter Bunny Toilet Paper Roll Craft

    Easter Bunny Toilet Paper Roll Craft

    Materials

    • Empty Toilet Paper Roll
    • Construction or Foam Paper
    • Googly Eyes
    • Paint Pen or Marker
    • Craft Pom Pom
    • Hot Glue and Hot Glue Sticks

    Instructions

    Cut paper to size and glue onto roll, covering completely. 

    Glue on the craft eyes. 

    Use paint pen or marker to draw a nose, mouth, and teeth.

    Cut ear shapes from the paper, adding details with the paint pen or marker. 

    Glue ears to the top of the roll, just above the eyes. 

    Cut bowtie shape from paper, adding detail with paint pen or marker. 

    Attach bowtie with glue.

    Glue on the pom pom tail to one side of the roll. 

    Your Easter Bunny is complete!

  • How to Make Rainbow Rice

    How to Make Rainbow Rice

    Learn how to make rainbow rice with just a few simple ingredients! Rainbow rice is great for sensory play.

    With a toddler at home, I’m always on the hunt for new ideas for sensory play. My son loves to play with a variety of materials and items that we add to his sensory bins.

    One of the easiest ingredients to add to a sensory bin is rainbow rice! Instead of adding basic white rice to a sensory bin for play, we like to make colorful rice for added sensory benefits. This helps him learn and recognize primary colors!

    If you’d like to learn how to make rainbow rice for sensory bins, follow this easy to follow photo tutorial below!

    Get creative with your sensory bins. Add scoops, small cups, toys, etc. to make your sensory bin more exciting!

    You may also like:

    Printable Rainbow Activity Pack

    Benefits of Rice Sensory Play

    Rice sensory play offers a host of benefits for kids.

    It is a great way to encourage sensory exploration and to promote fine motor skills. rice sensory play can also help to calm and soothe children, making it an ideal activity for kids with sensory processing issues.

    Rice sensory play is also a great way to boost creativity and imagination.

    If you are looking for a fun and beneficial activity for your child, rice sensory play is definitely worth considering!

    Rainbow Rice for Sensory Play

    Supplies:

    NOTE: This is not an edible recipe! Adults supervision recommended.

    • white rice (uncooked)
    • food coloring (rainbow colors)
    • 6 plastic sandwich zipper bags
    • rubbing alcohol (or white vinegar)
    • sensory bin or trays
    • sensory scoops
    • paper towels

    Directions:

    Add 1/2 cup of rice to each bag.

    Add 15 drops of each food coloring to each bag of rice. You can easily find the primary colors of food coloring: red, yellow, green, blue.

    If you don’t have orange food coloring, add 8 drops red and 8 drops yellow.

    If you don’t have purple food coloring. mix red and blue food coloring together until you get the desired shared. For light purple, use more red food coloring.

    For dark purple, use more blue.

    Add 1 tsp of rubbing alcohol to each bag.

    Close the bag well and start mixing the rice and food coloring mixture together with your hands.

    Mix the rice together until all rice is colored.

    Pour the rice onto a paper towel lined drying tray and allow rice to dry completely. When rice is dry, add rice to sensory bin, cups, etc. for play time!

    Mix the rainbow rice together when you are ready!

    how to make rainbow rice

    Allow the child to play with the rainbow rice using their hands, scoops, spoons, cups, etc.

    How to Make Rainbow Rice

    How to Make Rainbow Rice

    Materials

    • white rice (uncooked)
    • food coloring
    • 6 plastic sandwich zipper bags
    • rubbing alcohol (or white vinegar)
    • sensory bin or trays
    • sensory scoops
    • paper towels

    Instructions

    Add 1/2 cup of rice to each bag.

    Add 15 drops of each food coloring to each bag of rice. You can easily find the primary colors of food coloring: red, yellow, green, blue. If you don’t have orange food coloring, add 8 drops red and 8 drops yellow. If you don’t have purple food coloring. mix red and blue food coloring together until you get the desired shared. For light purple, use more red food coloring. For dark purple, use more blue.

    Add 1 tsp of rubbing alcohol to each bag.

    Close the bag well and start mixing the rice and food coloring mixture together with your hands.

    Mix the rice together until all rice is colored.

    Pour the rice onto a paper towel lined drying tray and allow rice to dry completely. When rice is dry, add rice to sensory bin, cups, etc. for play time!

    Mix the rainbow rice together when you are ready!

    Allow the child to play with the rainbow rice using their hands, scoops, spoons, cups, etc.

  • Blue Bird Paper Plate Craft

    Blue Bird Paper Plate Craft

    Create this adorable Blue Bird Paper Plate Craft with the kids! This easy to follow photo tutorial will show you how to make this cute bird craft.

    Blue Bird Paper Plate Craft

    The spring season is here! We have already been taking advantage of the spring months by spending plenty of time outdoors!

    We have also started a new hobby this spring, right in our very own backyard — bird watching!

    Learn how to make a Pine Cone Bird Feeder, too! Or, save your empty toilet paper rolls and create a Toilet Paper Roll Bird Feeder.

    We have a pretty great set up right now for our birds and forest friends to visit.

    We currently have our bird feeder, bird bath, and plenty of bird seed out for the birds. Every day, my husband and I watch the variety of birds that visit.

    We see cardinals, blue jays, woodpeckers, doves, brown thrashers, titmice, black birds, and other types of birds that we are still trying to identify!

    If you are interested in learning more about birds, I recommend setting up a safe space in your yard for backyard birds to visit!

    We do see other critters like squirrels, rabbits, salamanders, butterflies, dragonflies, and more! (Yes, we did see a non-venomous snake this week!)

    To celebrate our new hobby, I wanted to share this Blue Bird craft with you to make with your own kids.

    Blue Bird Paper Plate Craft

    Supplies:

    • dessert size paper plate
    • blue pom pom balls (3 different shades)
    • 2 googly eyes
    • 1 blue pipe cleaner
    • 1 yellow pipe cleaner
    • 1 orange pipe cleaner
    • school glue

    Directions:

    Glue the pom poms to the paper plate. If using three shades of blue as pictured, start with the wings first, then the breast area, and finally the top.

    With the blue chenille stem, cut in half and shape into wings. Glue into place.

    Twist the orange chenille stem into a beak shape. Glue into place.

    Cut one yellow chenille stem in half. Twist each half into bird feet. Glue into place.

    Glue the wiggly eyes to each side of the beak.

    Blue Bird Paper Plate Craft

    Blue Bird Paper Plate Craft

    Materials

    • dessert size paper plate
    • blue pom pom balls (3 different shades)
    • 2 googly eyes
    • 1 blue pipe cleaner
    • 1 yellow pipe cleaner
    • 1 orange pipe cleaner
    • school glue

    Instructions

    Glue the pom poms to the paper plate. If using three shades of blue as pictured, start with the wings first, then the breast area, and finally the top.

    With the blue chenille stem, cut in half and shape into wings. Glue into place.

    Twist the orange chenille stem into a beak shape. Glue into place.

    Cut one yellow chenille stem in half. Twist each half into bird feet. Glue into place.

    Glue the googly eyes to each side of the beak.

  • St. Patrick’s Day Shamrock Slime

    St. Patrick’s Day Shamrock Slime

    Create this stretchy St. Patrick’s Day Shamrock Slime to enjoy during the month of March!

    St. Patrick's Day Shamrock Slime

    Do your kids love slime as much as my kids do?

    My girls love to make slime. I’ve seen them make just about every kind of slime you can think of – from regular slime to textured or fluffy slime!

    With St. Patrick’s Day coming up, I have a new St. Patrick’s Day Shamrock Slime recipe to share with you!

    This is a great slime recipe for the family to make this spring season. The green glitter, gold confetti dots, and shamrock confetti are what make this recipe a big hit!

    Be sure to store this when you are finished playing with it for fun all month long.

    If your kids love to color as much as mine do, check out these coloring pages, too!

    St. Patrick’s Day Shamrock Slime

    Supplies:

    • 1 (6 ounce) bottle clear Elmer’s Glue
    • About ½ cup warm water
    • ½ teaspoon baking soda
    • 1 tablespoon contact lens solution (containing boric acid)
    • Shamrock confetti
    • Gold dot confetti
    • Lime green glitter

    Directions:

    Empty the glue into a large bowl. 

    Fill the empty glue bottle about ⅓ full with warm water (about ¼ cup) and seal with the lid. Shake well to combine the remaining glue with the water. Pour into bowl with glue and stir to combine.

    Add the baking soda to the glue and stir to mix thoroughly. 

    If you are adding additional glitter or confetti, stir the glitter into the glue mixture.

    St. Patrick's Day Shamrock Slime

    Add contact lens solution to the glue mixture and stir well.

    (Note: regular glue will require less contact lens solution than glitter glue. Add the contact lens solution slowly, mixing between additions, and add only enough to bring the glue together into a soft ball.)

    Remove the slime from the bowl allowing any excess liquid to remain in the bowl. 

    The slime will be sticky.

    Begin to play with the slime, kneading it as you would bread dough, to bring the slime together. The slime is ready when no longer sticky.

    Best if stored in an airtight container or slime container in the refrigerator when not in use.

    St. Patrick's Day Shamrock Slime

    St. Patrick's Day Shamrock Slime

    Materials

    • 1 (6 ounce) bottle clear Elmer’s Glue
    • About ½ cup warm water
    • ½ teaspoon baking soda
    • 1 tablespoon contact lens solution (containing boric acid)
    • Shamrock confetti
    • Gold dot confetti
    • Lime green glitter

    Instructions

    Empty the glue into a large bowl. 

    Fill the empty glue bottle about ⅓ full with warm water (about ¼ cup) and seal with the lid. Shake well to combine the remaining glue with the water. Pour into bowl with glue and stir to combine.

    Add the baking soda to the glue and stir to mix thoroughly. 

    If you are adding additional glitter or confetti, stir the glitter into the glue mixture.

    Add contact lens solution to the glue mixture and stir well.

    (Note: regular glue will require less contact lens solution than glitter glue. Add the contact lens solution slowly, mixing between additions, and add only enough to bring the glue together into a soft ball.)

    Remove the slime from the bowl allowing any excess liquid to remain in the bowl. 

    The slime will be sticky.

    Begin to play with the slime, kneading it as you would bread dough, to bring the slime together. The slime is ready when no longer sticky.

    Best if stored in an airtight container or slime container in the refrigerator when not in use.