Are you looking for a fun and new way to dye eggs this year? Learn how to dye Easter Eggs with Rice! This is one of our favorite ways to dye eggs as a family!
We’ve been getting more creative in the kitchen lately!
With the Easter holiday approaching, I thought it would be fun to dye Easter eggs a few different ways. I guess I was a bit bored with dyeing eggs the traditional way of just sticking them in colored water and vinegar!
Dyeing eggs with colored rice gives the eggs an entirely new and cool look! Even I thought this way of dyeing eggs was way more fun and hands on for all.
My girls said that they preferred dyeing eggs with rice over just soaking the eggs in colored water and then taking them out.
What’s neat about this activity is that in the end, you have colored rice left over for sensory play if you are interested in that!
Can you use rice vinegar to dye eggs?
Yes, you can use rice vinegar to dye eggs. It works as well as regular white vinegar.
How to Dye Easter Eggs with Rice
Supplies:
boiled eggs
white rice
food coloring
sandwich bags that seal
vinegar
Directions:
Fill 6-8 different sandwich baggies with about a cup full of rice in each bag.
Add at least 10-15 drops of food coloring into each bag. You can experiment with different colors in each bag.
Seal the bags well.
Use your fingers to mix the rice and food coloring together until the rice is colored.
If you have any rice left uncolored, add more drops of food coloring into the bag and seal again.
Mix until you get the desired colors.
Place a boiled egg into a small bowl of vinegar for a few seconds.
Open the bag of colored rice and place the egg inside.
Seal the bag and gently mix the egg around the rice until you get the desired color on the egg. Be careful not to break the egg!
Feel free to experiment with placing the eggs in different baggies to give the eggs a multi-colored look.
We will definitely dye Easter eggs with colored rice in the future.
We enjoyed our new method of dyeing Easter eggs this year and I hope you do, too!
How to Dye Easter Eggs with Rice
Materials
boiled eggs
white rice
food coloring
sandwich bags that seal
vinegar
Instructions
1. Fill 6-8 different sandwich baggies with about a cup full of rice in each bag.
2. Add at least 10-15 drops of food coloring into each bag. You can experiment with different colors in each bag. (This is my favorite food coloring that I use for crafts and activities!)
3. Seal the bags well.
4. Use your fingers to mix the rice and food coloring together until the rice is colored. If you have any rice left uncolored, add more drops of food coloring into the bag and seal again. Mix until you get the desired colors.
5. Place a boiled egg into a small bowl of vinegar for a few seconds.
6. Open the bag of colored rice and place the egg inside.
7. Seal the bag and gently mix the egg around the rice until you get the desired color on the egg. Be careful not to break the egg!
8. Feel free to experiment with placing the eggs in different baggies to give the eggs a multi-colored look.
There are two main types of potty training seats, standalone and attachable.
When it comes to potty training, having the right gear is essential.
Choosing a potty seat can be tricky, so first determine what type best suits your needs.
Standalone seats allow for quick and easy set-up and are usually the go-to choice for kids in daycare or when on vacation, as they don’t require access to an existing toilet.
On the other hand, attachable seats offer convenience since they fit onto most standard toilets and provide additional comfort for little ones with their secure fit.
Ultimately, selecting the perfect potty training seat depends on your individual needs and preferences.
Consider the size of the seat and whether it will fit your child comfortably
The size of the potty training seat is an important factor to consider when making a purchase.
You want to ensure the seat will fit your child comfortably and securely so they can focus on learning how to use the potty without feeling insecure or distracted.
Measurements like width and height come into play when shopping for a potty seat, and most brands list product dimensions on their websites for convenience.
If you still have questions about fit, chat with customer support or do an online search for detailed in-depth reviews.
Knowing your child’s specific needs before you shop will help you keep your sanity and make the transition to potty training smoother in the long run.
Choose a seat that is easy to clean and maintain
When it comes to potty training your toddler, it’s important to choose a seat that is both comfortable for them as well as able to withstand the mess.
A seat that is easy to clean and maintain can help minimize the stress of potty training for both you and your little one.
Look for a toilet seat with a removable lid, preferably one that snaps on and off easily but is also securely fastened once attached.
Also check features like hidden linings or built in odor control to keep the area fresh.
With all these features in mind, you’ll be sure to find the perfect potty training seat for your family in no time!
Select a seat with fun features like built-in handles or a step stool to make potty training more enjoyable for your child
An essential element of making the transition easier is selecting a seat that will make your little one feel comfortable and confident.
A great option to consider is one that has fun features like built-in handles or a step stool to help them get on and off the potty more easily.
Not only can having tools like these help make the process less intimidating, they can even be enjoyable as they add an element of playfulness to potty training – it doesn’t have to be boring!
Having fun features incorporated into the experience of potty training leads to greater levels of success and can support your child in feeling more confident with their overall bathroom routine.
Compare prices and reviews to find the best value for your money
To find the best potty training seat for your money, look to a combination of price and reviews.
Compare different products side by side to analyze their cost and features, as well as read customer reviews to learn more about how the product has performed in other settings.
With the right research and comparison, you can find the perfect potty training seat that fits both your budget and needs—an optimal combination of value and quality.
In summary, when it comes to potty training seats, there are a few things you should keep in mind to ensure you’re getting the best value for your money.
First, decide what type of seat you need – standalone or attachable.
Second, consider the size of the seat and whether it will fit your child comfortably.
Third, choose a seat that is easy to clean and maintain.
Fourth, select a seat with fun features like built-in handles or a step stool to make potty training more enjoyable for your child.
Fifth, compare prices and reviews to find the best value for your money.
By following these simple tips, you’ll be sure to find the perfect potty training seat for your child!
Writing a letter is an important skill to have. Here are some tips on how to write a letter.
We’ve all been there – it’s time to write a letter, but we don’t know where to start.
Whether you’re writing a letter to your child’s teacher, principal, friend, coworker, or a thank you note to Grandma, follow these simple tips and you’ll be an expert in no time!
Make sure your purpose is clear, and that it’s in line with the tone of the letter (whether it be friendly or formal).
Add the Date
When it’s time to write a letter, make sure you start off right with the date in the top left-hand corner.
Writing the date is important as it gives the recipient a clear reference when they look back at your letter.
The format of writing the date could be day-month-year or month-day-year, depending on style or preference.
Placing it in the top left also follows a well accepted norm so your reader will know exactly where to find it!
Address the letter to the recipient by name
Writing letters is a great way to stay connected with people, and addressing the recipient by name makes it all the more meaningful.
Whether you’re writing a letter to an old friend or to someone you’ve just met, make sure that you take the time to get the name right and include it in your greeting.
Doing so will show them that you care enough to spend the extra effort in making the letter personal.
Addressing the person by their name is sure to make them feel special, which can help your message be even better received!
Choose Salutation
Write your salutation, such as “Dear Mr./Mrs./Ms.”
Writing a letter can sometimes be tricky, but saluting the recipient correctly is the first step to ensure your message reaches its proper destination.
It’s important to use a formal title and last name of the person you’re addressing – it gives them an extra touch of respect.
You should take care not to make any spelling or grammar mistakes that could alter the intended meaning when writing your salutation, as this could negatively impact how they receive and respond to your letter.
So while it might seem like just one small part of drafting a letter, the salutation can make quite an impression!
Introduce yourself in the first paragraph
Writing a letter can feel daunting, but it doesn’t have to be!
In the first paragraph of your letter, it’s important to introduce yourself. Start by introducing your name and any other relevant information – where you’re from or any credentials you may have.
Make sure to be friendly and warm when expressing who you are and what you’re about. Being genuine will make it easier for the recipient to connect with you from the get-go.
State your purpose for writing in the second paragraph
Writing letters is a great way to stay in touch or express your thoughts and feelings when you can’t say them in person.
Knowing the basics of letter-writing makes conveying your message easier and more effective.
The second paragraph of a letter should state your purpose for writing; this gives the reader an immediate understanding of why you’re writing.
Give enough detail so that there’s no confusion about what it is you are requesting or sharing but don’t ramble.
This puts your point across clearly and succinctly which is exactly what you want to do when communicating through written correspondence.
Expand on your points in the third and fourth paragraphs, if necessary
Although the third and fourth paragraphs may require less detail and cover the main points, it’s also important to think about how much elaboration you want to provide.
If there are important details that need addressing or further explanation of your position, feel free to expand accordingly.
Your thoughts should always be expressed clearly and truthfully in order to optimize letter-writing techniques.
If you are writing a formal letter, try not to deviate too much from formality by being overly informal with your language; however, if you’re writing an informal letter, don’t be afraid to inject some humor and personality into your writing!
Get started on writing your letter!
Now that you know the basic format for a letter, go ahead and give it a try.
Start with the date in the top left-hand corner, address the letter to the recipient by name, write your salutation, introduce yourself in the first paragraph, state your purpose for writing in the second paragraph, and expand on your points in the third and fourth paragraphs if necessary.
Keep your tone casual throughout the letter. With these tips in mind, you should be able to write a great letter in no time!
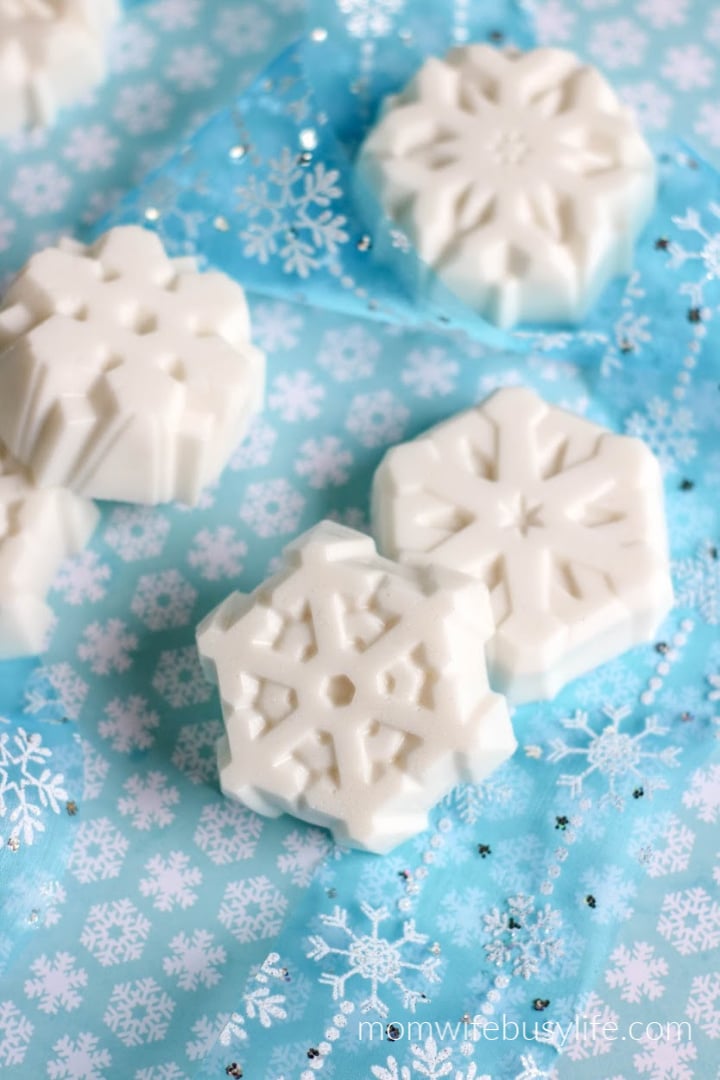
Bring the winter indoors this season with this DIY Winter Snowflake Soap Recipe! This recipe is fun and easy to make.
Plus, you can get creative and customize the scents and colors of these bars. One of the perks of making your own soap is that you’ll know exactly what’s going into each bar!
If you haven’t made any DIY soaps yet, this is a great recipe to try for beginners!
These Snowflake Soap bars make great gifts during the holiday season, too!
Remove soap base from container and cut into pieces.
Place in a microwave safe container and heat according to package directions. Once the soap is melted, work quickly as it will begin to harden immediately around the edges of the bowl.
Meanwhile, mix together mica powder and melted coconut oil until blended.
To the soap base, add essential oil and mica liquid. Stir to combine.
If the soap has begun to harden, reheat in the microwave for about 10 seconds.
Pour melted soap into the molds and allow soap to rest for at least 45 minutes before moving.
When the soap is set, remove from the mold and package for gifts.
½ soap base makes 6 bars
Snowflake Soap
Materials
½ soap base
Silicone soap mold
10 drops essential oil, if desired
1 teaspoon mica powder
1 tablespoon coconut oil, melted
Instructions
Remove soap base from container and cut into pieces. Place in a microwave safe container and heat according to package directions. Once the soap is melted, work quickly as it will begin to harden immediately around the edges of the bowl.
Meanwhile, mix together mica powder and melted coconut oil until blended.
To the soap base, add essential oil and mica liquid. Stir to combine.
If the soap has begun to harden, reheat in the microwave for about 10 seconds.
Pour melted soap into the molds and allow soap to rest for at least 45 minutes before moving.
When the soap is set, remove from the mold and package for gifts.
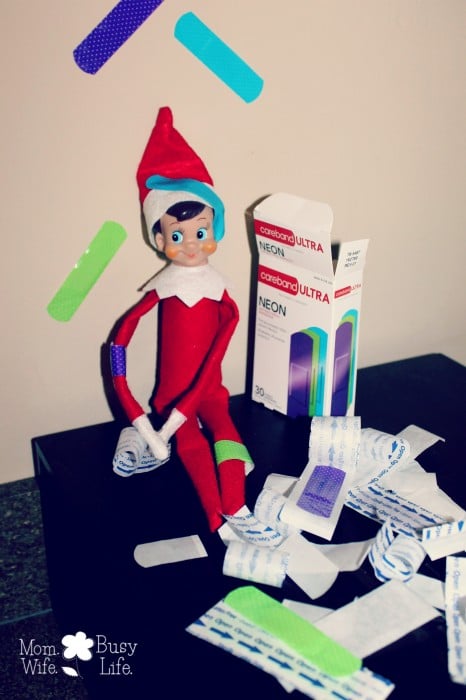
We’ve been participating in elf planning for a while now!
Our elf started visiting our home in 2013 and my girls (and now son) remind me every year about our elf coming for a visit in December! We actually added a girl elf in 2019 to mix things up a bit!
I have to say, hiding our elves and creating activities for the kids to enjoy is actually a lot of fun.
Finding new ways to display our elf does take a bit of time and creativity!
This year, I’m planning ahead and getting things ready and in place before our elves arrive. It can be easy to forget to move the elves or come up with ideas when you are rushed or tired!
I wanted to compile a few of our favorite kid friendly elf ideas for you that we have personally done, from 2013 to 2022.
If you need ideas for welcoming your elf back this year, check out these Elf I’m Back Ideas!
Not into planning this year? These Elf Kits below are filled with premade activities that can help you save time (and your sanity!)
Try this adorable DIY Gingerbread Man Soap Recipe! This soap recipe is a great gift idea for the holiday season.
Gingerbread is one of my FAVORITE flavors during the holiday season. I love anything and everything gingerbread! I really enjoy pairing gingerbread with my coffee.
When you think of gingerbread, what comes to mind?
You probably think of gingerbread men cookies or gingerbread houses. Did you know that you can make gingerbread SOAP? Yes, it’s true.
This fun and easy Gingerbread Man Soap recipe is a fun twist on this holiday favorite.
Wrap these adorable gingerbread men in cellophane gift bags, tie with a pretty bow, and give as gifts this holiday season! (Just make sure you label, “Do not eat!”)
You can also set these out in the guest bathroom to use during the holidays.
Remove the soap base from container and cut into pieces.
Place the soap pieces in a microwave safe container and heat according to package directions.
Once the soap is melted, work quickly as it will begin to harden immediately around the edges of the bowl.
Add spices and vanilla and whisk to blend.
If the soap has begun to harden, reheat in the microwave for about 10 seconds.
Pour melted soap into the molds and allow soap to rest for at least 45 minutes before moving.
When the soap is set, remove from the mold and package for gifts.
½ soap base makes 6 bars in the mold linked above
Gingerbread Man Soap
Ingredients
½ soap base
Silicone soap mold
¼ cup ground ginger
2 to 3 tablespoons ground cinnamon
1 teaspoon vanilla extract
Instructions
Remove soap base from container and cut into pieces.
Place in a microwave safe container and heat according to package directions.
Once the soap is melted, work quickly as it will begin to harden immediately around the edges of the bowl.
Add spices and vanilla and whisk to blend.
If the soap has begun to harden, reheat in the microwave for about 10 seconds.
Pour melted soap into the molds and allow soap to rest for at least 45 minutes before moving.
When the soap is set, remove from the mold and package for gifts.
½ soap base makes 6 bars in the mold linked above
Frequently Asked Questions (FAQs) about Gingerbread Man Soap
What is the main base of this soap?
The main base of this soap is the soap base which forms the primary ingredient.
How many bars of soap does this recipe yield?
This recipe yields 6 bars of soap using the mold linked above.
Can I use any soap base?
You can use any soap base, but ensure it’s compatible with the added ingredients and suitable for skin application.
Why is it essential to work quickly once the soap is melted?
Once the soap is melted, it begins to harden immediately, especially around the edges of the bowl, which can make the mixture difficult to work with.
How long should I allow the soap to set before moving it?
You should let the soap rest for at least 45 minutes before moving it.
Is it necessary to use both ginger and cinnamon?
While both ginger and cinnamon are recommended for the gingerbread scent and feel, you can adjust the quantities based on your preference or even omit one if you wish.
Can I use vanilla essence instead of vanilla extract?
You can use vanilla essence, but the scent might vary slightly compared to using vanilla extract.
What should I do if the soap hardens before I pour it into the molds?
If the soap begins to harden, you can reheat it in the microwave for about 10 seconds to soften it before pouring into the molds.
Is this soap suitable for all skin types?
While the natural ingredients in this soap are generally skin-friendly, it’s always a good idea to conduct a patch test or consult with a dermatologist if you have sensitive skin or known allergies.
Can I add other spices or essential oils to the mix?
You can customize the soap with other spices or essential oils, but ensure they are safe for skin application and complement the gingerbread theme if you’re maintaining that scent.
How do I store the gingerbread man soap?
Once the soap is set, keep it in a cool, dry place. If you’re packaging them for gifts, you can wrap them in wax paper or place them in airtight containers.
Can I use a different mold shape?
The gingerbread man shape is thematic, but you can use any silicone mold shape you prefer.
How long does the gingerbread man soap last?
The longevity of the soap depends on storage conditions and frequency of use. However, it typically lasts several months when stored in a dry, cool place.
Learn How to Write a Letter to Your Child with these easy and helpful letter writing tips!
In this post, I’ll share with you how to choose the right location, time, and supplies for your letter writing.
You’ll also read about how to choose what to say in your letter with a list of things you can include in the letter.
At the end of the post, you’ll find examples of letters that you can write to your child to help you get started.
As a mom, you may find yourself wanting to write a letter to your child. There are many reasons why this might be appealing.
Perhaps you want to tell them about their birth story, or share some wisdom that you’ve gained along the way.
Or maybe you just want to let them know that you love them and are thinking of them.
Whatever the reason, writing a letter to your child can be a really special experience. In this post, I’ll share some tips on how to make a letter to your child as meaningful as possible.
While you’re here, check out these other letter writing tips:
When I sat back to think about writing a letter to my child, it wasn’t hard to come up with a list of reasons why my child is amazing and inspiring.
The problem is, I can get so busy with life that I don’t always take the time to tell my children these things personally, so writing a letter is a great way to sit down, collect my thoughts, and make sure each child knows how I feel about them with words.
I’d like to challenge you to take some time to write a letter to your child soon!
Letter writing is a great communication tool, but it can be difficult to write a letter because it takes time and focused energy to sit down and put your thoughts into words.
If you need some tips on writing a letter to your child, these tips may help.
Benefits of Writing a Letter to Your Child
Writing a letter to your child is a cherished tradition that can be very meaningful for both parents and children.
It’s also a great way to stay connected when you are apart. Letters offer the opportunity for parents to share their thoughts, feelings, and experiences with their children in a way that goes beyond just telling them what happened during the day.
They also provide kids with a window into their parents’ lives and hearts. If you have never written one before, the tips mentioned in this post can help!
The most important thing is to start today so you can enjoy the process of writing and giving letters throughout the year.
How to Write a Letter to Your Child
Gather your writing supplies.
You’ll want to make sure you have everything you need to write a letter when you decide to get started on your personal letter.
Here are a few letter writing supplies and options you may find helpful.
There’s no best time to write a letter to your child – just do it when the feeling strikes you!
It’s always nice for them to receive a handwritten note from you, whether it’s just to say hi or to express your love and pride.
Pick a quiet moment when you have some time to yourself, and let the words flow from your heart. Your child will cherish your letter forever.
Pick a Location where you’d like to write your letter.
There are many different places where you can write a letter to your child. You can write it anywhere that is special to you, or anywhere that has meaning for your relationship. Here are some ideas to get you started:
Coffee shop
Local library
Home office
Your favorite cozy space in your home
Place where you first met your child
Child’s favorite park or playground
Your backyard patio
Anywhere that reminds you of a happy memory with your child
In the car
Beach
You can also write your letter to your child anywhere that you feel comfortable and safe.
Just remember to choose a place where you’ll be able to focus on your thoughts and feelings, and where you’ll have some privacy to write.
What type of letter do you want to write to your child?
There are many types of letters that you can write to your child. You may want to write a letter of love and encouragement, or a letter apologizing for something you have done.
Whatever the reason, it is important to choose the right type of letter for your child.
Some common types of letters to write to your child include:
A Letter of Love and Encouragement
This type of letter is perfect for telling your child how much you love and appreciate them. It is also a great way to encourage them in their pursuits and remind them that you are always there for them.
A Letter Apologizing for Something You Have Done
If you have made a mistake, it is important to apologize to your child. This will show them that you are willing to take responsibility for your actions and that you care about their feelings.
A Letter Asking Forgiveness
If you have done something that has hurt your child, it is important to ask for their forgiveness. This shows them that you are remorseful for your actions and that you value their relationship.
A Letter Congratulating Your Child on a Job Well Done
Whether your child has achieved a personal goal or accomplished something great, it is always nice to write a letter congratulating them on a job well done. This shows them that you are proud of their accomplishments and that you support their efforts.
No matter what type of letter you choose to write, be sure to write it from the heart. Your child will appreciate your words more if they can see that you are genuinely sincere.
Choose a type of letter that you feel will best express your feelings and be sure to take your time in writing it.
A well-written letter can make a world of difference to your child.
How to choose what to say in a letter to your child
Are you trying to decide what you should write about in a letter to your child? Here are some tips!
Think about what your child means to you. What are some of the things you love about them? What are you proud of them for? These are all great things to write about in a letter to your child.
Consider sharing some of your own experiences with your child. What lessons have you learned in life that you think would be valuable for them to know?
Think about what advice you would want to give your child. What do you want them to know about life? What do you want them to remember?
Take some time to think about what you want to say in a letter to your child.
This is an opportunity to really express your thoughts and feelings, so make sure to choose something that is important to you and that you think will be meaningful for them.
List of things you may include in a letter to your child
1. Tell your child you love them unconditionally.
2. Tell your child that you are proud of them and list a few reasons why you are proud of them.
3. Tell your child that you value your relationship with them.
4. Let your child know what kinds of things you like about them and/or the activities you like to do with them.
5. List out things that your child is good at.
6. Keep your letter short. Remember quality vs. quantity.
7. Leave out any negative criticism or complaints about your child.
8. Keep this in mind when writing your letter: “What did you like to hear from your own parents or wish you would have heard from your own parents if they were to write you a letter?
9. Use these positive words throughout your letter: love, proud, enjoy, cherish, & believe
10. Be honest with your child, in a positive way. Open up to him or her. This is your time to really tell your child how much he or she means to you.
Hopefully these tips will help you write a meaningful letter to your child!
Now that you have a few ideas of what to include in your letter, here are example letters that you can use to help you get started on your letter writing to your child.
Example letters:
Example 1:
Dear child,
I am so proud of the person you are becoming.
You are kind, caring, and always think of others. I can’t wait to see all the wonderful things you will do in your life.
I am grateful to be your parent and witness all your accomplishments. Keep up the great work!
Love always,
Mom
Example 2:
Dear child,
I hope this letter finds you well. I wanted to write and tell you how much I love you and how proud I am of you.
You are such a smart, talented young man/woman with so much potential. It brings me joy to see you doing so well in school and following your dreams.
I know there will be challenges along the way, but I know that you have the strength and determination to overcome them.
I will always be here for you, no matter what. I love you more than anything in this world, and I am so proud to be your mother.
With all my love,
Mom
Example 3:
My dearest child,
I hope this letter finds you well. I wanted to write to you and tell you how much I love you. You are the light of my life and I am so proud of you.
I hope that you always remember how much I love you, no matter what happens in life.
No matter what storms we face in life, know that I will always be here for you, cheering you on and supporting you every step of the way. You are my everything and I will never give up on you.
I hope that this letter gives you strength and comfort knowing that no matter what, I will always love you unconditionally.
With all my love,
Mom
Example 4:
Dear Child,
I hope this letter finds you well. I wanted to write and tell you how much I love you and how proud I am of the person you are becoming. It seems like only yesterday you were a little baby, and now you’re growing up so fast!
It has been such a joy to watch you grow and learn new things. You have such a bright future ahead of you, and I know that you will achieve great things in your life.
I am so grateful to be your mom and to have the privilege of watching you grow into the amazing person that you are.
I love you unconditionally and no matter what happens in life, know that I will always be here for you. You are the light of my life and I am so proud to be your mother.
With all my love,
Mom
Example 5:
My dearest child,
I wanted to write you a letter and tell you about all the things I am proud of. I am so proud of you and all that you have accomplished. You are such a shining example to others and an inspiration to me. You have made me so proud.
You have always been such a good example to others, even from a young age. I remember when you were just a little girl/boy, you would always help your friends and classmates.
You would go out of your way to make sure everyone felt included and accepted. You have always had such a kind heart.
You have always worked hard in school and achieved excellent grades. But more importantly, you have never been afraid to put yourself out there and try new things. You have always been confident and fearless.
You are such a beautiful person, inside and out. You have always been so positive and optimistic, no matter what life throws your way. You are always looking for the good in people and situations.
I am so proud of the person you have become and I know that you will continue to achieve great things in life. I love you so much, my dear child.
Always,
Mom
Get Started on Your Letter!
Now that you have the basic structure of a letter to your child, it’s time to get started. The most important part is simply putting thoughts and feelings into words.
Don’t worry about making the letter perfect – just let your heart speak through the pen (or keyboard).
Get started today on telling your child how much they mean to you. They will cherish these letters for a lifetime!
This website uses cookies to improve your experience. We'll assume you're ok with this, but you can opt-out if you wish.AcceptRejectRead More
Privacy & Cookies Policy
Privacy Overview
This website uses cookies to improve your experience while you navigate through the website. Out of these, the cookies that are categorized as necessary are stored on your browser as they are essential for the working of basic functionalities of the website. We also use third-party cookies that help us analyze and understand how you use this website. These cookies will be stored in your browser only with your consent. You also have the option to opt-out of these cookies. But opting out of some of these cookies may affect your browsing experience.
Necessary cookies are absolutely essential for the website to function properly. This category only includes cookies that ensures basic functionalities and security features of the website. These cookies do not store any personal information.
Any cookies that may not be particularly necessary for the website to function and is used specifically to collect user personal data via analytics, ads, other embedded contents are termed as non-necessary cookies. It is mandatory to procure user consent prior to running these cookies on your website.